Tag Archive for: deer

Deer Food and Deer Feeding in Winter

Deer Food | Feeding Deer in the Winter

By: Weston Schrank, BuckScore Specialist and Biologist

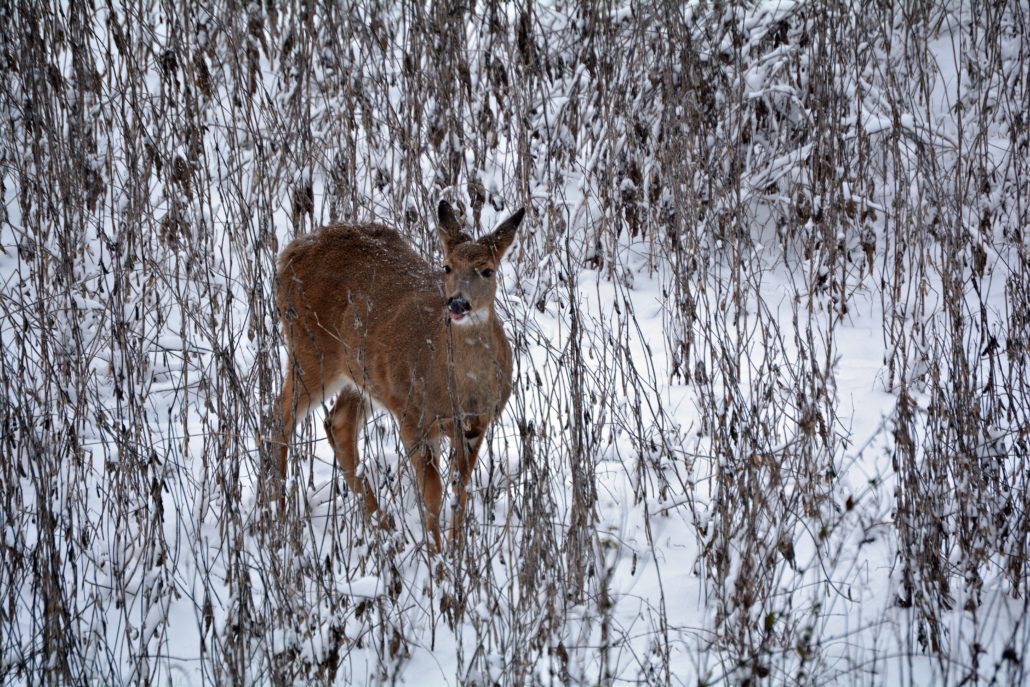
As deer hunters and land managers, we worry about our deer herds in the winter. With freezing cold temperatures, snow, ice storms, and a sun that doesn’t often show itself, it’s a miracle deer can make it through such conditions. While deer are built to handle these tough situations, it’s our job to ensure the habitat and herd are in a healthy state for any type of weather. One question that often comes up during this time of year is “should I be feeding my deer?” In most circumstances the answer is no. However, the answer depends upon the situation as both the terms “deer food” and “feeding deer” can have different meanings. Understanding the right and wrong way to feed deer this winter is your job as a deer hunter and more importantly as a deer steward.

There are three sections below, carefully read and watch the videos in this blog to get a full understanding of the right and wrong way to feed deer. There is a wrong way to feed deer, a better way to feed deer, and “the best way” to feed deer during the winter months.

Feeding Deer in the Traditional Sense

What is the first thing that comes to mind when you hear “feeding deer”? I bet that 90% of hunters think of deer corn. Corn or deer feed pellets are the most common foods that hunters refer to when they talk about feeding deer. So what is the problem with this? Feeding deer large amounts of corn in the winter in an area where they don’t normally get it can be a disaster. The video below explains why this can be a problem.

Feeding Deer with a Better Understanding

As the video above explains, this does not necessarily mean that all feeding is bad. There is a way that you can start feeding deer on a supplemental feeding program during the winter. The secret is feeding in the right amount and at the right times. The video below covers how to properly provide supplemental feeding.

The Best Way to Feed Deer

While many deer hunters and land managers might successfully incorporate a supplemental feeding program on their property, there is a better option. Through habitat management, food plots, and timber management plenty of deer food and nutrition will be available to the deer herd. Food in the form of food plots, early successional growth, woody browse, and downed trees should always be a higher priority for a deer manager than a feeding program. Unfortunately, there may not be enough natural food or habitat to sustain a herd throughout the winter. If this is the case, it might be time to create some emergency deer food and cover through hinge cutting. The video below covers hinge cutting and how it creates food and cover for deer.

When it comes to the terms “deer food”, “deer feed”, and “feeding deer,” it’s important to understand what each means to your management plan. There is a right way and a wrong way to provide food for your deer herd. Which will you choose and more importantly how will your choice affect the future of your herd?

Looking to read more deer hunting and deer manager related articles? Check out the link below!

How to Score Deer Using the BuckScore® App

How to Score Deer | 4 Steps to Scoring a Buck

Ever wondered how to score deer? Curious what the easiest way to score a deer is? BuckScore® is your answer! Holding two U.S. issued patents, BuckScore® is the only science-proven program that allows you to score pictures of bucks in minutes. The app accurately estimates antler size including spread, beam length, tine length, and circumference all to calculate a Net and Gross score within 3% of the actual score. With BuckScore®, you have one app that organizes, documents, and scores all your big bucks.

BuckScore® Features:

  • Works on any desktop, laptop, tablet, and most smartphones
  • Score trail cam or harvest photos
  • Know every measurement from spread to tine length
  • Score calculated in minutes
  • Manage buck photos across multiple years
  • Edit buck photos in program

How To Score Deer with BuckScore®

Scoring deer, whether it be a trail camera photo, hero photo of a harvested deer, or a freeze frame from recently captured footage of a buck, can easily be done with BuckScore® by following four simple steps.

Step 1. Adding a New Buck Profile and Picture

The first step to scoring a deer using BuckScore® is to add a new buck. First, click the “ADD BUCK” button in the upper left-hand corner of the home screen. In the box that appears, name your buck and click “ADD BUCK” to move into this buck’s album.
Once in the “Buck Album”, you can begin adding images of the buck you want to score. To do this, click the “ADD PHOTO” button in the upper left-hand corner of the screen, assign a name to the image, and select a photo from your device.
Once selected, crop your image to the desired size and click “SAVE” to upload it to BuckScore®. You are now ready to prep your buck photo for scoring.

Step 2. Adding Photo Details

Once your buck photo has been uploaded, enter the correct photo details next to each section. Note: Some sections may be completed automatically depending on the camera you are using. If the Time and Date are incorrect, you can manually adjust it to log the correct timing. Once the details of the buck photo are complete, select “NEXT” to continue the process. After entering the correct information, rotate the computer-generated buck image on the right-hand side of the screen using the “ROTATE” buttons so that it most accurately represents the buck photo you have uploaded. Select “Next” Choose the reference feature that can be seen most clearly in your uploaded image. This is the most critical step in ensuring the accuracy of your final score. Remember the top option is always the most accurate feature, if applicable for measuring.
Finally, use the drop-down arrows next to each section to select the approximate age of the buck – select “unknown” if you are not sure, state located, whether your buck is in velvet or not, and the number of points on each antler – including abnormal or non-typical points.
You are now ready to score your buck – select “Next” to continue.

Step 3. Measuring Reference Points

The most critical part of the BuckScore® scoring process is measuring the reference feature accurately. This will determine the accuracy of all other measurements on the buck’s antlers and should be done carefully, making sure to compare your markings to the sample image provided.
Keep in mind that the ear width measurement is the most accurate, followed by eyeball width, and then eye to eye width, and that not all photographs will allow every feature to be measured.
Ear Width is the most accurate of the feature measurements, and can be available for use at every angle BuckScore® can be used.
Eyeball width is the second most accurate feature to be used and can be available at every angle except zero-degrees. However, be careful of eye glare on night images as it can greatly skew the true size of a deer’s eyeball.
Eye to eye width is a great feature measurement at the zero-degree angle. Be sure to measure from eye duct to eye duct. Often users measure incorrectly by measuring from eyeball to eyeball which will cause all antler measurements to be smaller than actually are.
Once you are satisfied with your reference measurements, you are ready to move on to the scoring process – Select “NEXT”

Step 4. Scoring Your Buck

The fourth and final step in scoring your deer with BuckScore® is to actually start the scoring and measuring process through the program. Starting with “Inside Spread,” take each measurement according to the checklist on the right-hand side of your screen.
Select the “Pen Icon” next to the measurement to open the Measurement Activity box.
Your measurement should mirror that depicted under “Sample Measurement.” To undo mismeasurements, use the UNDO LAST and CLEAR ALL buttons at the top of the activity box. When satisfied with your measurement, select “Save”.
Repeat for each measurement, and refer to the “Measurement Progress Bar” for status to completion.
Once every measurement has been made, and “Measurement Progress Bar” is signaling completely. Click “SCORE” at the bottom right-hand corner of the checklist.
This will take you to your official BuckScore® Results page where you will be able to view the each measurement you’ve made along with gross & net scores.

You are done! You have officially scored your deer using BuckScore®. You have completed the full BuckScore® scoring process and can begin adding more bucks to your profile! You can also begin to manage bucks photos, and bucks over multiple years! Don’t forget to score any new bucks you get on camera, or any old trophies you have hanging on the wall!