How to Upgrade Your BuckScore Account for Aging Bucks
BuckScore, a patented deer antler scoring app used by managers, researchers, and hunter’s alike is now proud to bring you an all new patented buck aging feature. Take your current account or start a new account with the advanced billing plan to access this new technology. Here is a step by step guide on upgrading your account to access the aging feature.
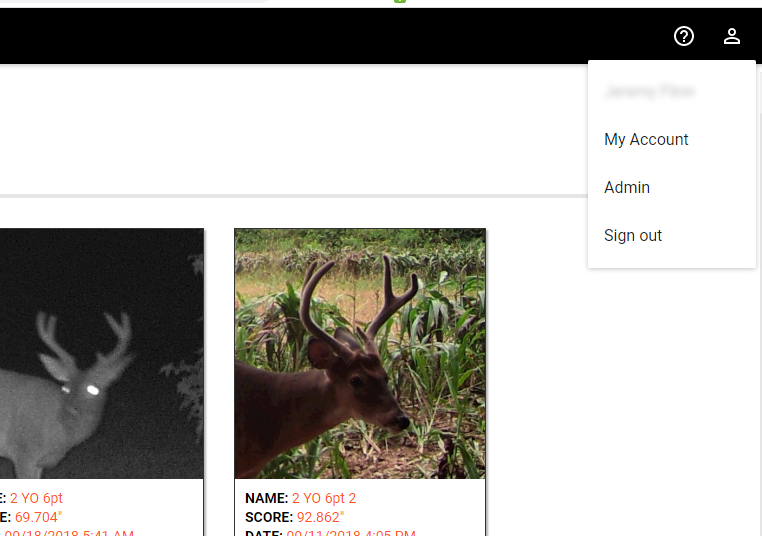
Step 1: Login or create a new BuckScore Account, and select “My Account” from the menu
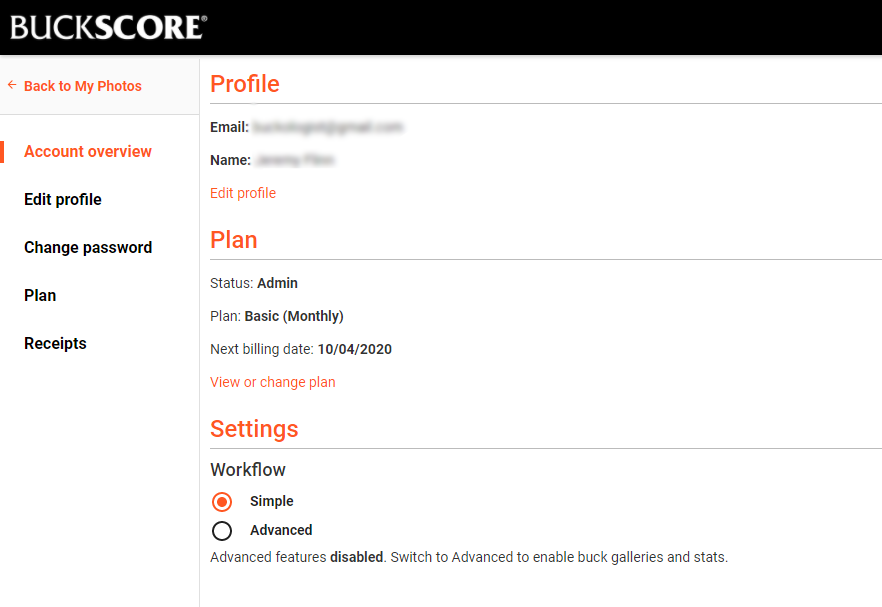
Step 2: In “My Account” select to change your “Plan” from the menu on the left of the screen:
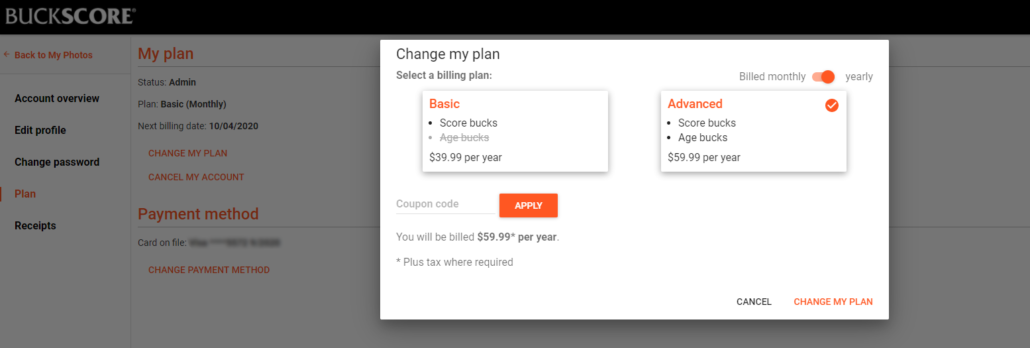
Step 3: Select to change my plan
Step 4: Advanced Monthly or Yearly Plan to access the Buck Aging Feature.
A Month
Basic – Scoring deer – $3.99
Advanced – scoring and aging – $5.99
A Year
Basic – Scoring deer – $39.99
Advanced – scoring and aging – $59.99
After you have changed your billing plan you can start aging
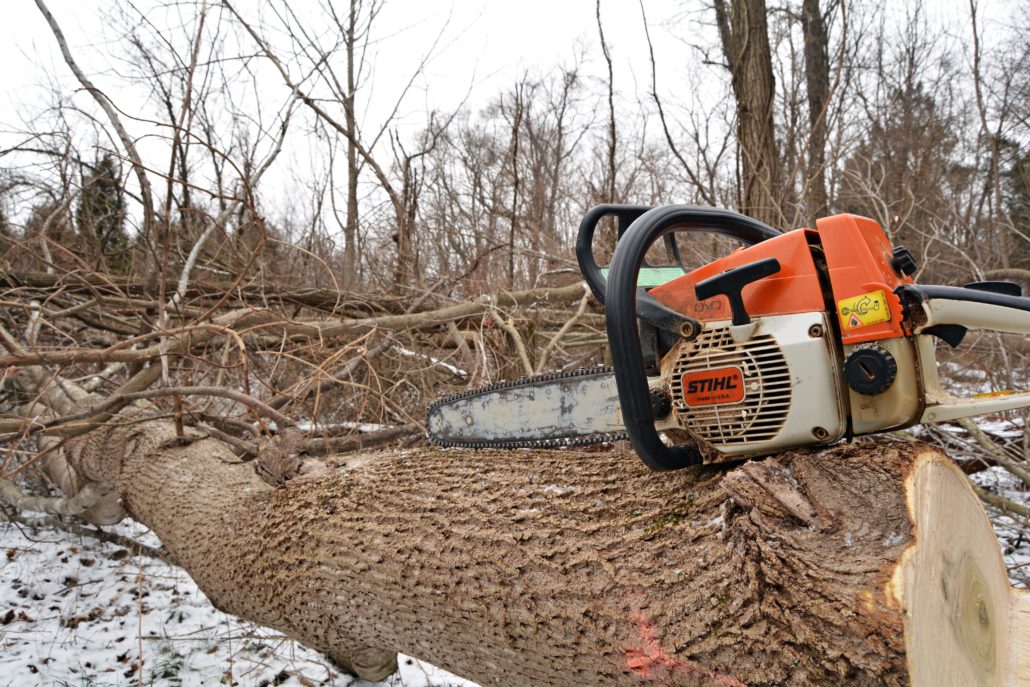
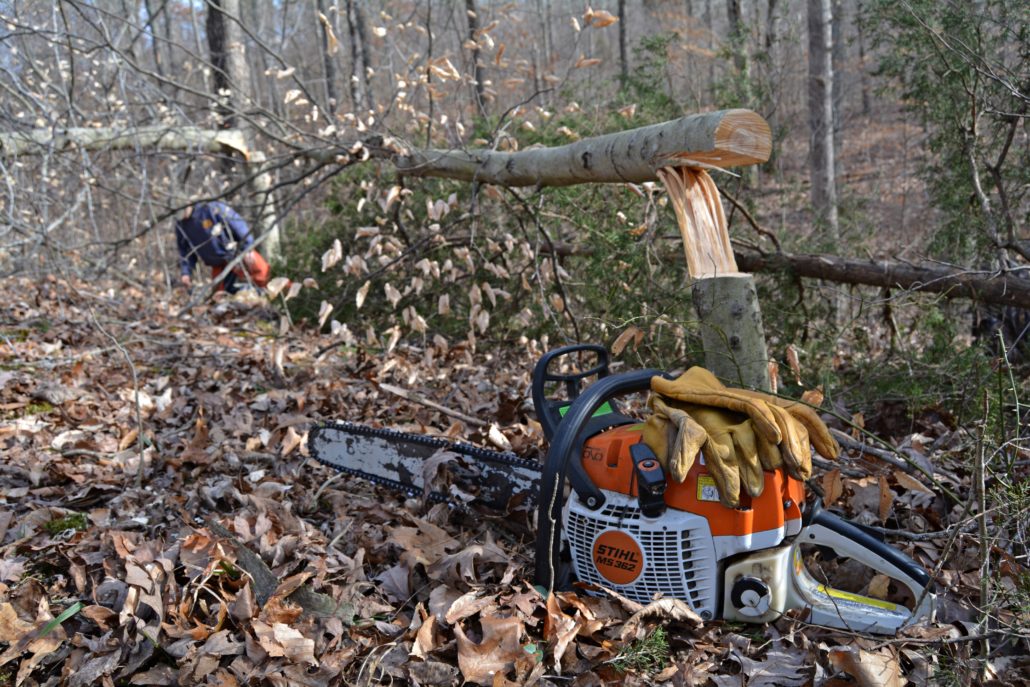
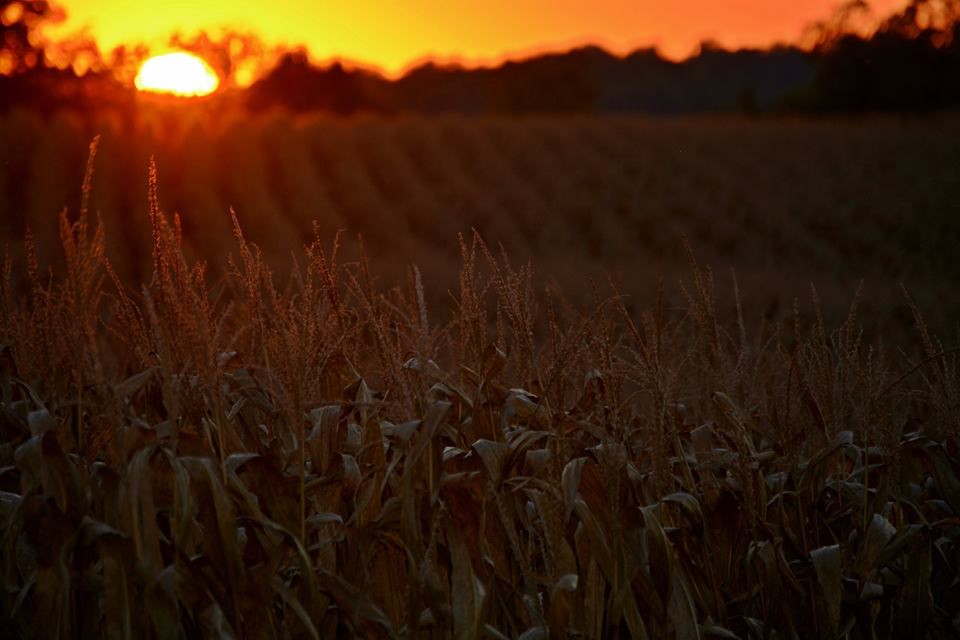
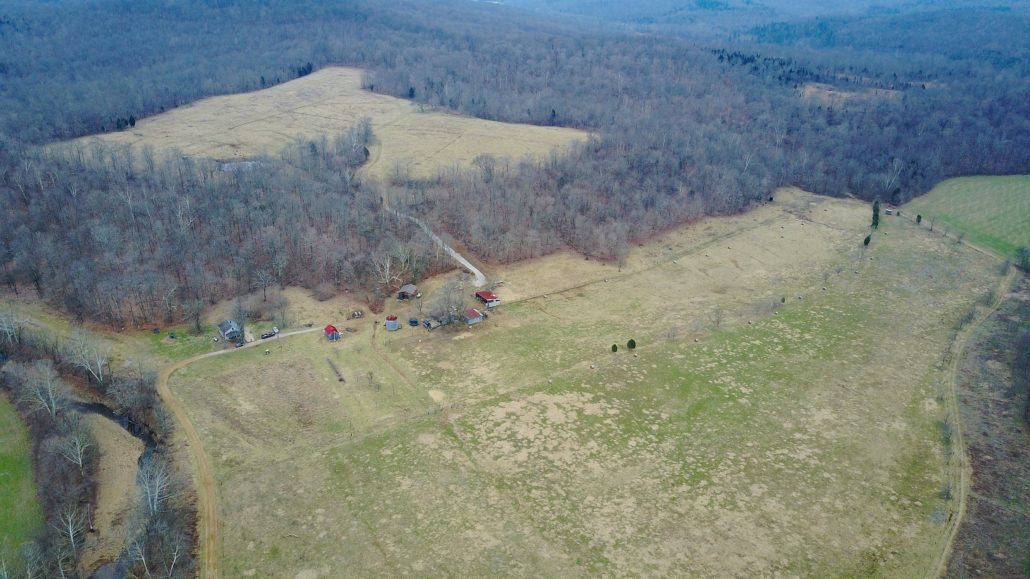
February and March are the hardest times of year for whitetails. They are near the end of their fat reserves, AG field residue is wiped out, and woody browse is limited and often over pressured. What is your solution for feeding deer in the winter if your property is not up to par? The solution is sitting in your garage, your chainsaw…
February and March will bring new challenges to our properties, are roles as deer managers, and to the deer themselves. March is hardest time of year for whitetails. They are near the end of their fat reserves, AG field residue is all dried up, and woody browse is limited and often over pressured. Spring green up is right around the corner but deer still have a month or two of hardships ahead. It’s important that we understand what a whitetail desires this time of year and exactly what type of food they need in the winter.
A whitetail is adapted to survive the winter, they reduce movement, reduce intake and survive off of their fat reserves from fall. Currently a deer’s diet in winter will consist roughly 40% fat reserves, crop residues, and left over hard mass, but 60% will be woody browse. The main question you need to ask yourself this time of year is “do you have enough food and Quality cover on your property to carry your deer herd through the winter?”
We can correct this by putting out the right feed for deer in the winter with the chainsaw. By hinge cutting tree species such as hackberry poplar, and maples, non-mass bearing trees (do not cut oaks and hickories) we can put food at a deer’s level and also create bedding areas with certain cuts. The tops of the trees offer a lot of food in the form of newly grown buds and branches.
Cutting this way also serves the purpose of creating side cover, multiple hinge cuts can offer a lot of food and cover where it was once open. You are dropping a lot of shade closer to the ground, at the deer’s level( up to 6ft) and they will eat on the buds and branches, bed next to or under the hinge, and the top of the tree serves as protection for young samplings, ,especially important for oak regeneration.
The Alternatives
Hinge cutting solves our problems for cover and deer food during the winter, it is a better long term solution for problems of March, and it is an alternative for the negatives associated supplemental feeding and/or feeding deer large quantities of corn. If you don’t have the habitat that can support hinge cutting as the form of emergency food you might have to rely on a stronger food plot program or supplemental feeding. Supplemental feeding is not recommended or illegal in some states, but where legal and in the right areas, you can do it right!
The long hard grind of deer season is now behind us in most of the whitetails range. Aside from a few southern states, the season has closed, however, that doesn’t mean the work should stop. If you’re a property owner, lease land, or have permission to work on a property, the winter months serve as an important time period to get ahead of the game. Ultimately, a lot of the habitat projects you start now will have lasting results, some of which just might help you bag a buck next season. So before you put your nose to the ground in search of shed antlers, consider doing a few of these off-season deer habitat improvement projects this winter.
#1 Plan and Set Goals for the New Season
Every project needs a plan, and every good plan has a specific set of goals to attain. Before diving right in and getting crazy with a chainsaw or bulldozer, carefully write down what it is you hope to accomplish with regards to your hunting property this season. From there, break it down and rank which are the most crucial to get done and when. From there, you can organize your to-do list and put a solid plan of attack in place. Now, let the real work begin!
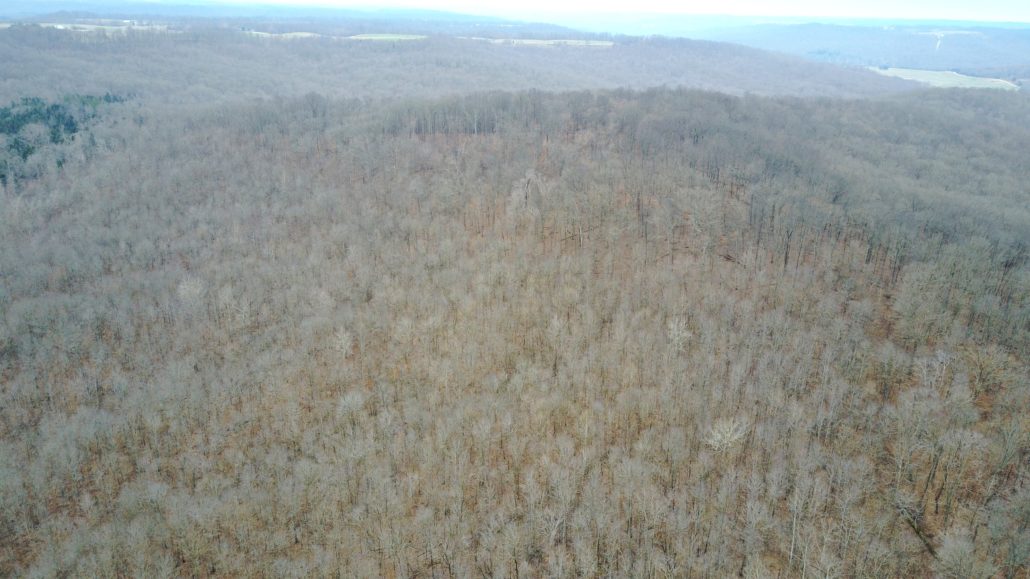
#2 Timber Stand Improvement
Improving the cover provided by native habitat resources is critical for future success and winter is the perfect time to get to work. If you have a property with homogenous stands of hardwood forests you may consider doing some chainsaw work. In an open stand of timber there is very little ground cover for deer. Remember, security cover for deer exists between ground level and approximately three feet up.
While timber stand improvements can achieve multiple goals, the core emphasis is often to open up the canopy and to selectively release preferred trees. By opening up the canopy you will see an immediate change this spring with new growth of forbs and ground vegetation. This new growth helps with nutrition and cover, so it’s like killing two birds with one stone.
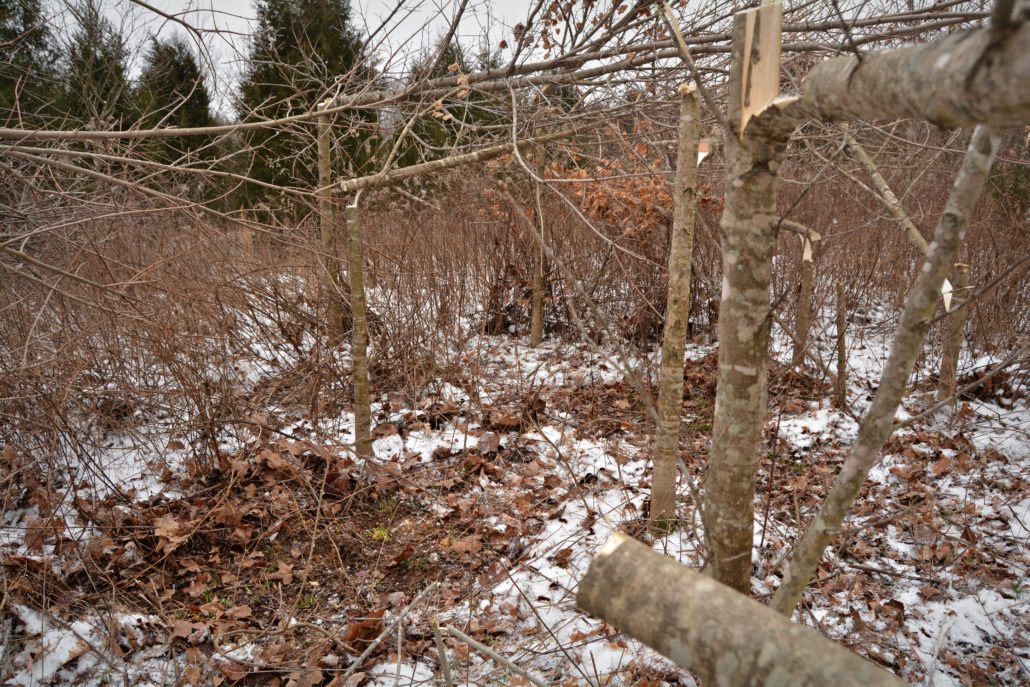
#3 Hinge Cutting
Hinge cutting is the popular timber stand improvement process in which you saw half-way through a tree and then bend it over to the ground in order to provide living cover and browse for deer. While you can really hinge cut trees during any time of the year, winter is the best time. For one, the trees are dormant during the winter, thus, you’ll experience a better survival rate. Secondly, it’s comfortable working conditions – it’s not too hot out, and there’s no bugs and leaves to annoy you all day. It’s also a lot easier to see what you’re doing and where the trees are falling in winter compared to the green jungle of summer. Lastly, hinge cutting during the winter allows time for deer to find and utilize these new sanctuary thickets and browse areas.
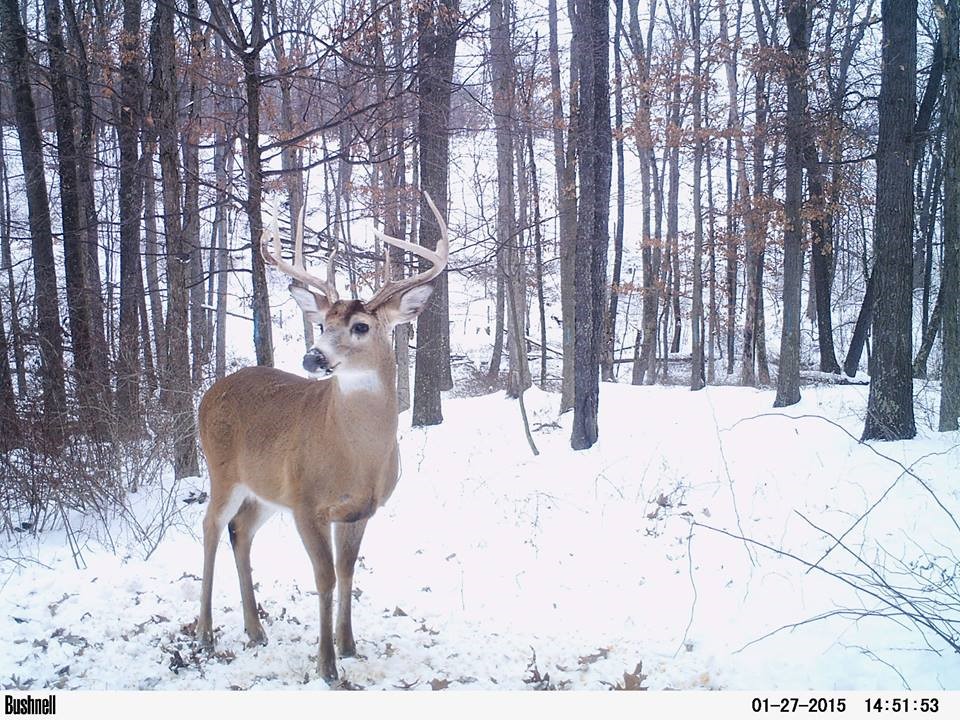
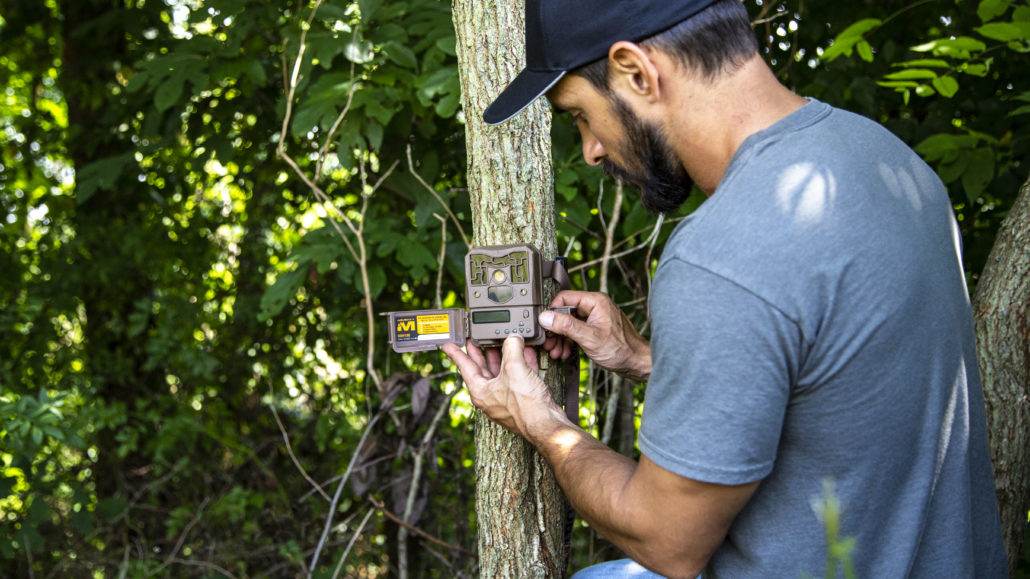
#4 Post Season Trail Camera Survey
The best times to conduct camera surveys are during August and in January before bucks begin to shed their antlers. Conducting an annual trail camera survey will provide an invaluable amount of information pertaining to the deer herd. Sex ratio, deer density, buck age class, antler development, and fawn recruitment numbers can all be evaluated by conducting a trail camera survey. Studies have shown one bait/camera site per every 75 to 100 acres of land will provide a survey with >90% accuracy. For a full rundown on how to conduct a post season trail camera survey check out this link: How to Run a Trail Camera Survey
#5 Food Plot Planning
As was stated earlier, it’s never too early to start planning. It always seems like food plot season sneaks up fast. One minute you’re searching for sheds and the next you’re throwing seed in the ground. Taking the time in February and March to figure out a few key details of food plotting will go a long way in the spring and ultimately impact your hunting season.
Collect soil samples in time to add amendments prior to planting.
What type of forage will you be planting in your food plots? And where?
How much seed will you need to purchase?
Are you creating any new food plots this year?
What kind of site prep is needed?
Who is planting the food plots? And when?
#6 Frost Seeding
While we are on the topic of food plotting, don’t forget about frost seeding this winter. It may not feel like it now, but planting season is less than a month away. No, not your typical spring time planting of annuals like soybeans and corn, but rather using the planting technique known as frost seeding as a means to plant clover. Frost seeding relies on the freeze-thaw cycle and early spring showers to establish quality seed to soil contact. As spring approaches, the soil awakens and actually begins moving up (freeze) and down (thaw). That up and down movement causes tiny little cracks, which ultimately suck in the small and hardy clover seeds. Clover seed is very hard so it can withstand the potential to rot much better than other larger less hardy seeds like most warm season annuals. Thus, it’s common to see food plotters spreading it over the top of a thin layer of melting snow.
Frost seeding makes nature do your dirty work. It essentially works the seed into the soil, eliminating the need for disking and/or dragging. It’s an effective planting method, one that saves you time and money. The timing can certainly vary year-to-year depending upon how long ‘Old Man Winter’ hangs around, but as a general rule of thumb, the best time to frost seed is when there are approximately 4-5 expected frosts remaining.
Wrap Up
Let’s not wait until the last minute this year when it comes to deer hunting projects. Make this year the year of preparedness and try to get as much done during the winter and spring. If you do, you can bet you’ll have a more successful hunting season come fall, not to mention the fun and memories created working out in the field along the way.
https://www.buckscore.com/wp-content/uploads/2019/01/frost-seeding-clover-food-plots_feature-scaled.jpg17072560BuckScorehttps://www.buckscore.com/wp-content/uploads/2024/09/buckscore-logo.pngBuckScore2019-01-24 20:29:372019-08-28 12:20:106 Winter Deer Habitat Improvements You Should Be Doing
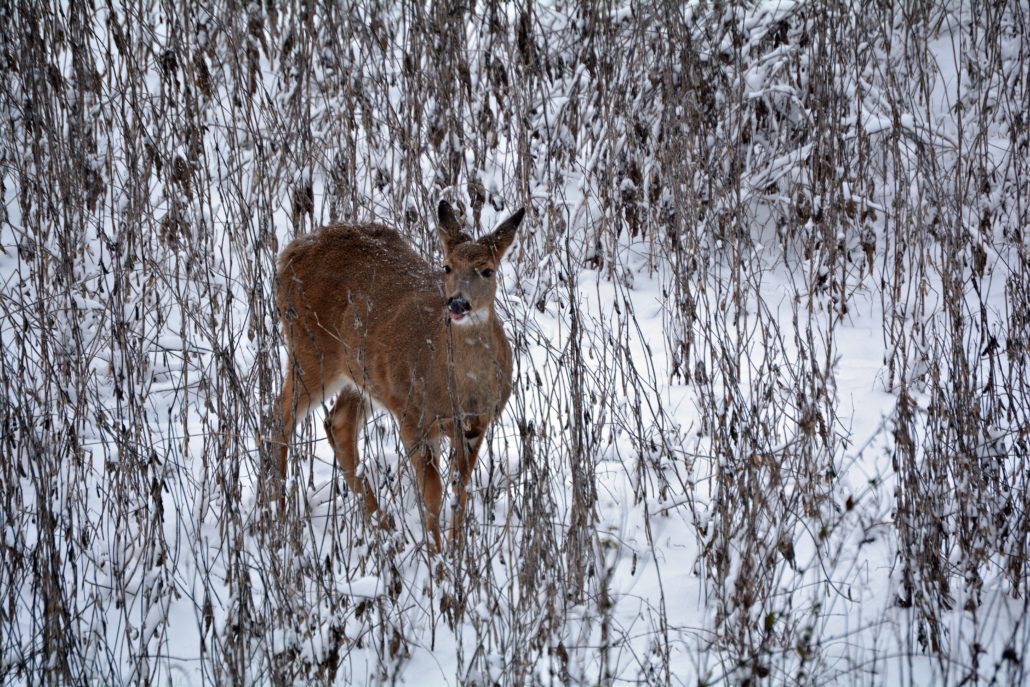
Many of us are settling in to the heart of winter, which means dealing with the brutal cold and snow. Most people have a friend or family member that can barely make the trip from their vehicle to their office without complaining about how cold it is. Lucky for them, they have the luxury of climate control! White-tailed deer aren’t so lucky. They endure the cold and snow 24 hours a day, 7 days a week. It’s no surprise that winter can be a devastating time for deer, so how do they survive? This article will discuss some of the adaptations deer have to help them through winter weather.
Fall and Early Winter Feeding Habits
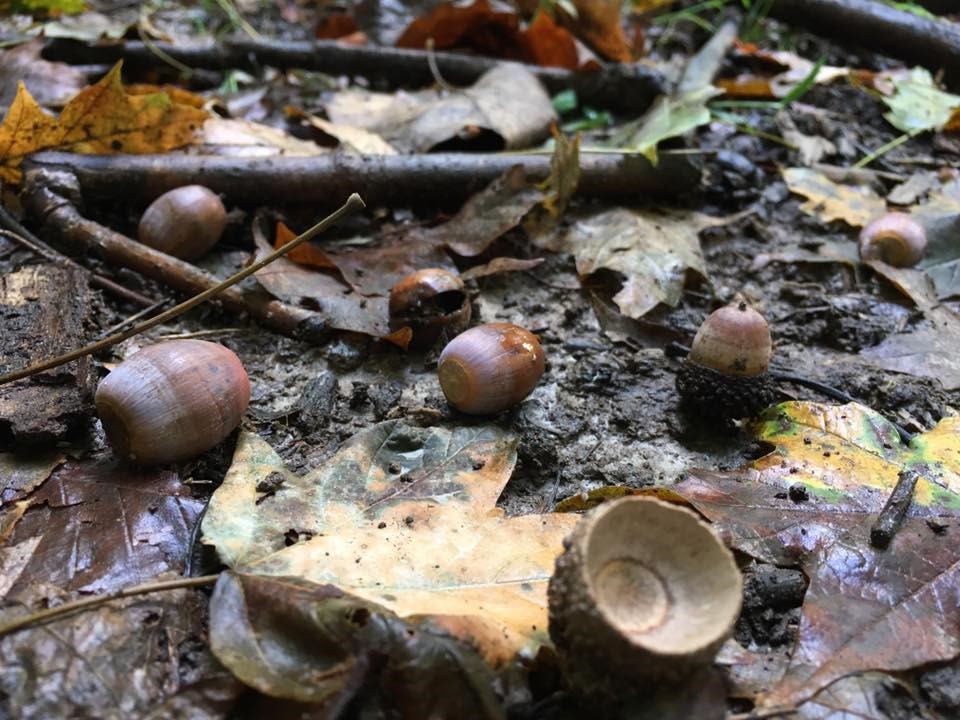
Surviving the dead of winter is no easy task, as such, deer begin preparing for winter in the fall months. This is when both bucks and does push to put on weight by eating high fat foods like acorns when they are available. But it’s not only the foods they eat that help them put on a layer of fat. Deer also display what’s called an obligatory weight response. Essentially, all deer will start converting food to fat to prepare for winter, regardless of the quality of nutrition they have available. This is just one adaptation deer have to help them prepare for the coming winter months.
In particular, bucks have it pretty rough during this time period because they can lose up to 25% of their body weight from chasing does during the rut. This, in part, is why you see mature bucks hitting food sources during daylight in December. They have to try to replenish some of the fat reserves they lost during the rut so they have a chance to survive the rest of the winter.
January
Although January may seem like a brutal winter month to you, it is just the start for deer. Luckily, most deer still have plenty of their fat reserves to burn through in January, but deer also have some other strategies to help them conserve energy during this month.
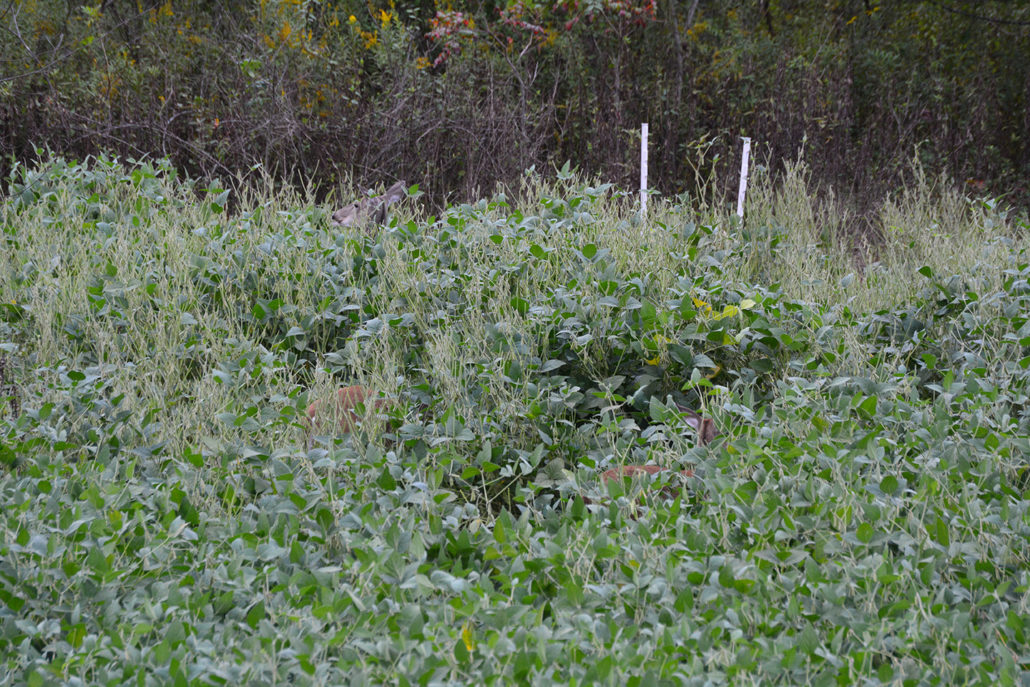
Once temperatures start plummeting and snow depths increase, deer dramatically change their behavior. Deer will herd-up and move more during daylight hours to help conserve energy they need to maintain their body temperature. Deer will also start hitting high-energy content food such as soybeans or cornfields. These high-energy food sources won’t necessarily help replenish their fat reserves, but they will help deer maintain the caloric intake they need to survive the day.
Although many of us envision herds of deer feeding in a picked soybean or cornfield during the winter, agriculture only accounts for a portion of a deer’s diet. So what else are they eating during this energetically demanding time? Woody browse is the answer. So what is woody browse? Woody browse is pretty much exactly what it sounds like. It’s any type of woody vegetation where deer can browse on the tips or terminal buds of the plant. The type of woody browse species a deer prefers depends on what part of the country you find yourself in but some examples of high quality woody browse species in northern states are aspen seedlings, eastern hemlock, and if you find yourself in the far north, Canada yew. In fact, regardless of the amount of agricultural crops available in your area, woody browse will still make up at least 40% of a deer’s diet. Deer have adapted over hundreds of years to eating woody browse and this type of forage helps maintain the pH level in their highly complex four-chambered stomach. The importance of woody browse to a deer is exactly why deer biologists and managers stress the need for habitat management. The more habitat management you engage in, the more woody browse there is available to deer.
Another thing most people don’t consider is how difficult it is for deer to consume enough waste grain from soybean or corn fields to survive. Throughout most of the year, deer need to consume 6 to 10 pounds of food per day. Luckily, a deer’s metabolism slows down during the winter months so they don’t need to consume as much food. But still, it’s hard to fathom how many kernels of corn or bean pods it would take to weigh even 3 to 6 pounds. Now combine that with the fact that most agricultural fields are plowed after harvest, making finding waste grain even more difficult. It’s easy to see why woody browse is so important!
February
Most people realize how brutal February is for winter weather. Blizzards, snow, cold temperatures, and heavy winds can make for some nasty days during this month. But February can also bring some nice weather giving you hope that spring is right around the corner. However, this isn’t necessarily the case for deer. Deer have already burned through a lot of their winter fat reserves during January, so February can be the start of trouble.
Migrations
You may not think of white-tailed deer as a stereotypical migratory species. Generally, when people think of migratory species of ungulates, they think of caribou, elk, pronghorn, or mule deer. Biologists have known for a while that deer in far northern states like Minnesota, Wisconsin, Michigan, Pennsylvania, and New York will herd up and migrate during late January and February to yarding areas. These yarding areas allow hundreds of deer to congregate which helps them survive the winter. Yarding areas historically provided woody browse to deer, but also allowed deer to create travel corridors into and out of the yarding area. These travel corridors consist of beaten down snow paths that allow for easy travel. Easy travel also allows deer to more easily escape predators such as wolves. Finally, yarding areas also provide deer with an increased ability to thermoregulate, or maintain their body temperatures, by providing cover and allowing for several animals to bed next to each other.
Although deer migrations in the north woods are common and have been documented for a while now, deer in agriculturally dominated regions like the Dakotas and southern Minnesota were not thought to migrate during the winter months. But recent research has shown that in states like North Dakota and South Dakota, a high percentage of deer will still migrate over winter. We generally think of the Dakotas as being agriculturally dominated regions, so why would deer need to migrate? Well research hasn’t quite nailed this one down, but one of the most logical hypotheses is related back to food and cover. As already mentioned, many agricultural fields are plowed immediately following harvest. This leaves a barren landscape as agriculture can comprise up to 60% of land use in some of these regions. Regardless, deer may still have plenty of resources to carry them through most of January and into February, but what happens when the food runs out? You guessed it! It’s time to find greener pastures, quite literally. So even deer in agriculturally heavy regions will migrate to find the necessary resources to survive the rest of winter. Although food is at the top of the list, don’t discount the importance of cover during winter months. Research from the Dakotas has also shown that the probability of adult does migrating decreases with increasing amounts of forested areas found within their winter home range. This emphasizes not only the importance of forested areas in helping deer thermoregulate, but also emphasizes the potential importance of woody browse during the winter months.
March
In like a lion, out like a lamb. This old adage describes why March marks the danger zone for overwinter survival of white-tailed deer. Regardless of how severe the December, January, and February months were deer are actually pretty well equipped to survive these months regardless of what type of winter weather is thrown at them. Deer burn through their fat reserves slow and steady. Then March hits. The beginning of March is still generally cold and nasty meaning deer are still having to use the last bit of their stored fat reserves. Usually by the end of March temperatures are warming up and snow is melting. Warming temps means deer need to use less energy to keep warm and also means that snow is melting. Decreasing snow depths means deer can find food easier because they don’t have as much snow to paw through to reach it. As long as temperatures steadily rise throughout March, then deer will be in the clear and will likely survive another winter. But what if severe winter weather persists throughout March?
Most biologists agree that it’s not necessarily the winter severity of January and February that can be deadly to deer, rather it’s how long severe winter persists into the spring. Deer have adapted to store enough fat reserves to survive the previous months and then to start replenishing those reserves once spring hits in late March and April. However, if severe winter weather continues to persist throughout March then deer can find themselves in trouble. By late March, most food resources have been depleted, regardless of the available food resources in that region. This means that if a deer can’t find any food then they are in real danger of starving. So what can you do help deer through this stressful period?
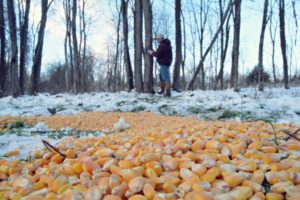
The Do’s and Don’ts of Feeding Deer
Unfortunately, there are more don’ts than do’s when it comes to trying to help deer survive a brutal winter. The biggest don’t is NOT to feed deer a high quantity of high energy foods like shelled corn. It’s the same story every year; you hear about somebody with good intentions putting out shelled corn for deer to help them survive the winter but then find several deer dead just feet away from the corn pile. You may be asking yourself why deer can survive just fine eating waste grain and standing corn, but shelled corn represents a major threat to survival? Well believe it or not, although corn represents a high energy food source that can help deer survive energetically stressful time periods like winter, in general, corn is not the best food for deer. That’s because corn is hard to digest and changes the pH of their stomach. In turn, the bacteria composition needs to change in a deer’s stomach to help them digest the corn. When deer are feeding on waste grains, they generally aren’t consuming enough corn at a fast enough rate to do any harm. And when deer are feeding in standing corn, they are also usually consuming parts of the corn stalk that serves as roughage and helps a deer maintain the pH in their stomach. The issue is when deer have essentially unlimited access to shelled corn. They will eat too much corn without having any roughage available, which increases the pH in a deer’s stomach so fast that it can kill the deer. This change in pH is known as acidosis causes deer to die almost instantly. Although these people have good intentions, their actions prove to be deadly.
Generally speaking, there is more harm than good that comes from feeding wildlife. So avoid feeding deer with piles of corn to help them survive harsh winters. But don’t worry, it’s not all doom and gloom because there are a few things you can do to help deer survive the winter, particularly if you have the ability to manage your hunting property.
One of the easiest things you can do is to plant some food plots into corn or beans and leave them stand throughout winter. Depending on the size of the plot they may serve as an important food resource throughout winter. If you don’t have the ability to plant food plots where you hunt but there is still abundant agriculture, then talk to the farmer about working out a deal to leave some standing corn or beans. This may be something as simple as paying the farmer for their losses of not harvesting a certain amount of crops. Who knows, you may even get lucky and the farmer will do it at no cost to you.
A more permanent fix is engaging in habitat management. Talking with your area wildlife biologist and area forester will help you to better understand what parts of your timber and which specific trees may need to be cut. Cutting timber to improve habitat may seem counterintuitive, but in reality, cutting timber allows sunlight to hit the forest floor and initiates the growth of the understory. High quality deer browse will regenerate, including important woody browse species. Remember, a deer can’t eat anything higher than five or six feet off the ground so if you walk into your woods and can clearly see for a hundred yards or more without any vegetation obstructing your view, then you aren’t providing any food or cover to your deer herd. Habitat management takes a lot of effort, but also has long-term benefits.
Believe it or not, deer have several adaptations and are fairly well equipped to survive the winter months. But even with all of these adaptations, they can still find themselves in trouble if winter weather persists into late March and April. Although you should avoid feeding deer to help them survive, there are a couple of things you can do if you are worried about deer making it through the winter on your hunting property. If you have the ability to do so, make sure you’re leaving crops like soybeans and corn standing throughout the winter. These are high-energy content foods and will help deer survive. You should also consider conducting habitat management to provide cover and woody browse throughout these months. Deer are amazing animals and hopefully this article helps you better understand how they can survive brutal winters!
https://www.buckscore.com/wp-content/uploads/2019/01/BuckScore_FeatureImage.jpg596960BuckScorehttps://www.buckscore.com/wp-content/uploads/2024/09/buckscore-logo.pngBuckScore2019-01-16 14:42:122019-01-16 14:50:46Strategies Deer Use to Survive the Winter Months and What You Can Do to Help Them
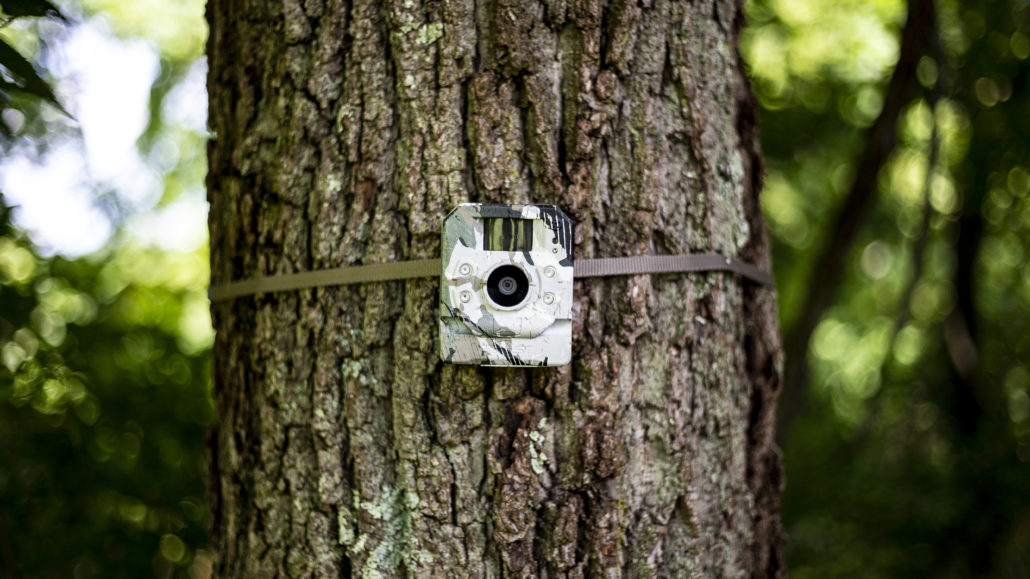
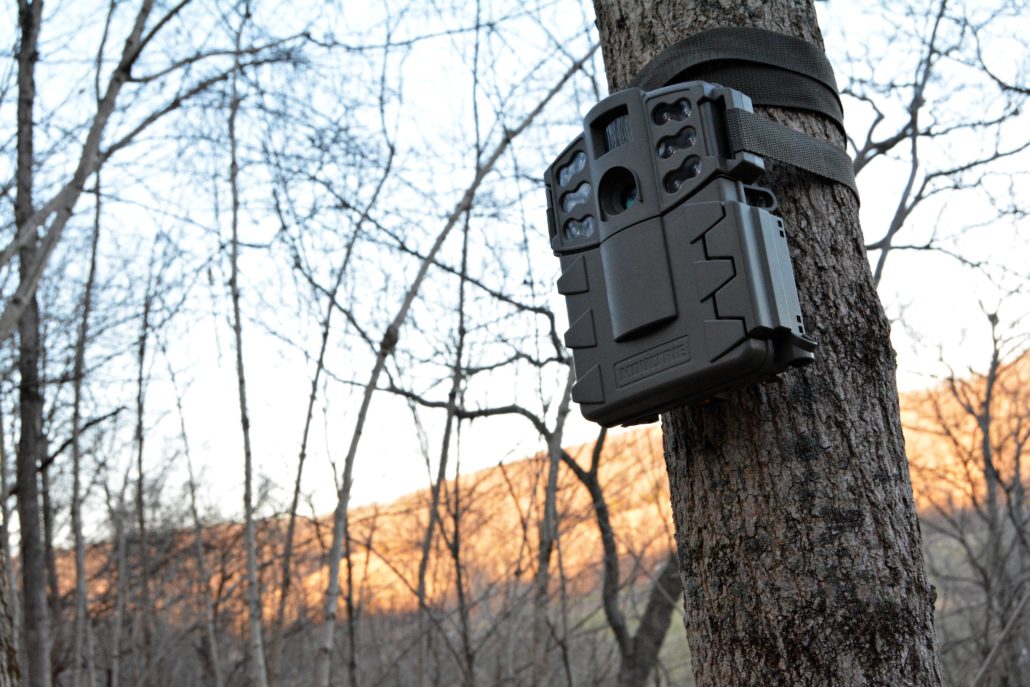
Trail cameras have been the sportsman’s favorite scouting tool for decades. What was once only a blurry snapshot of a deer running off, has turned into a highly detailed image that is packed full of valuable scouting data. Everything a hunter could need is right at their fingertips.
Cameras have also become incredibly convenient. Before, having a trail camera meant running to grab the camera and then proceeding to run to the print shop to have the film developed. For some individuals, this was a process that took hours, if not days, depending on the convenience of the location. However nowadays, images are viewable on the spot. Not only are they clear and detailed, but they are packed full of data. In fact, cameras can go as far as telling you exactly how big the deer you are going to shoot is, before you even hunt it.
As with all technology, trail cameras are now better than ever. They are more compact, have higher quality photos, are more discrete, and give out such a significant amount of information that most people don’t even know what to do with it all.
However, getting the most out of a trail camera requires more than just buying the latest and greatest. Instead, it takes careful planning, knowledge, and a management strategy. That’s why we have put together a list of tips that will help improve your trail camera game.
Pick a Quality Camera (not just the fanciest one)
This one is pretty obvious. There can’t be quality trail camera photos without a quality camera. Using an outdated or poorly designed unit means not only disturbing deer, but also getting disproportioned and low quality images. Not being able to see the image makes it difficult to analyze the image and its data.
Therefore, one of the most important aspects of a productive scouting plan is having a camera that can take high enough quality images. Unfortunately, this is much more complicated than most people think. For starters, a high number of megapixels does not indicate a high quality camera. In fact, manufactures even inflate megapixels to help inflate sales. Therefore, it’s wise to look at more than just the megapixel count. Instead, look at its capabilities and if those capabilities will fit your individual situation.
For example, find out and compare the following features between cameras before making a purchase:
Motion detection range
Flash capabilities
Type of flash
Recovery time
Number of “true” megapixels
Number of lenses
Age of camera
Mode options (time lapse, video, etc..)
If your camera doesn’t have a fast recovery time; you’ll likely miss seeing critical angles, or even multiple deer in a photo. If your camera doesn’t have high quality flash, you risk spooking the deer or missing valuable night images. All of these have big impacts on your scouting plan.
Some people get lost comparing and understanding technical features; however, something everyone can do is read reviews, watch reviews, and even try a little trial and error of their own before committing to a purchase.
Ways to do this include:
Looking at real life example photos on social media,
Watching YouTube reviews
Reading reviews across the internet
Trying a friend’s camera out
Test running a camera in store before making that purchase
Remember not all trail cameras are created equal. Therefore, even when hunters aren’t familiar with a camera’s specifications, they can still look at real work examples to help them make a better purchase.
Find the Right Location and Don’t Be Afraid to Move
Location is everything. From macro-environment to the micro-environment, having the right location tends to be the one of the most critical factors in success. Whether you are talking about which parcel of land you want to focus your attention to the food plot you will decide to hunt over, success is highly dependent on each location and its ability at the time to support quality deer. When that field no longer has corn? It’s time to move locations.
Therefore, whether you hunt land in different locations, or during different times of the year, it’s important that you keep an open mind and move your camera when necessary. If you aren’t seeing deer that you think should be there, then move. You wouldn’t hunt the same spot without seeing deer; therefore, don’t scout the same spot – no matter how convincing the environment might look.
Perhaps you pushed too much scent through the area causing deer to re-route your area. Maybe the food source was harvested, water dried up, or hunting pressure changed the deer’s pattern. Then it’s time to move.
How to Find the Right Locations
When deciding on the right location before and after a trail camera move, there are some critical aspects to consider. These can include:
The Conditions of the Land
Is it woodland, prairie, or cropland? Understanding the landscape is important in understanding which areas you should monitor.
The Time of Year
As mentioned, deer patterns and actions change throughout the course of a year. In fact, the food plot you were monitoring in September might not be the best place to set up your camera during the rut. Instead, you might choose to setup over a scrape, or a funnel. As the season’s change, so should your scouting plan.
Number of Trail Cameras You Have at Your Disposal
If you could only afford one camera in your budget, make it count. Use it to help you find proper stand placement based on deer size, time of day, and routine.
If you use multiple cameras you can monitor the entire area, multiple deer patterns, and even find your buck’s core areas.
Ability to Move
If possible, move throughout the season. This helps reduce scent in a particular area and reduce pressure on the deer.
We have an in depth article discussing the best trail camera locations that you can read in full here.
Know Your Settings and What They Do For You
Setting up your trail camera means adjusting its settings to fit you and your situation. Just like with our cell phones and computers, sometimes it is easier to set it and forget it then to actually learn why these settings are there or what they can do for you.
Our tip is to have a list of tasks you should do before implementing any camera.
When you get your camera, first make sure you insert the right size SD card and the proper batteries. If you are checking your camera, be sure to check the batteries and camera storage. If you don’t plan on returning to this area for a significant amount of time, the bigger the card, the better.
Next, check for software updates. This is crucial to assure your camera is operating smoothly and at its highest capability.
Then you need to adjust the settings for your particular goal. Trail cameras come with many different modes and settings. For example, you can pick time lapse mode to catch the changing environment from afar. You can also adjust motion detection and response time to capture a select amount of images when movement appears. Perhaps video mode will be better for deer analysis and scoring.
In general, be sure to adjust the following settings:
Mode (video, timelapse, etc…)
Trigger speed
Flash settings
Frequency
Test these features. After finding the proper location and placement, be sure to test these settings before leaving the area. Nothing is worse than leaving the camera for a few weeks only to return and find that your photos aren’t angled appropriately, or you happen to have no photos at all.
Reconsider Your Placement
Knowing where to place your camera, means knowing your goals. Sometimes hunters seem to think it’s a “one size fits all approach”. However, that couldn’t be farther from the truth. There are many different angles and scenarios you can use your camera in.
For example, are you looking over a field and want to monitor the number of deer, environment, or other factors? Or do you hope to place it over a salt lick to catch that close up photo?
Knowing which one is right for you depends on a number of factors:
Do you want an aerial view of your food plot or a close up shot of that buck?
Do you have multiple cameras to catch multiple angles (close vs aerial)?
Do you want to score that deer? You will need a clear and close image, or video.
Is motion detection important or will you be using time lapse mode?
Is the camera the perfect distance from the target?
Go through each one of these before choosing, and especially leaving, a spot. Keep an open mind. Perhaps monitoring the environment while you monitor your deer size can help you put together a better scouting plan. Maybe video will suit your needs better. Don’t be afraid to learn the settings, find the right locations, and then change up your placement.
You can find a more detailed guide on properly setting up your trail camera here.
Photo Management
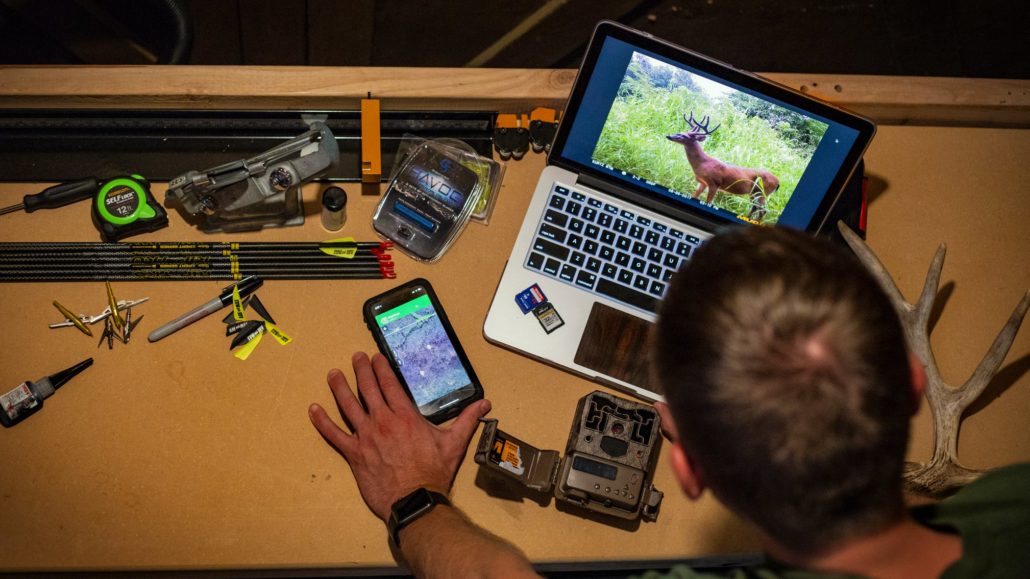
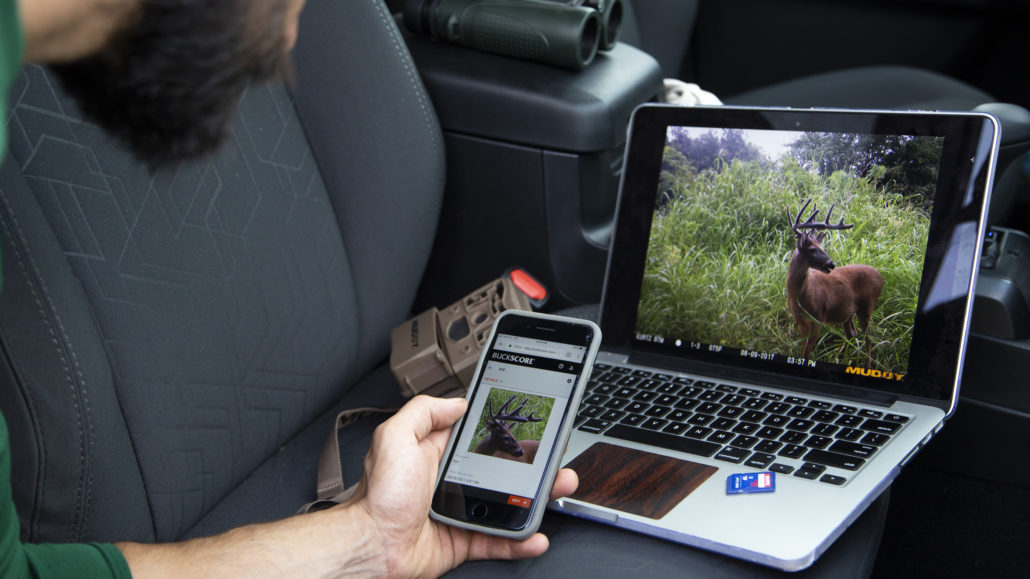
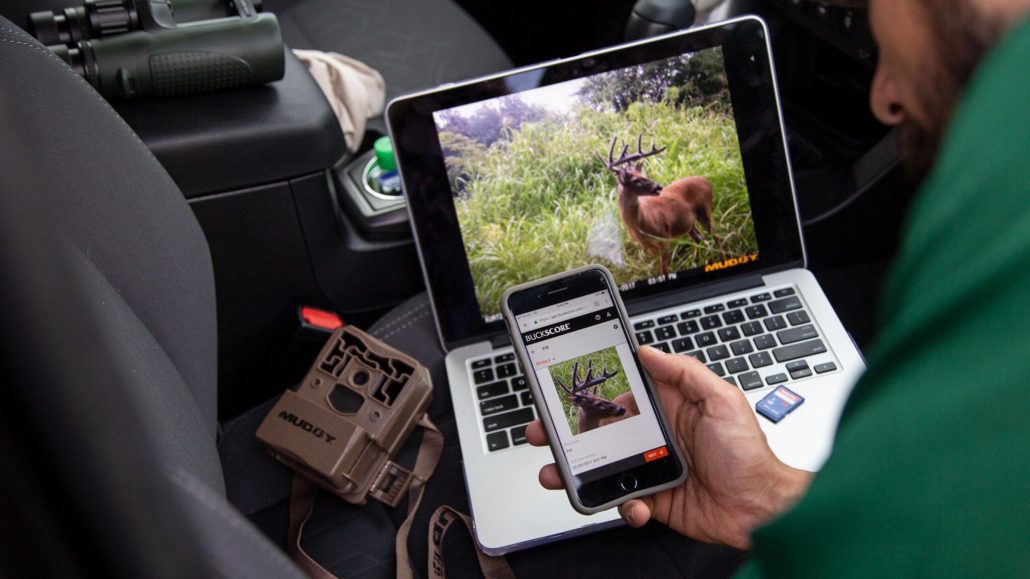
One of the most overlooked features of any trail camera strategy is organization. In fact, photo management can revolutionize a scouting routine. For example, being able to pattern deer means having a traceable record of deer size, timing, and camera placement. You cannot rely on your own memory for this. You need an organized database where you can literally map trends, track conditions, and even analyze deer size.
Photo management software is a must for properly organizing and analyzing this data. However, not all photo management software is the same. Despite there being plenty of options available, there is only one that is developed by researchers to accurately estimate your deer’s size: BuckScore.
BuckScore
One of the best tools for organizing and analyzing trail camera photos is BuckScore. Instead of traditional tools that simply organize photos based on environmental conditions and/or time, BuckScore can help you organize buck based on its size. This is incredibly important when determining which bucks to target and which ones to let walk. It also helps alleviate wasteful data and photos that clutter your computer and don’t let you reach your end goal: shooting that trophy deer. It’s also incredible exciting to know if that buck you’ve been tracking can join the Pope and Young club.
Take Your Trail Camera More Seriously This Year
Many people simply set it and forget it when it comes to trail cameras. They add the batteries, insert the SD card and set it out for use. However they are missing out on the cameras most advanced and beneficial features. A few adjustments can go a long way in trail camera value.
For example, if you don’t plan on leaving your camera out for a significant amount of time; you might benefit more from video mode then from capturing stills. Additionally, if you plan on leaving your camera unattended for a few months, it’s in your advantage to not use video or time lapse to save space.
By better managing your data, taking time to find the best spots, and doing your research before you invest; you cannot only improve the quality of your trail camera information, but also improve the success rate of your hunt this fall.
https://www.buckscore.com/wp-content/uploads/2018/12/BuckScore_FeatureImage-scaled.jpg14402560BuckScorehttps://www.buckscore.com/wp-content/uploads/2024/09/buckscore-logo.pngBuckScore2018-10-18 19:50:122019-08-28 12:20:11Best Trail Camera Tips for Deer Season
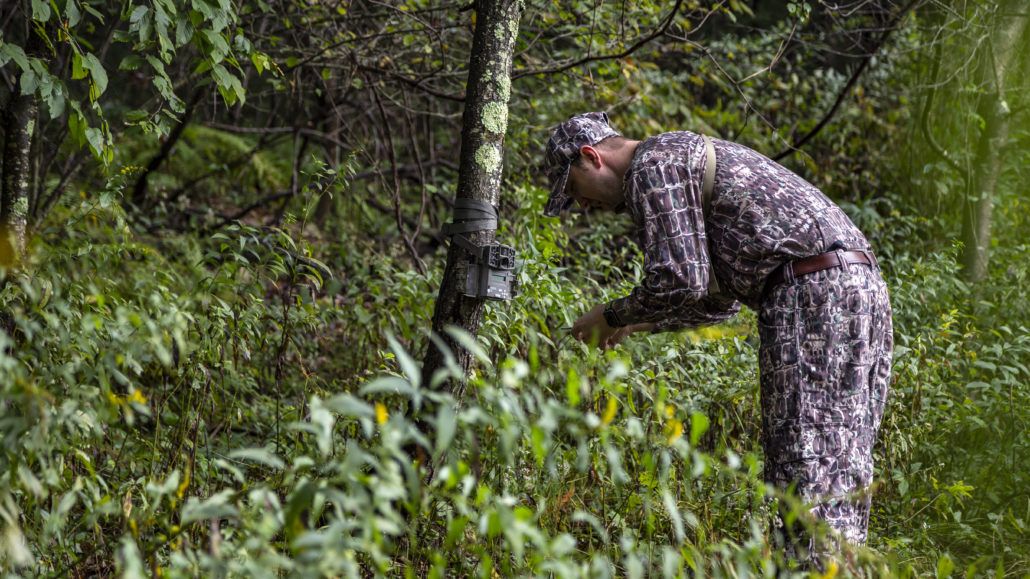
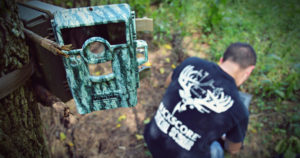
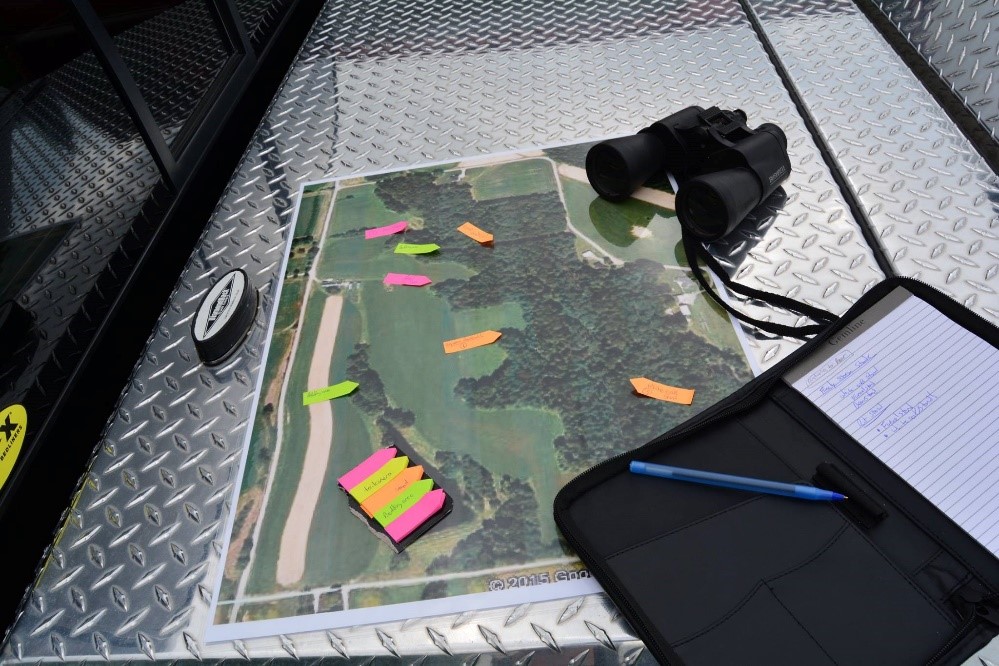
Trail cameras are arguably one of the best tools you have as a deer hunter to help increase your chances of harvesting a buck in the fall. Hunters are able to develop things like their hit list of bucks they would like to harvest if given the opportunity during the hunting season and can glean the most recent information about deer movement to help guide which stand to hunt. Although using trail cameras can be useful, how do you know how many to use or where to put them on your hunting property? This article will give you some tips on where to set up your cameras and how many cameras you may need to be effective in your scouting.
Identifying Buck Movements
Every hunting property is a little bit different. Some properties may have plenty of bedding areas but lack food sources and others may have just the opposite. Using cameras is one of the more effective ways to identify how individual bucks are using your property. This generally begins sometime in mid to late summer when you can start to identify bucks based off their antler development. Place your cameras in known feeding areas to inventory which bucks are hitting which food sources. Once you have a buck identified and know which food source they are consistently visiting, you can then begin to identify travel corridors and potential bedding areas. Hopefully you have already had a chance to scout the property to identify travel corridors and bedding areas, but if you haven’t you can begin with an aerial map to help you narrow down these locations. Once you have identified those areas on the map, you can more precisely go in to scout. Using multiple cameras on multiple food sources will also help paint a picture for you regarding deer movement on your hunting property. For example, if you get a picture of a buck in your food plot planted with soybeans at 7:30 p.m. and then another photo of the same buck in your white clover plot 6 hours later, you likely can start to put together that buck is taking it’s time moving between plots. That may mean there is a bedding area in between them or there are certain features in the landscape that the buck may be more likely to use when traveling. This type of scouting if done well before hunting season or even year-round can dramatically improve your chances of harvesting a buck by simply knowing how deer in general, or a buck in particular, is moving across your hunting property.
Inventorying Bucks on Your Hunting Property
One of the more entertaining things hunters generally look forward to each year is creating a hit list of bucks they may be interested in harvesting in the upcoming hunting season. Trail cameras can obviously aid in this process, but how many cameras do you need and where should you place them to accurately inventory the bucks using your property? Research has shown that when conducting a trail camera survey to estimate things like deer density, recruitment, and adult sex ratios, you will need one camera per 100-acres of land with larger properties generally yielding more accurate estimates. This is a good rule of thumb to follow, but what if you only hunt 200-acres and are most concerned with simply inventorying the bucks using your property? If this is your situation, then placing a camera on each major food source, whether that be a summer food plot, an agricultural field, or even a supplemental mineral site, will allow you the best chance of identifying a majority of the bucks using your property. If you are limited on the number of cameras you have, make best use of them by placing them on high-traffic food sources. In other words, use some on the ground scouting to identify heavily used trails coming into or leaving a food source. This will help maximize your efficiency. If you check your cameras and find that you don’t have many pictures, then don’t be afraid to move the camera. Placing cameras in major food sources means you can check them without causing a major disturbance. Drive right up to the camera if you can. This will help decrease the impact you have on the area and will allow you to move the camera if you think you may have a better area.
Gaining the Most Recent Information (MRI)
Being mobile during the hunting season can be one of the best ways to increase your chances of harvesting a buck. But how do you know when it’s time to move to another stand or move your set-up all together? Having the most recent information, or MRI, on hand will help you in making this decision. There are several ways to gain information during the hunting season. You may simply see deer consistently using a trail just out of range and need to move your set-up to capitalize on that movement. But what about the movement around other stands you aren’t using? You guessed it! Trail cameras can help in this arena as well. Using cameras at stand sites can be tricky given you will want to minimize disturbance when checking them. Waiting for the perfect stand conditions to hunt that particular stand and then switching out SD cards when you are walking into or leaving the area will help minimize the disturbance you are causing. You can also try using cameras that use cell phone connection to remotely send you pictures of what’s going on. This will completely eliminate any disturbance from an area while still allowing you to obtain the MRI. Deciding on how many cameras you need to have out during the hunting season is also a bit trickier than when you’re inventorying what bucks are using your property. Try to identify which stands will be your best stands during the season. This may change throughout the fall as bucks transition from using food sources more during early and late seasons to checking bedding areas during the rut; though, bucks will also still scent check food plots during the rut so it’s always a good idea to have a stand on a food source that does will use throughout the fall. Again, you want to be careful and minimize your disturbance when checking cameras during the hunting season, so wait on ideal conditions to hunt a stand and check your cameras then to see what’s going on and don’t be afraid to move if the cameras are showing heavy action in a different area.
The old adage, “a picture is worth a thousand words” couldn’t be more accurate when using trail cameras for scouting. Using them year-round will help you identify everything from how deer are using your hunting property to which hit list bucks are around in the fall. Try using some of these tips the next time you’re scouting your hunting property and they just might help you close the deal during hunting season.
https://www.buckscore.com/wp-content/uploads/2018/12/BuckScore_TrailCameraTips_FeatureImage.jpg11522048BuckScorehttps://www.buckscore.com/wp-content/uploads/2024/09/buckscore-logo.pngBuckScore2018-10-17 17:39:012018-12-17 17:51:21Trail Camera Tips for the Hunting Season and Beyond
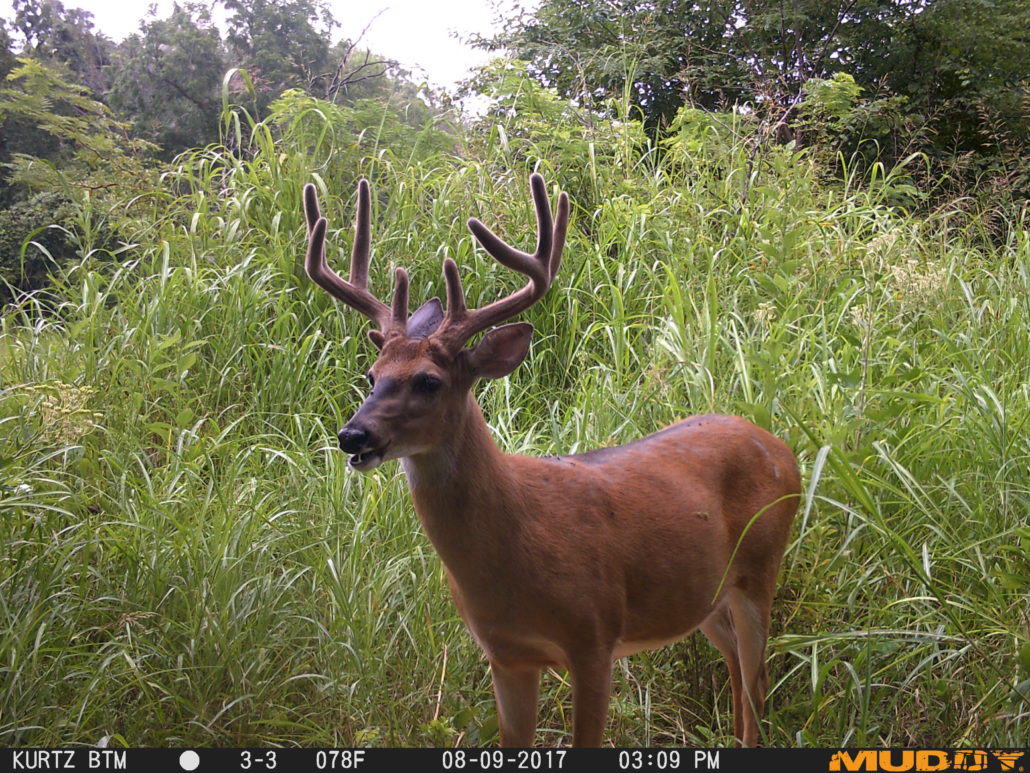
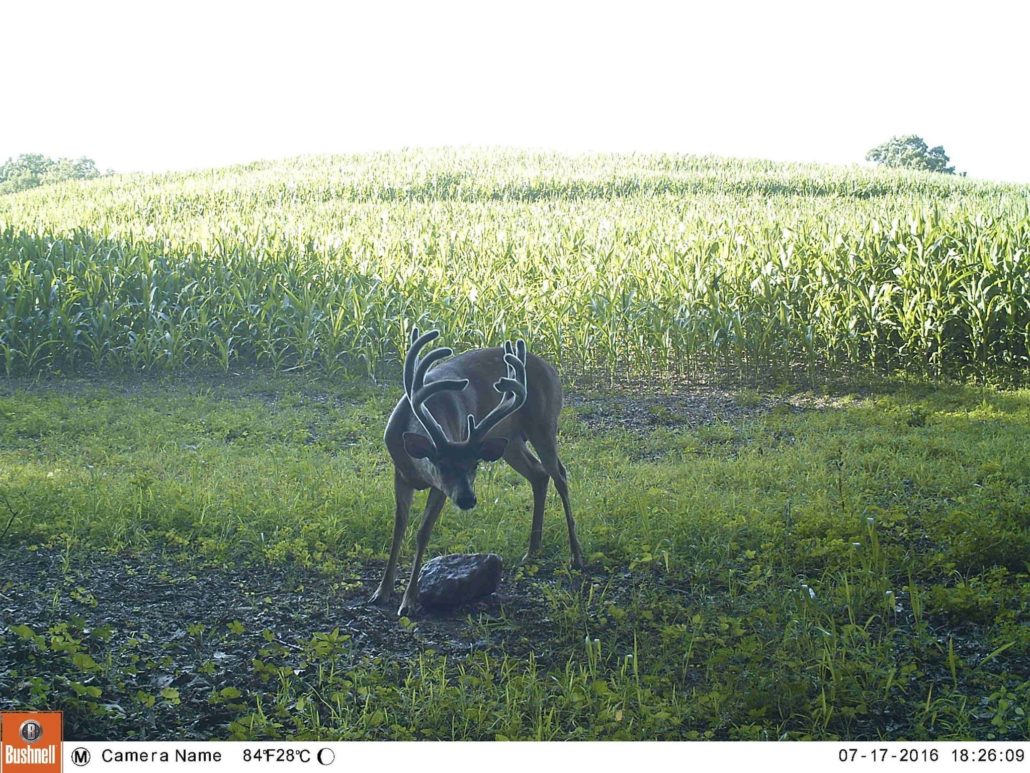
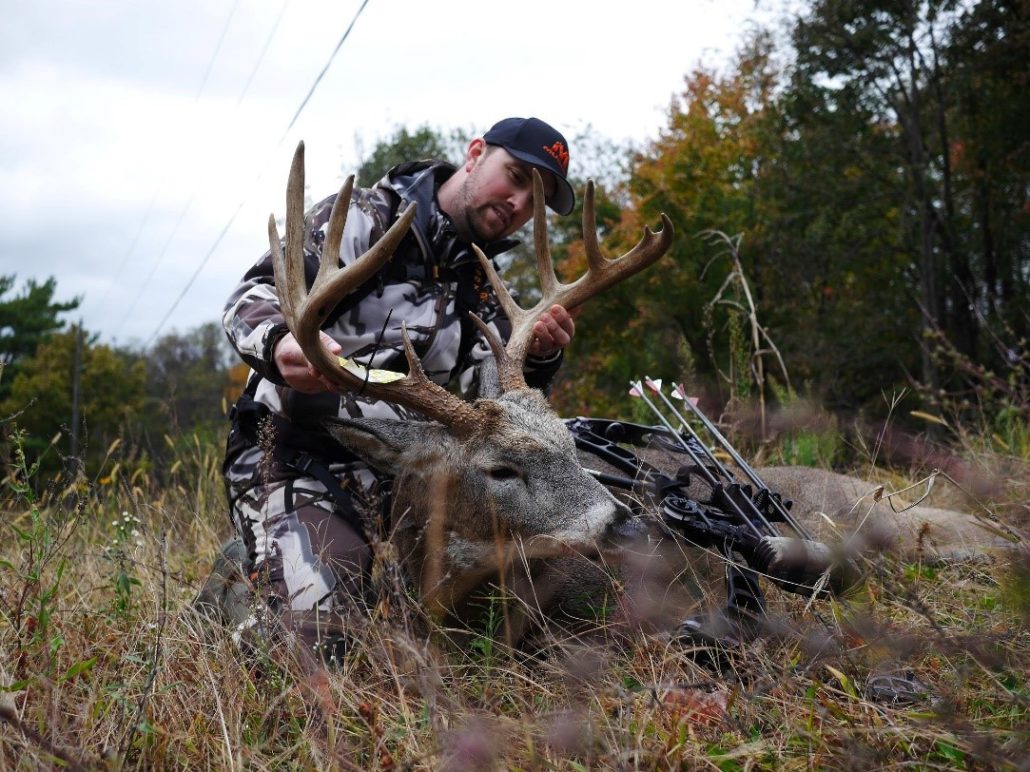
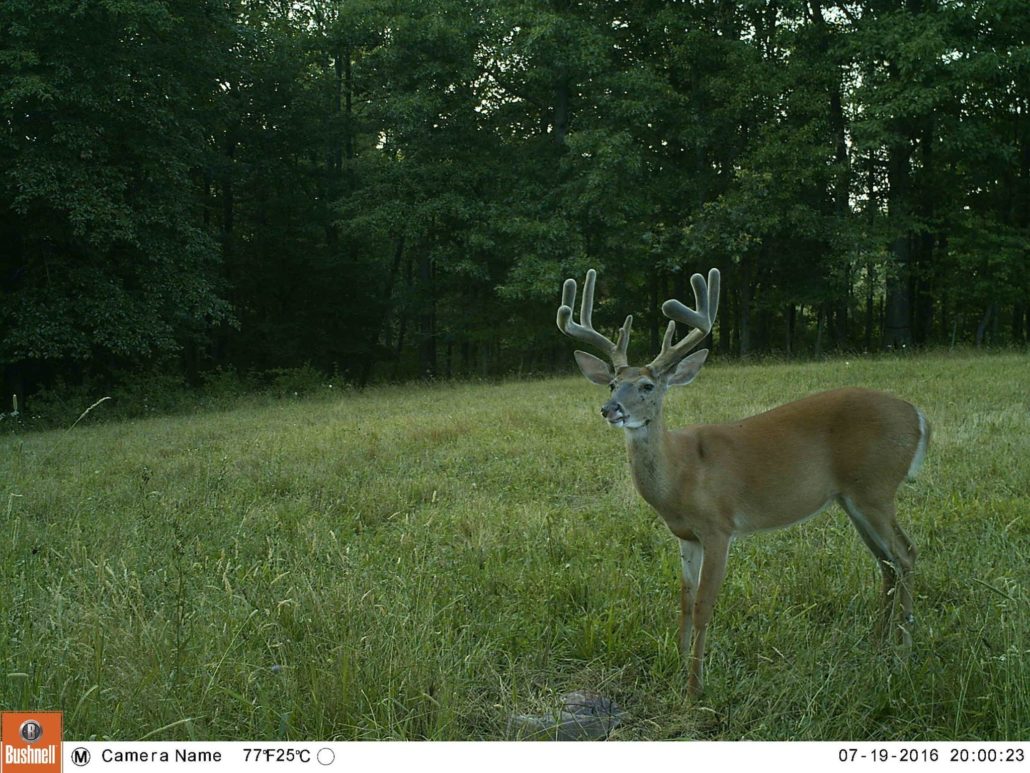
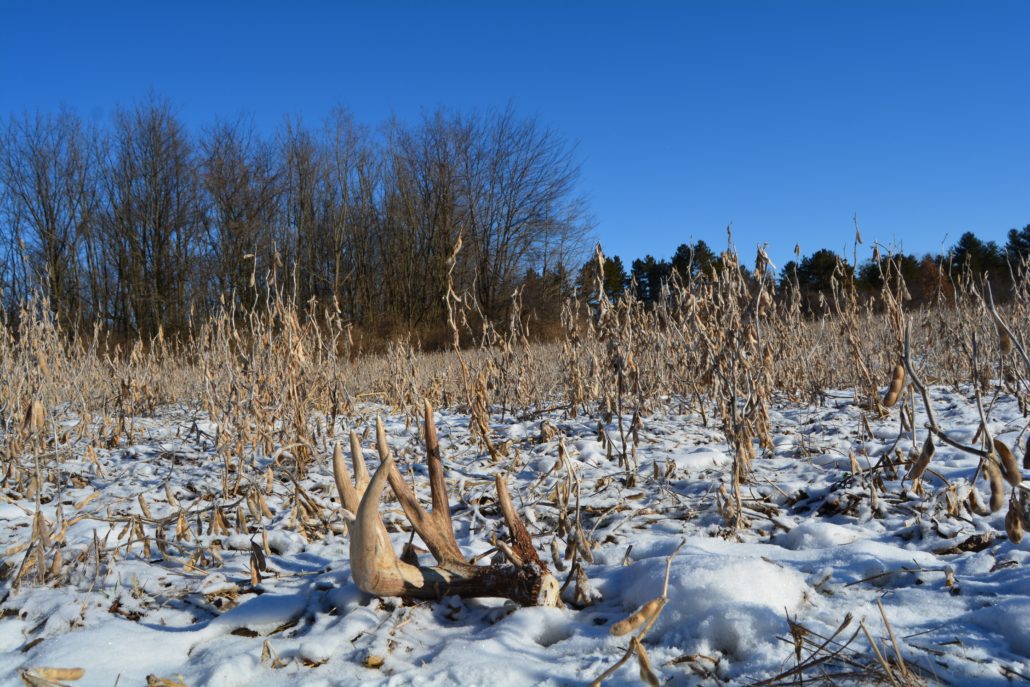
The chance of actually harvesting a velvet buck is greater in some states than others and it’s this rarity of harvesting a velvet buck that is exactly what makes it so special. For others, velvet bucks are just part of the offseason hit-list, gathering, sorting, and strategizing over fuzzy antlered pictures. In either case, whether you are building a hit-list or have a chance at harvesting a velvet buck, the same set of questions apply… how do you go about scoring velvet bucks? How do you estimate a velvet buck’s score from a trail camera picture? How does that score translate into a score for when the buck has hardened antlers? This article will discuss some things to consider when scoring deer in velvet and estimate antler score from velvet bucks.
Antlers are an amazing feature on white-tailed deer and the fact that antlers are shed on a yearly basis and grow back makes them that much more special. Antler growth generally begins in late April but depends on several variables including the health of the individual buck. It takes an average of about 120 days for a buck to grow his antlers with antlers growing up to ½ inch per day at their fastest point. But believe it or not, antlers are pretty much done growing by mid to late August and then begin to harden. You’ll know that antlers are done growing when the tips of the tines and main beam start to develop sharp points instead of looking so rounded. But generally speaking, what you see is what you get for antler size by the time August rolls around. This is important to keep in mind when you are scrolling through your trail camera pics before opening day of archery season.
Scoring Velvet Antlers
Velvet antlers produce two challenges when trying to estimate their size. First, there is the challenge of estimating what the buck would score after it sheds its velvet. The second challenge is going about scoring and entering your velvet buck in the record books if it is big enough.
Estimating the score of a velvet buck can be difficult for several reasons. Obviously, antler score is higher when velvet is present but there isn’t much good research out there showing the percent decrease in antler score after velvet is removed. The one exception is the research that BuckScore was developed from, as a reduction value to apply in measurements from velvet to hard antler scores. Regardless, it’s important to keep in mind what measurements will be most dramatically impacted by the presence of velvet. Measurements like main beam length and tine length won’t change as much as the circumference measurements will when a buck is still in velvet. If you’re estimating antler score from a velvet buck, it’s smart to be more conservative on circumference scores if you are hoping to get an idea of what a buck will score once he’s shed his velvet.
Scoring your velvet buck is the same as scoring a buck without velvet. All of the measurements you would take for a scoring system used by groups such as the Pope and Young Club or the Boone and Crockett Club are the exact same. The issue comes if you harvested a big enough buck to enter it into one of these two record books as they differ on how they handle velvet bucks. If you are wanting to enter your buck into the Pope and Young Club, then there is no issue with the velvet. The Pope and Young Club will enter velvet bucks with whatever their score is with the velvet on. They don’t have a correction factor and won’t make you remove the velvet first before scoring. However, the Boone and Crockett Club is different. They will not score a buck if it has any velvet present that will affect the overall score. Instead, they will make you remove the velvet before scoring. You may ask yourself why not just enter your velvet buck with the Pope and Young Club if that’s the case? Keep in mind that the Pope and Young Club only accepts animals harvested with archery gear whereas the Boone and Crockett Club will accept bucks harvested by any legal means.
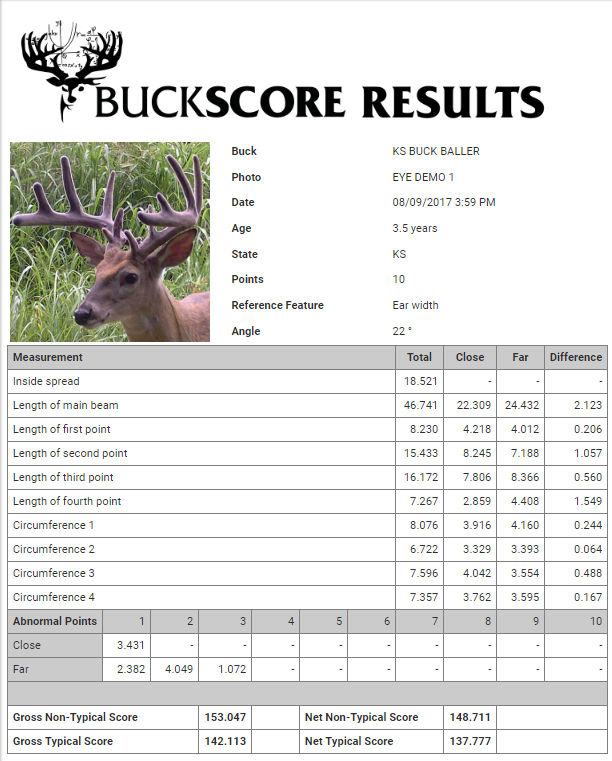
How BuckScore Scores Velvet Bucks
If you are looking to quickly generate a score that applies a factor that relates to the score of a hard antlered buck from a velvet buck picture or harvested buck, BuckScore is your solution. When developed a reduction value was applied and tested, resulting in the ability to accurately estimate the score of a velvet buck.
Judging antler score for velvet bucks can be difficult and you have to manage your expectations of what that buck will actually score once the velvet is gone. It’s easy to get caught up in how big a buck looks with his velvet on but understanding that there will be shrinkage will help you manage your expectations. If you are trying to estimate the velvet buck’s score, use BuckScore to keep your expectations within 3% of his actual score!
Regardless, there’s something special about velvet antlers and having the chance to harvest a buck with velvet is something that doesn’t happen often. Make sure to keep these things in mind regardless of whether you are looking through trail camera pics or are lucky enough to harvest a velvet buck!
https://www.buckscore.com/wp-content/uploads/2018/09/how-to-score-velvet-bucks_feature-scaled.jpg18182560BuckScorehttps://www.buckscore.com/wp-content/uploads/2024/09/buckscore-logo.pngBuckScore2018-09-12 18:38:432019-08-28 12:20:12How to Score Velvet Bucks | Estimating and Scoring Velvet Bucks
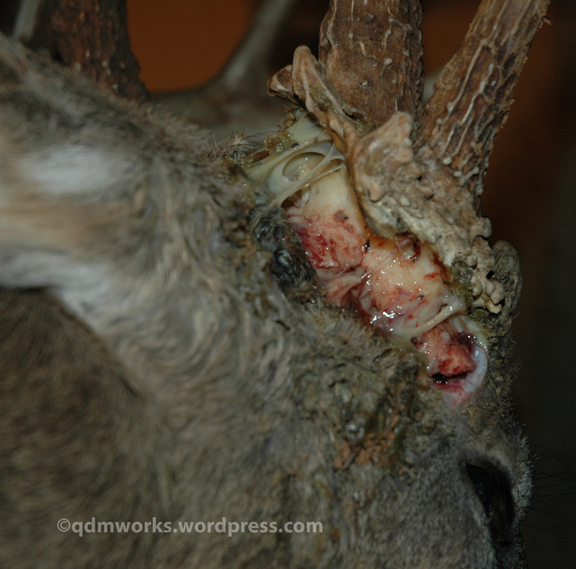
Shed antler traps, a dangerously popular tactic of collecting sheds. I’ve seen all the designs, safe or otherwise, and they all do the same thing…threaten the well-being of a buck. Using shed antler traps can cause major damage to a buck’s pedicle or even cause death. This article should persuade you to shed hunt the ole’ fashioned way, and hopefully allow you to educate other hunters who might be using antler traps.
How do Antlers Naturally Shed
Shedding of an antler actual occurs when testosterone drops below a certain level in a buck. The osteoclast layer of cells between the skull and the antler absorbs calcium from the antlers….once absorbed the antler is rough and porous and will separate. A deer’s antler can be hard and stuck like glue one minute then 5 minutes later fall off, it’s all about the timing of the testosterone getting low enough to complete the process.
Like many things related to deer such as the rut, antler growth, and fawning, all is based on photoperiod (the amount of daylight). However, many factors can influence the actual drop date, including social stress, nutrition, and herd dynamics that may increase or decrease testosterone.
Putting corn or bait around a trap like this in order to get sheds is often more risk than reward. You may have found a shed before with a piece of the pedicle or skull still attached. If so, this is what you are in danger of doing when using a shed trap. You will most likely not get a shed unless the deer is stuck and rips his antlers off before they are ready. This can cause injury of the pedicle or to the growth platform of the antler, causing one of two things…a deadly brain abscess or abnormal growth next year!
Photo Credit: Karl V: Miller of the UGA Deer Research Lab
Why is potentially harming the buck a better option than shed hunting and learning more about the property? Is picking up antlers around a metal or bungee cord trap your idea of shed hunting? These are the types of questions you should ask yourself when considering the use of an antler trap.
https://www.buckscore.com/wp-content/uploads/2018/02/antler-traps-feature-scaled.jpg17072560BuckScorehttps://www.buckscore.com/wp-content/uploads/2024/09/buckscore-logo.pngBuckScore2018-02-08 18:32:082019-08-28 12:20:13Why You Shouldn’t Use Shed Antler Traps
It’s that time of year again! With sheds hitting the ground and your social media feed, you’re now begging the question… “when should I start shed hunting?” Determining when to shed hunt can be tough. Sure February and March are the months when you should shed hunt, but that doesn’t tell you exactly when to start looking. Will you be too late, resulting in chewed up antlers? Will you be too early, pushing bucks off the property before they shed? Understanding when to start might actually be simpler than you think!
When to Shed Hunt “GENERALLY”
When discussing how to time your shed hunt in the general sense, you need to know why sheds are hitting the ground when they are. The why and when are simple, the timing is based on photoperiod. Just like velvet development, the rut, fawn drop, and most things in a deer’s life, photoperiod tells a buck when they should drop their antlers. For most of us, that means the time to shed hunt is early February to March. However, outliers are always present…bucks that either drop very early or late even pushing into early April. Besides photoperiod, social stress, injuries, severe winters, or poor nutrition can and will affect the time of actual antler drop for a buck. The video below covers this and other factors you should consider when figuring out the dates you should start shed hunting your properties.
While the general information behind the shed process is good to know, it still doesn’t answer the question of when you specifically should start. The next section and video dives into the details beyond the general sense of shed hunting, and whether or not you should play it safe.
When Should You Start Shed Hunting?
The biggest consideration to make revolves around the attributes of your property. Do you have a big destination food source the deer are currently hitting? Is your property mainly cover, or the only “good” deer habitat in a landscape dominated by Ag fields? Is your property small with known buck bedding areas?
Each property is different, the best thing you can do is think logically through the benefits and cost associated with shed hunting early or late.
Review the following situations and take a look at the shed hunting recommendation for that situation.
Small Parcel
Reasoning: Under 50 acres or even under 100 acres is still considered small for a buck’s core area and habitat. An early shed hunt could kick the buck off the property, causing him to settle into a bedding area on a neighbor’s property.
Shed hunt timeframe: Late
Property with Large Destination Food Source
Reasoning: Sheds drop where deer spend a fair amount of time. A large standing grain plot or plot with brassicas/cover crops will have sheds early into shed season. Shed hunting a food source during the late morning to mid-day hours could turn up sheds. More importantly shed hunting during these time frames normally does not disturb deer.
Shed hunt timeframe: Early
Property with Thick Cover
Reasoning: A property with thick cover, especially with sunny south slopes or thermal cover such as native grasses, is a great place to find sheds. Unfortunately, these types of properties take giant groups of people, shed dogs, or extensive searching that causes a major disturbance. For most properties, this disturbance should only come after the majority of deer have shed their antlers.
Shed hunt timeframe: Late
Balanced Habitat on a Big Property
Reasoning: if you hunt or own a decent sized property with a good balance of edge, crop fields, cover, and timber habitat, then you may be very unsure of when to start shed hunting. If this is the case, split your property up into sections. You can shed hunt early on the big food sources, but may want to hold off entering the woods, cover, and thick southern slopes until later into the year.
Shed hunt timeframe: Late or early dependent on area
Using Trail Cameras to Figure Out When to Shed Hunt
If you want to find out exactly when most of your bucks have shed, or when a specific buck has shed, exploiting trail cameras will be your best tactic. By placing bait (if legal) such as corn in front of a trail camera, you can take inventory of your deer herd to figure out when the majority of bucks have shed their antlers. In the video below I walk you through how to figure out when to shed hunt using trail cameras. This video also reveals some opportunities to gain more insight into the deer herd’s demographics with a late season trail camera survey.
Trail Camera Setup for Shed Hunting
Scatter trail cameras with 50lbs of corn (new corn every 2-4 days) in the best places for finding sheds like food sources and edges of bedding areas. Often trail camera density goes over 1/100 acres. This is in order to get more encounters and pictures over the entire property
Use a 3-8 photo burst or video setting to narrow down which bucks are shedding and to identify bucks vs. does once shed.
Run cameras until the last buck has shed and check trail cameras every few days to determine when to go shed hunting.
These tips should help you choose the perfect time to shed hunt. Each property is different and each buck is different. That perfect timeframe, before antlers are chewed up and just after they drop, is a small window. Knowing the science and some tactics to use to figure that time out is just part of becoming a better shed hunter and a better deer hunter.
Want to figure out what that buck scores based upon a trail camera picture? Score him with BuckScore! Simply add, draw, and measure the photo using the patented software and figure out what he scores. Find out more below!
https://www.buckscore.com/wp-content/uploads/2018/02/when-to-shed-hunt_feature2-scaled.jpg17072560BuckScorehttps://www.buckscore.com/wp-content/uploads/2024/09/buckscore-logo.pngBuckScore2018-02-08 16:47:102019-08-28 12:20:13When Should You Start Shed Hunting?
By: Weston Schrank, BuckScore Specialist and Biologist
As deer hunters and land managers, we worry about our deer herds in the winter. With freezing cold temperatures, snow, ice storms, and a sun that doesn’t often show itself, it’s a miracle deer can make it through such conditions. While deer are built to handle these tough situations, it’s our job to ensure the habitat and herd are in a healthy state for any type of weather. One question that often comes up during this time of year is “should I be feeding my deer?” In most circumstances the answer is no. However, the answer depends upon the situation as both the terms “deer food” and “feeding deer” can have different meanings. Understanding the right and wrong way to feed deer this winter is your job as a deer hunter and more importantly as a deer steward.
There are three sections below, carefully read and watch the videos in this blog to get a full understanding of the right and wrong way to feed deer. There is a wrong way to feed deer, a better way to feed deer, and “the best way” to feed deer during the winter months.
Feeding Deer in the Traditional Sense
What is the first thing that comes to mind when you hear “feeding deer”? I bet that 90% of hunters think of deer corn. Corn or deer feed pellets are the most common foods that hunters refer to when they talk about feeding deer. So what is the problem with this? Feeding deer large amounts of corn in the winter in an area where they don’t normally get it can be a disaster. The video below explains why this can be a problem.
Feeding Deer with a Better Understanding
As the video above explains, this does not necessarily mean that all feeding is bad. There is a way that you can start feeding deer on a supplemental feeding program during the winter. The secret is feeding in the right amount and at the right times. The video below covers how to properly provide supplemental feeding.
The Best Way to Feed Deer
While many deer hunters and land managers might successfully incorporate a supplemental feeding program on their property, there is a better option. Through habitat management, food plots, and timber management plenty of deer food and nutrition will be available to the deer herd. Food in the form of food plots, early successional growth, woody browse, and downed trees should always be a higher priority for a deer manager than a feeding program. Unfortunately, there may not be enough natural food or habitat to sustain a herd throughout the winter. If this is the case, it might be time to create some emergency deer food and cover through hinge cutting. The video below covers hinge cutting and how it creates food and cover for deer.
When it comes to the terms “deer food”, “deer feed”, and “feeding deer,” it’s important to understand what each means to your management plan. There is a right way and a wrong way to provide food for your deer herd. Which will you choose and more importantly how will your choice affect the future of your herd?
Looking to read more deer hunting and deer manager related articles? Check out the link below!
https://www.buckscore.com/wp-content/uploads/2018/01/feeding-deer-food_feature-scaled.jpg17072560BuckScorehttps://www.buckscore.com/wp-content/uploads/2024/09/buckscore-logo.pngBuckScore2018-01-24 15:34:072019-08-28 12:20:13Deer Food and Deer Feeding in Winter
To provide the best experiences, we use technologies like cookies to store and/or access device information. Consenting to these technologies will allow us to process data such as browsing behavior or unique IDs on this site. Not consenting or withdrawing consent, may adversely affect certain features and functions.
Functional
Always active
The technical storage or access is strictly necessary for the legitimate purpose of enabling the use of a specific service explicitly requested by the subscriber or user, or for the sole purpose of carrying out the transmission of a communication over an electronic communications network.
Preferences
The technical storage or access is necessary for the legitimate purpose of storing preferences that are not requested by the subscriber or user.
Statistics
The technical storage or access that is used exclusively for statistical purposes.The technical storage or access that is used exclusively for anonymous statistical purposes. Without a subpoena, voluntary compliance on the part of your Internet Service Provider, or additional records from a third party, information stored or retrieved for this purpose alone cannot usually be used to identify you.
Marketing
The technical storage or access is required to create user profiles to send advertising, or to track the user on a website or across several websites for similar marketing purposes.