By: Weston Schrank, BuckScore® Specialist and Biologist
The first of a long list of responsibilities for a deer and land manager is to find out what is going on the property. It’s been a long hunting season… some deer have been killed by hunters, others killed by predators. The cornerstone of your new property management plan, and next year’s harvest plan, is taking a census of which deer and how many there are on the property. The best way to do this is by running a post season trail camera survey.
Post Season Trail Camera Survey
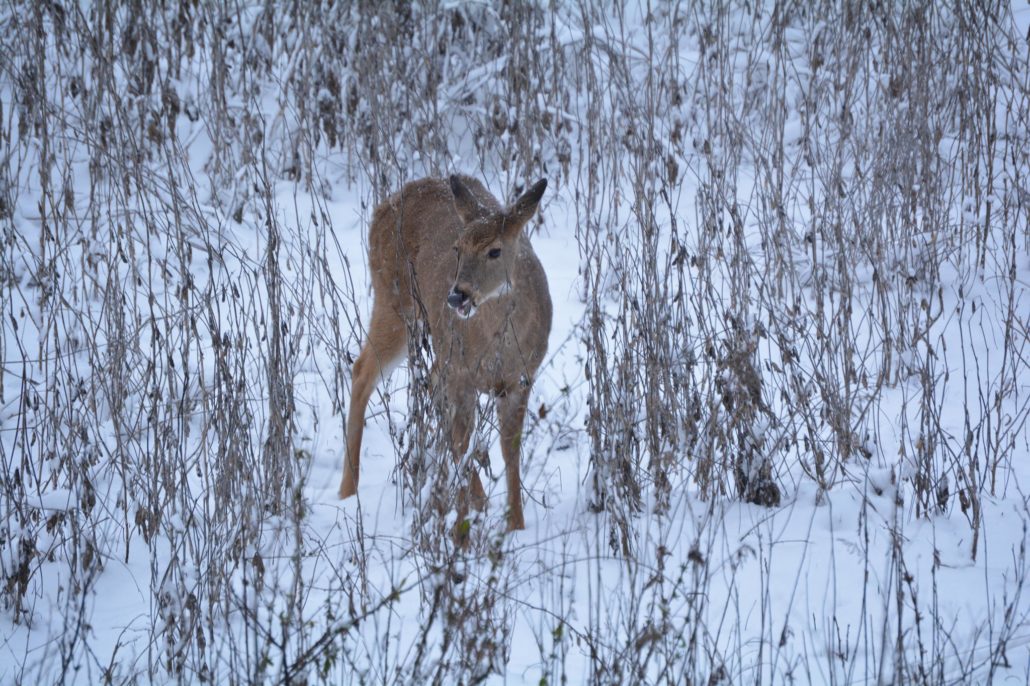
Most surveys are preseason surveys in summer, to determine which bucks are on the hit list… but a post season survey can be far more important to a deer manager. Population number, health assessments, post season age structure, and post season sex ratio are all very important to take note of after deer season.
Winter, specifically late February and March, is the hardest time for deer. A trail camera survey allows you to see the status, size, and overall health of the deer herd before this stressful time. Deer population numbers can fluctuate in terms of how many deer you actually see on the property. Your property may get an influx of deer stacking into your bedding areas, south slopes, and disturbed woodlots if you have a decent amount of cover and ideal habitat. This can cause a lot more stress to the property than what your management plan and property is set up for. Trail camera survey results combined with post season scouting can reveal management projects that might be needed before late February and March. This information also allows you to make smarter decisions on doe harvest, food plots, and even predator management!
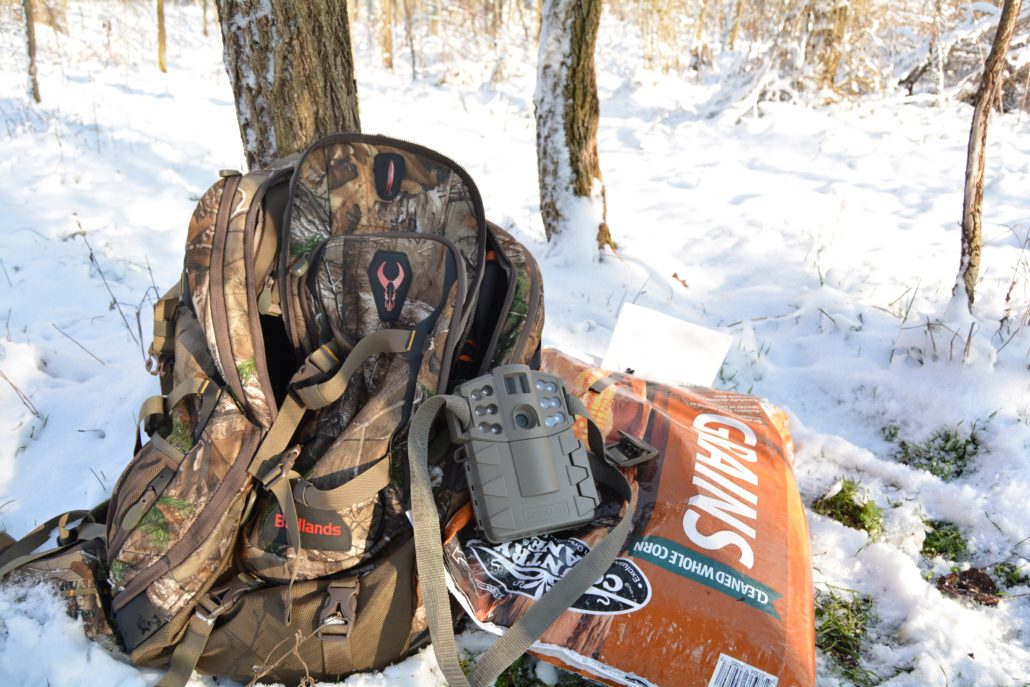
What You’ll Need
300 – 500 lbs. of corn or more per 100 acres of property (depending on deer densities)
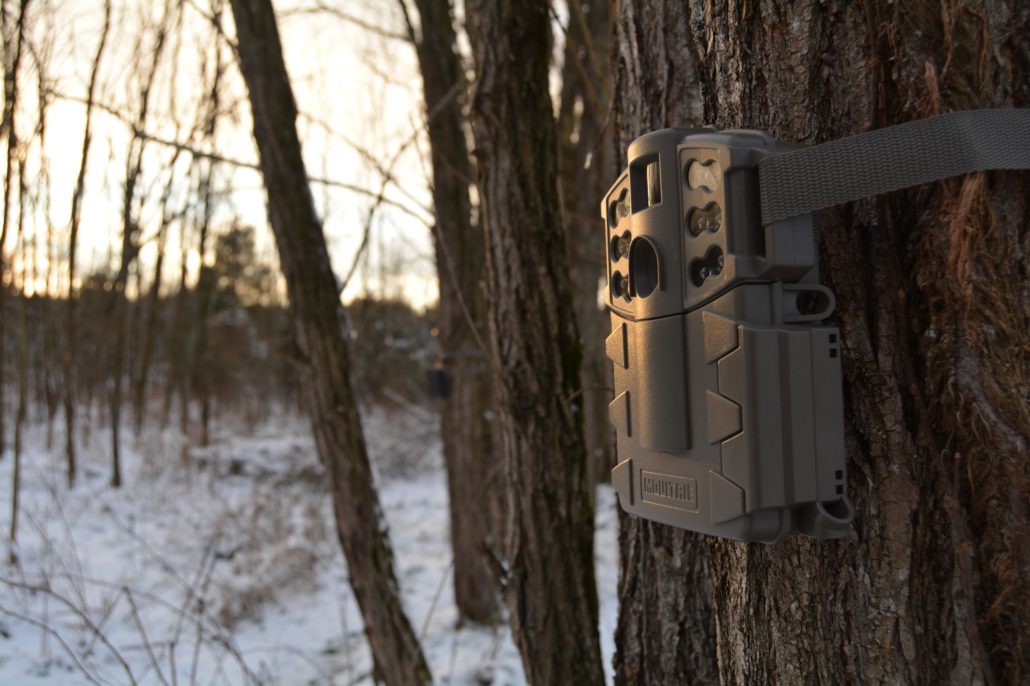
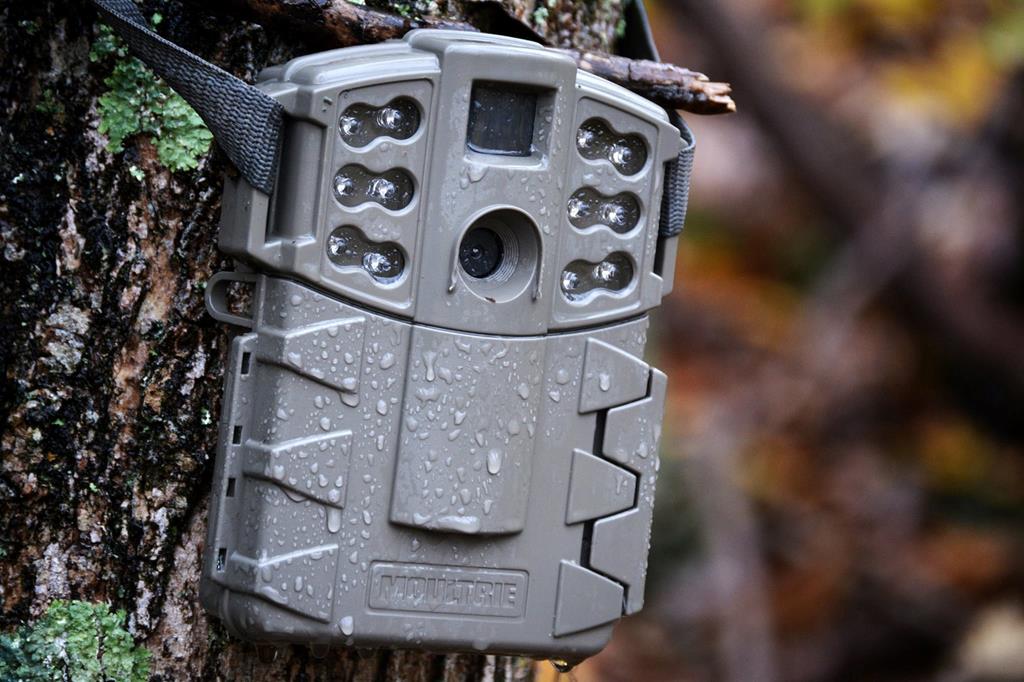
One trail camera per 100 acres of property
New batteries for your trail camera
8 GB or larger SD card (check compatibility with camera)
Time, enough time to refill trail camera stations every 2-4 days (depending on deer densities)
Trail Camera Survey Instructions
When setting up a survey you need to stick to the correct format that was conducted in the original research in order to get accurate results. The correct setup calls for a trail camera for every 100 acres. However, each property calls for different numbers depending on how it hunts, topography, and its habitat diversity. For example, while one camera may seem to cover an entire 70-acre property, you can learn from observations that each side of the property is used by different deer, and more importantly bucks, the number a survey uses as an index to estimate doe numbers. Setting up a trail camera on each side of this 70-acre property will give the ability to observe and identify each individual deer using the property. As another example, a 150-acre property in will have the same number of cameras. The habitat on this farm isn’t as diverse, meaning the deer move more freely from one camera location to the other.
After deciding how many cameras you need, the location of the trail cameras is your next decision. Your ideal trail camera location would be an area that you can maximize deer encounters with. You will want an area that is relatively clean of brush, saplings, and tall grass, essentially anything that can set off the camera besides a deer. Set up the trail camera about chest high and facing north or south to keep the morning or afternoon sun from blinding your image. Place 50-100 lbs. of corn out about 10 yards from the camera.
After the area is cleaned up and corn is down, turn your attention to the proper trail camera settings. The most important aspect that is often messed up by hunters and landowners is the setting and duration of the survey. The correct settings are 1 photo burst with a 5-minute delay. Make sure you have fresh batteries and an empty formatted memory card and run the survey for 3 weeks or 21- 24 days. During this time, keep coming back to ensure there is always corn on the site.
Trail Camera Survey Results
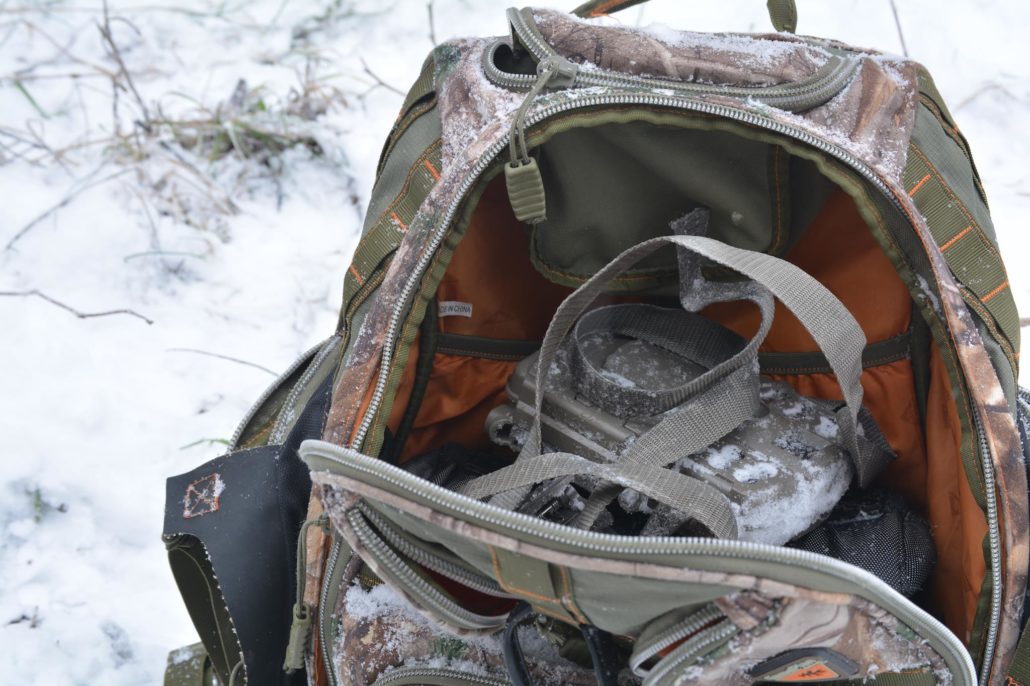
Once the 3 weeks are up you will pull the cameras. By this time you might have already been finding sheds, or deer will be casting their antlers within a few short weeks. There is no reason to keep the corn and trail cameras running this late into the season.
You are now ready to start the most important part of the survey, calculating the deer population and making decisions based on the survey. While the calculations are relatively simple, making decisions based on the data can be a little more confusing.
Look out for another video coming out in the upcoming weeks on how to start calculating these trail camera survey results. We will walk you through how to identify bucks, estimate does and fawn numbers, score bucks on the hoof, and what results management decisions can be derived from. I will also be pairing these videos with off-season responsibilities and activities you can be doing now that can increase deer movement across your property for next year’s hunting season.
In the meantime, here are several blogs that you can check out to increase your knowledge of deer, deer management, and deer hunting!
https://www.buckscore.com/wp-content/uploads/2018/01/trail-camera-survey-setup_feature-1-scaled.jpg17072560BuckScorehttps://www.buckscore.com/wp-content/uploads/2024/09/buckscore-logo.pngBuckScore2018-01-09 20:36:082019-08-28 12:20:14Trail Camera Survey | Take Inventory of Your Deer Herd This Winter
By: Weston Schrank, BuckScore Specialist and Wildlife Biologist
The first two weeks of December can be a rough and confusing time for any deer hunter. Personally, if I have not tagged out yet I’m very unsure what to do with myself. Usually I am already focused on coyote hunting or just spending more time with family and friends… but again only if I am tagged out. The weather and deer activity are in a weird place and deer hunters are caught in the middle of it all. Before the cold temperatures of winter arrive, and after the intense rut action, a lot of deer hunters can catch themselves in this period known as the December lull. The only thing that I have come to know is that trail cameras can be a saving grace during this lull period. I aim to give you some solid trail camera strategies and tips for the late season. But I know reading this will also give you a better understanding of what is actually going on during the late season!
Late Season Strategies
While I might completely ignore my cameras around the rut and focus more on just getting time in the stand, this ideal completely shifts during the first weeks of December. Unless you are a fan of throwing “Hail Mary” hunts together, trail cameras are the best strategy for the late season. While it might be obvious to some readers, the main reason why trail cameras are your best bet for the late season is because of deer patterns. The late season is the second time period where hunters can accurately pattern mature buck movement down to literally the minute!
Late Season Patterns
Mature bucks focus on recovery and staying warm during the late season. This is similar to their focus during late summer when they are busy feeding on protein. Naturally, their late season patterns fall prey to the same opportunities that their previous summer patterns do. This means that with some simple scouting, and some well-placed cameras a hunter has the ability to pick up on a pattern and plan a hunt based off the intel.
The buck will be noticeable in only one location… a food source. He will spend morning to early evening hours held up in his warm thermal bedding. This is often a southern slope, a spot where sun can reach the buck but also where the cover blocks the cold wind. Early successional spots and native grass fields that are southern oriented are perfect spots for mature bucks to bed. When the buck does get up he will be headed to a nearby food source. This food source will be most likely one of the 4 most attractive food sources a deer can feed on during this time of year.
Late Season Food Sources
There are 4 food sources that you should take notice of, or plant next year specifically for the late season. Some are quite easy to establish and hunt, and others take quite a bit of investment.
Brassicas – the fancy name for turnips, radishes, and rape. If enough acreage is planted, the green sugary tops and robust buried treasures can be a potent combo for cold winter days.
Cereal Grains – winter rye, winter wheat, and oats (winter hardy) can be a great green source of food that will stay green all winter long. They make great cover crops if you are managing soil properly.
Standing Corn – standing or freshly cut or mowed over corn can be a major attraction during the late season.
Standing Beans – standing beans, just like standing corn, can be a great late season food source, but it offers summer protein, something that corn cannot. This makes beans a better option if you have enough acreage to have standing beans throughout the season and into early spring.
The Occasional Hot Doe
Now before I dive straight into trail camera strategies and setups based on the information below ,I do need to talk about the occasional hot doe. Some people refer to it as the second rut, but the more correct term would be the fawn rut. Now, Midwest and Northern states can see an upwards of 75% of all breeding occur during the peak rut week. Some does do come in if they are not bred in the first round, especially if sex ratios are skewed towards more does than bucks. However what I am talking about here is what I commonly see on well managed properties. When doe fawns have great habitat, great food, and as a result great nutrition, they can reach the magical weight of 60-70 lbs. What happens then? If 6-7 month fawns reach this weight they can become sexually active and come into estrous. This is why you might have seen a small doe fawn being chased by 2 or 3 bucks in a late season food source or cut corn field. The one difference here of course is that these bucks are chasing an uneducated fawn, not a smart mature doe!
This is not something to rely on, just a word of caution that the mature buck you are hunting is not completely safe with a late season pattern on your property. There is still a chance that he could cross the property line.
Late Season Trail Camera Setups
Obviously the most successful trail camera strategies will be based around the most important aspect of the late season… food! This means creating camera setups that will either inventory the food source location. Or will catch deer movement and behavior around or in route to the food source. Now I have tried multiple setups, on multiple properties, and over the course of the years have ended up with a few videos to help viewers setup trail cameras for the late season.
Trail Camera Tips | patterning Deer with Late Season Cameras –this video was a couple years back, but the principles of the advice are solid. It discusses some of the information I have reviewed above.
Last year I ran a series called “Trail Cameras Weekly” on Muddy TV. During each week of the rut, I published a different video on what to do with your trail cameras for that week. Of course, I covered this time period in that series, and last year I gave some extremely helpful tips for late season trail camera setups.
The “Trail Cameras Weekly video reveals two very useful trail camera setups. One is a trail camera over a food source on time-lapse mode, and the other is on a late season funnel.
By setting up a trail camera over a late season food source over time-lapse mode, you can inventory what deer are utilizing the food source. You can also see where they frequent and even where they are filtering out of. You will want a camera with very high resolution photos (>10-12 MP). Set the camera to take pictures during the last 1-2 hours of daylight, with a photo every minute. Also make sure you have a big memory card (>16gb).
Late Season Funnels
If you can identify the main areas of a late season bedding area, essentially anywhere with thick cover and sunshine, you can gather intel by hanging a trail camera over a late season funnel. For this setup, identify a heavily used run and set the trail camera up at a 45 degree angle from that run. You will want a camera with a quick trigger speed that can capture 3+ photos in a photo burst mode.
When to Make a Move
Stay out of these food sources except to check trail cameras. Keep the pressure off your food sources until one of the following happens:
Cold temperatures – when a cold front moves through or snow hits, deer will be forced to get up and feed earlier in the afternoon just to ensure they can keep up with the energy demands of staying warm.
Daylight movement – if you capture a buck utilizing the food source on a regular basis during legal shooting light don’t hesitate! Go in after him immediately.
These trail camera tips should help you target late season movement patterns of bucks to target. It can be your saving grace that arrives just when it seems like all other opportunities have faded away.
Have a nice buck on camera? Score him in minutes using the BuckScore® Software!
https://www.buckscore.com/wp-content/uploads/2017/12/late-seasontrail-camera-tips_feature.jpg13652048BuckScorehttps://www.buckscore.com/wp-content/uploads/2024/09/buckscore-logo.pngBuckScore2017-12-08 16:49:472019-08-28 12:20:14Salvage Your Deer Season With These Late Season Camera Tips!
This is not your normal late season hunting tips blog, or late season strategy blog. If you are looking for that take a look at a blog we just posted. Instead, this is going to reveal some hidden late season intel that most hunters take the time to look at. Last year, I filmed a weekly video for “Trail Cameras Weekly”, a weekly trail camera tip based video series for Muddy TV that reviewed the deer gut analysis tactic.
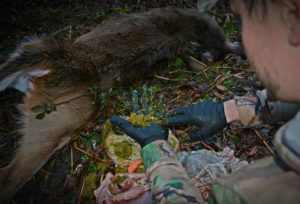
Analyzing a Deer’s Gut
Normally, figuring out a deer’s diet is not going to be directly useful for hunting. However, this information is absolutely vital for the late season! I know most hunters are no stranger to taking a doe or two during the late or second gun season of their state (primitive or bonus antlerless season). If so, take advantage of this incredible opportunity!
What Do Deer Eat in The Late Season? | Trail Cameras Weekly “Week 10” – This process offers very valuable intel when it comes to hunting. Figuring out what a deer’s diet consists of regarding the late season food sources on your property, can help you determine where bucks might be patterned.
You are essentially trying to figure out what the “green mush” of the stomach contents are and assign percentages of each “type” of food. You will be looking for the following food sources:
Woody Browse – large high fiber stem and tree bud looking stomach contents. The majority of a deer’s diet will be woody browse which can be confirmed by a lot of fiber strands and broken down stems of plants.
Forbs– herbaceous plants that can be seen as large green matter. Generally, you will not see a lot of forbs in a deer’s diet in the winter.
Mast – broken and shattered acorn bits can be confused by corn often, but it will be a significant portion of a deer’s diet in areas with a lot of mast-bearing trees (oaks mostly).
Crops – this is the one you want to try and focus on. Do you see a lot of corn/beans? In the case of this video, a large portion of the doe’s diet was winter rye or the cover crop on the property.
Grass – slightly less fibrous plant material that will make up a small portion of a deer’s diet.
If you can accurately identify food sources in the deer’s stomach contents you can then assume where the deer is spending the majority of its time. Remember deer will be mainly feeding in the late afternoon and early into the night. If there is a lot of acorns still in the diet, than oak flats may be where you want to spend time hunting. If its corn or another late season food source that can be easily hunted, start putting some late season trail camera setups in and around that food source.
This tactic can turn you onto to an unknown food source on or close by your property. This can allow you to rethink your hunting strategy for the late season just in time to snatch success before the season ends.
Want to Find Out More about this Tactic? Visit the Original blog here!
https://www.buckscore.com/wp-content/uploads/2017/12/what-do-deer-eat-late-season_FeatureBlog-Copy.jpg13922048BuckScorehttps://www.buckscore.com/wp-content/uploads/2024/09/buckscore-logo.pngBuckScore2017-12-08 16:15:242019-08-28 12:20:14Hidden Late Season Intel You Should Pay Attention To
Getting the perfect trail camera photo is hard enough. Add to it the pressure of trying to acquire a picture that would work to score with the BuckScore® program can feel next to impossible. This article’s aim is to clarify what pictures can be scored and what pictures cannot.
BuckScore® software scores deer based on the information you manually put in. The scoring starts with a reference feature. This measures the scale, angle, and other photo characteristics based on your manual measurement of the ear width, eye, or eye-to-eye measurement. After the reference feature, you will draw the other measurements on the antlers. This is why clear, crisp angles at correct angles must be used when using the BuckScore app.
Images That Cannot Be Scored Using BuckScore®
There are several images that won’t work when using the BuckScore® program, however they revolve around 4 main attributes.
Low quality
Movement
Angles
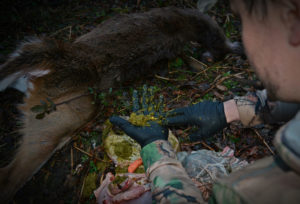
Anatomically incorrect reference features (mounted deer)
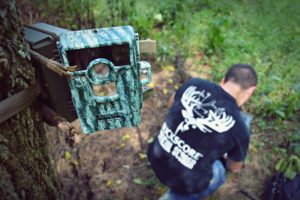
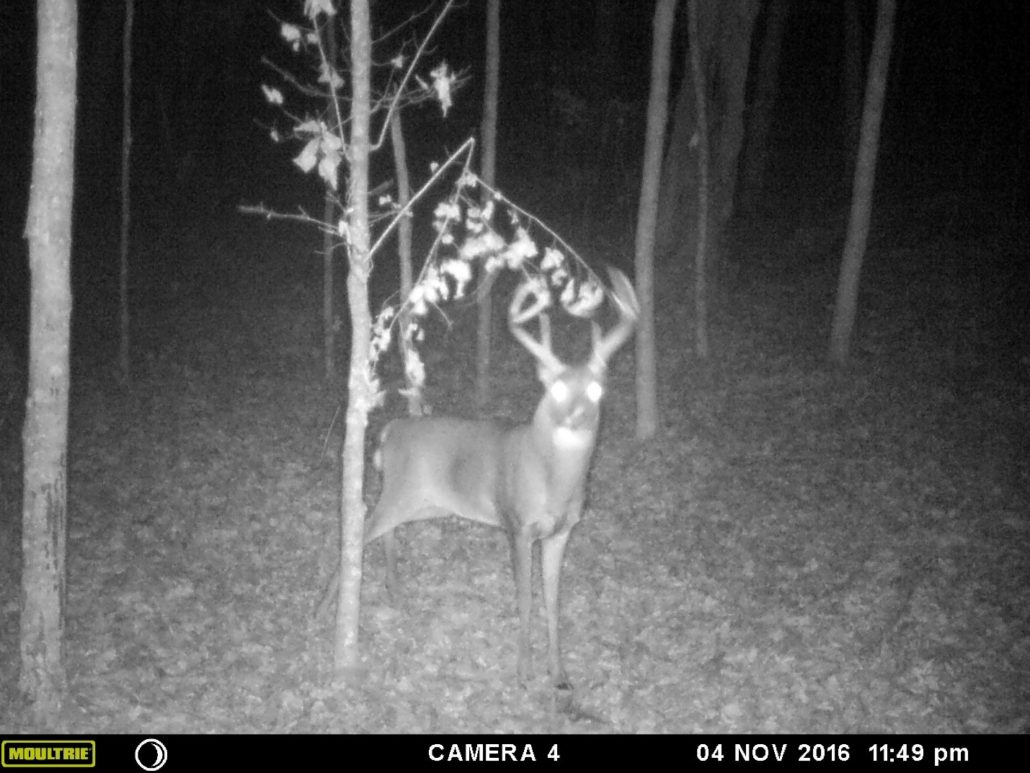
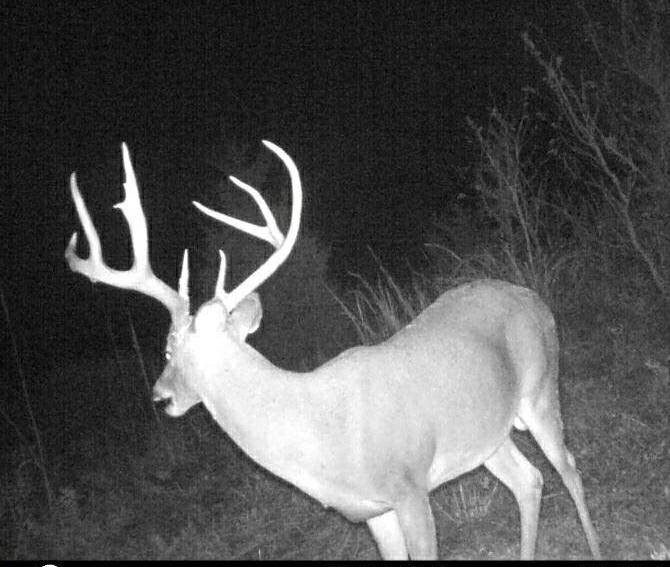
Low Quality
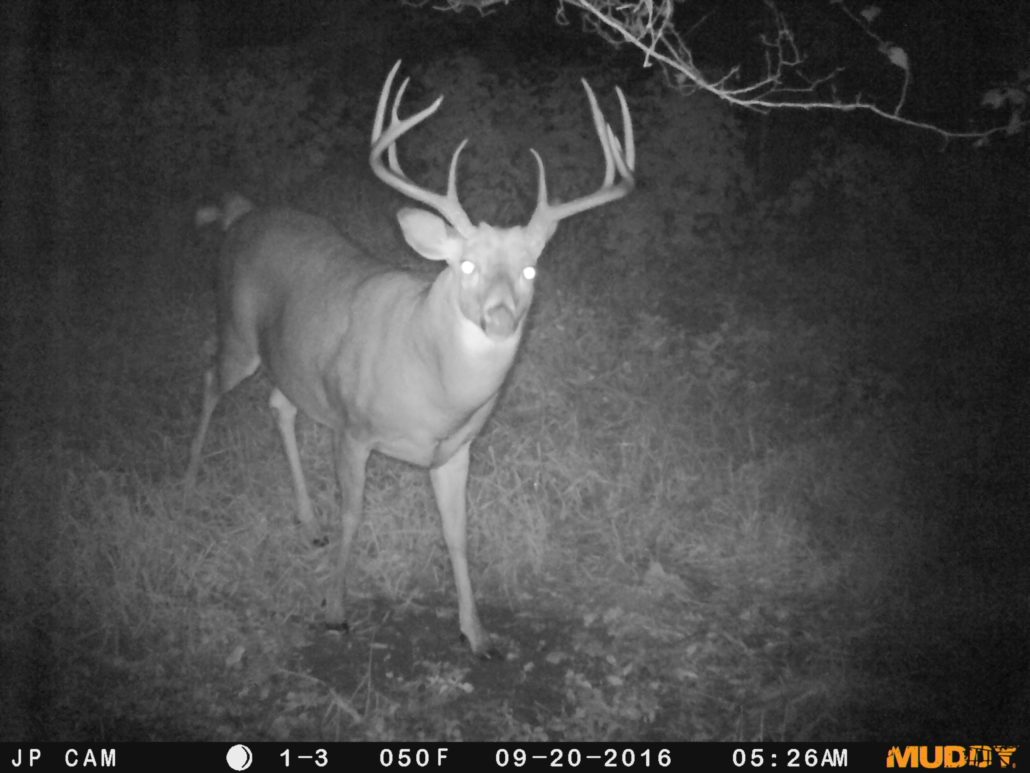
Why? – Low–quality images are simply too blurry or not detailed enough to accurately score with BuckScore®. Some cell phone pictures or any low–quality camera pictures, often from trail cameras, can lead to an inaccurate score. Inexpensive trail cameras with low megapixel images quickly become blurry when the deer gets further than 30 ft away from the camera. This is especially true if the image is captured at night. The “fuzzy” factor creates a lot of variation to exactly where a tine, circumference, or main beam measurement starts and ends. It can also throw the reference measurement off.
Photo: This image is low quality, but it also is at night. This renders the eye reference measurements useless as the glare exaggerates the eye location and width. This buck also has his ears laid back which does not allow the ear reference measurement to be taken.
Solution – The obvious solution here is to get a better camera. Most medium price range cameras offer 8-12 MP images. However, that is not going to fly with most hunters on a budget! The best option, in this case, is to bring the deer in closer. You can do this by setting up the trail camera differently on the run or food plot or simply create a point of attraction. Bait, licks, or mock scrapes are all great ways to stop a deer for a close detailed picture.
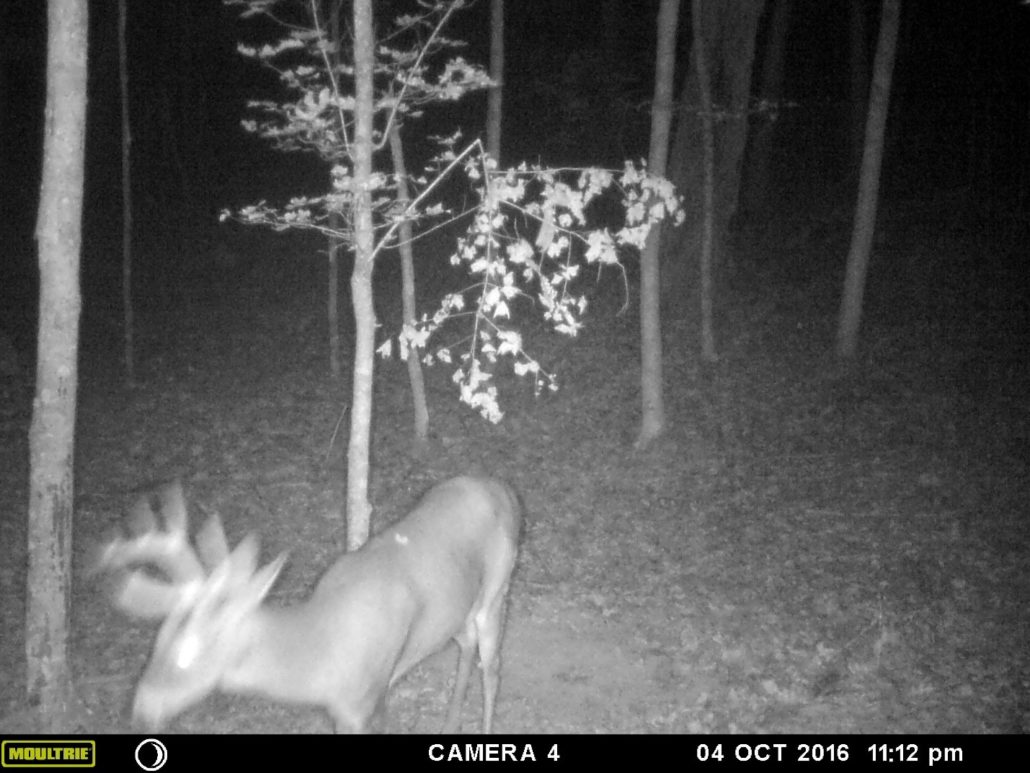
Movement
Why? –This one is pretty self-explanatory…movement causes blurry images. Blurry Images cause inaccuracy in the BuckScore® program.Even a slightly blurry picture due to movement can throw off circumference measurements and reference point measurements by an inch or more. A camera with a higher trigger speed and the ability to freeze images with a quick shutter speed is needed to capture moving deer. Higher price range cameras do a fantastic job of freezing images.
Photo: The buck in this image is not only moving, but his head is also at an angle that could significantly alter the accuracy of the score.
Solution– Try a camera with a faster motion freeze/trigger speed. If your camera is on a run, try stopping them with a point of interest, bait, scrape, or deer scent. Essentially something to stop them in their tracks!
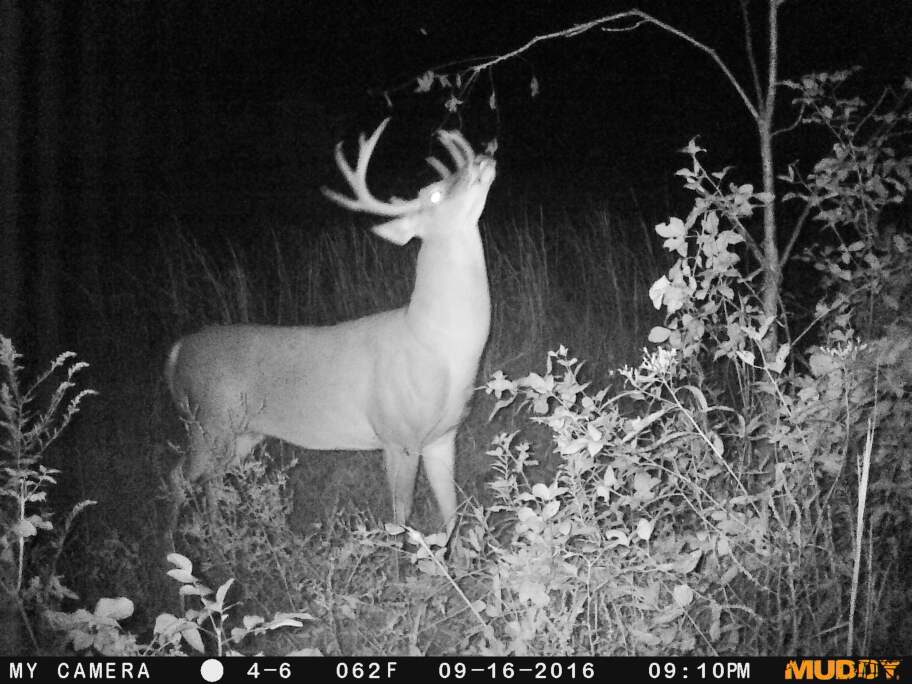
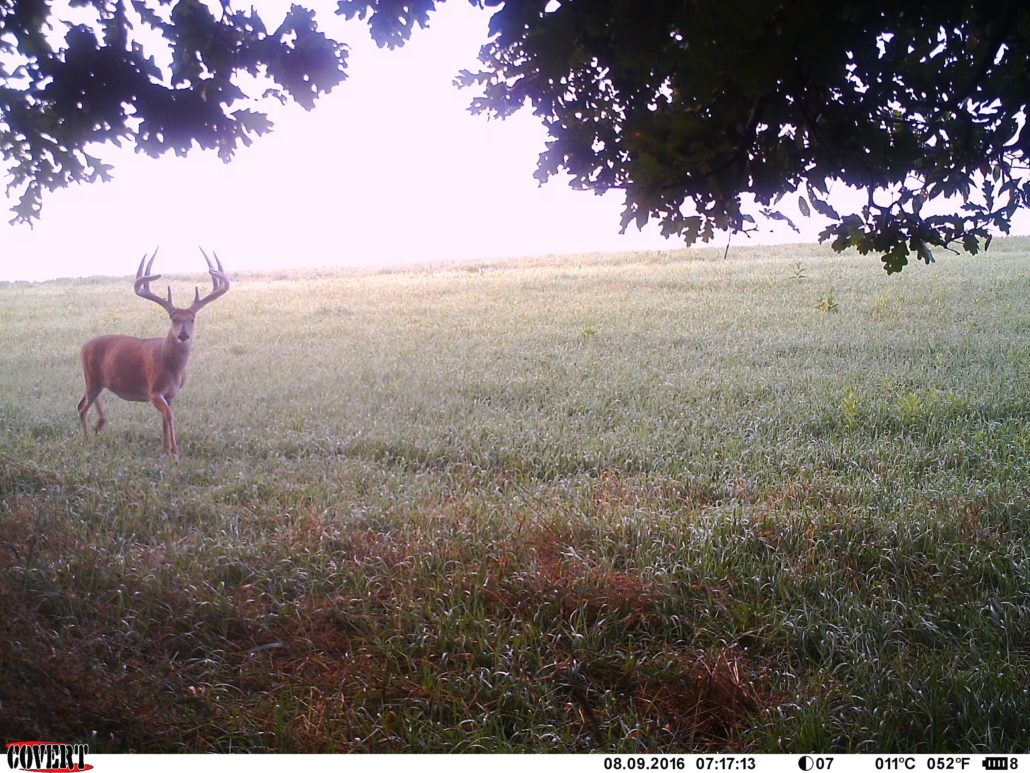
Angles
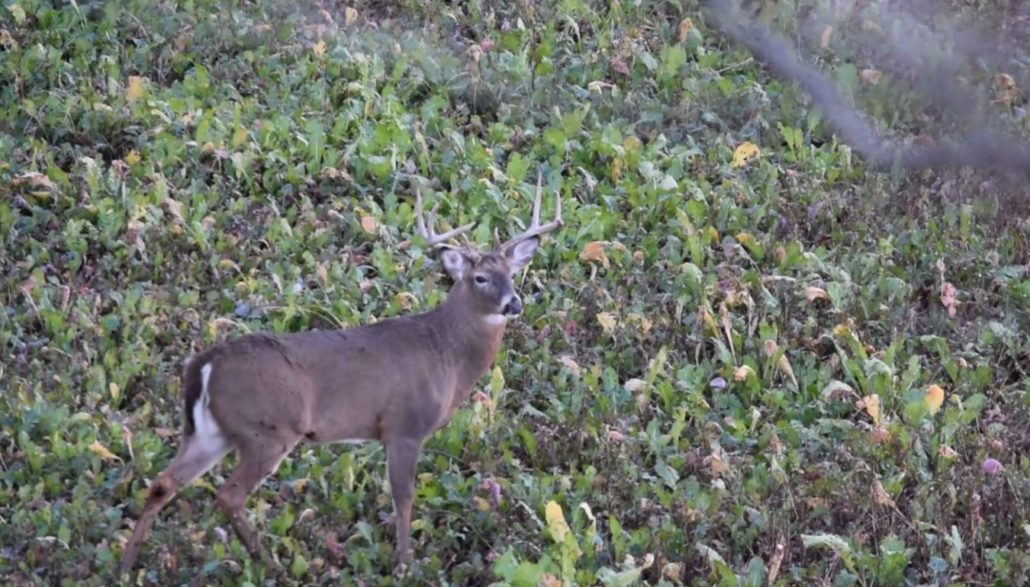
Why? – BuckScore® can accurately score images of deer at the 0°, 22° , 45°, 66°, and 90° angles. Essentially if the buck’s head is level and facing towards the camera the picture can be scored. Angles refer to not only deer facing away from the camera, but also the head being tilted forward, backward, or another variation that could cause variation in measurements. This means that bucks in the back of truck beds, lying flat on the ground, or pictures of bucks eating from bait piles cannot be scored.
Photo: In this picture, the buck is turned away from the camera. This can drastically overestimate the size of the rack and as a result, the BuckScore® results.
Solution–Making sure the trail camera is level is one easy way to make sure the deer’s head and the image is level. Of course, you can’t always get a buck to hold his head level, especially during the rut and images over bait. Having a higher burst photo mode or a video mode can allow you to make sure you drastically improve your odds of getting a shot of the buck’s head level and at the correct angles.
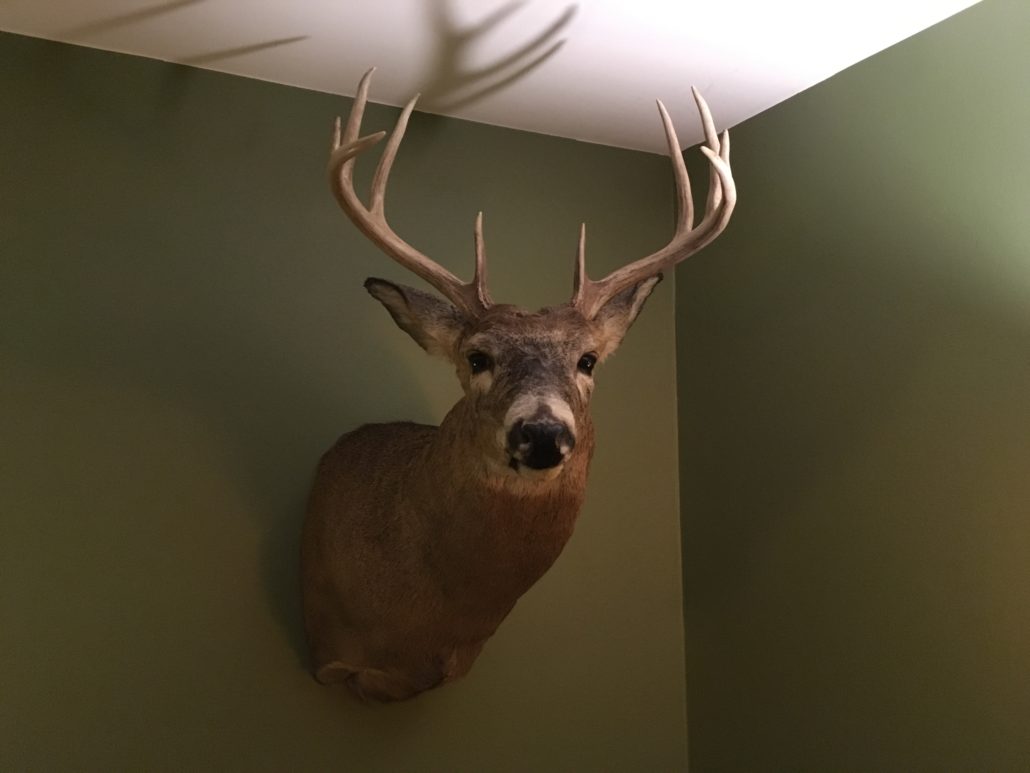
Mounted Deer
Why?– Mounted deer give you the ability to take the perfect picture for scoring deer with BuckScore®. However, the mounting process might throw off the reference measurements. While the score of the antlers remain the same, the reference features (ear, eye, and eye-to-eye) could all be anatomically incorrect. This will throw off the BuckScore® results.
Solution – Take a picture of the harvest according to the BuckScore® harvest photo guidelines. This will allow you to score a picture of a harvested deer.
5 Examples of Pictures That can be Scored
Of course, most photos can be scored by BuckScore®. These include pictures of harvested bucks or hero pictures. Take a look at some of the example pictures below. If you still have questions about scoring deer with BuckScore® contact us here.
Photo: With good camera quality, even deer far away from the camera can be scored.
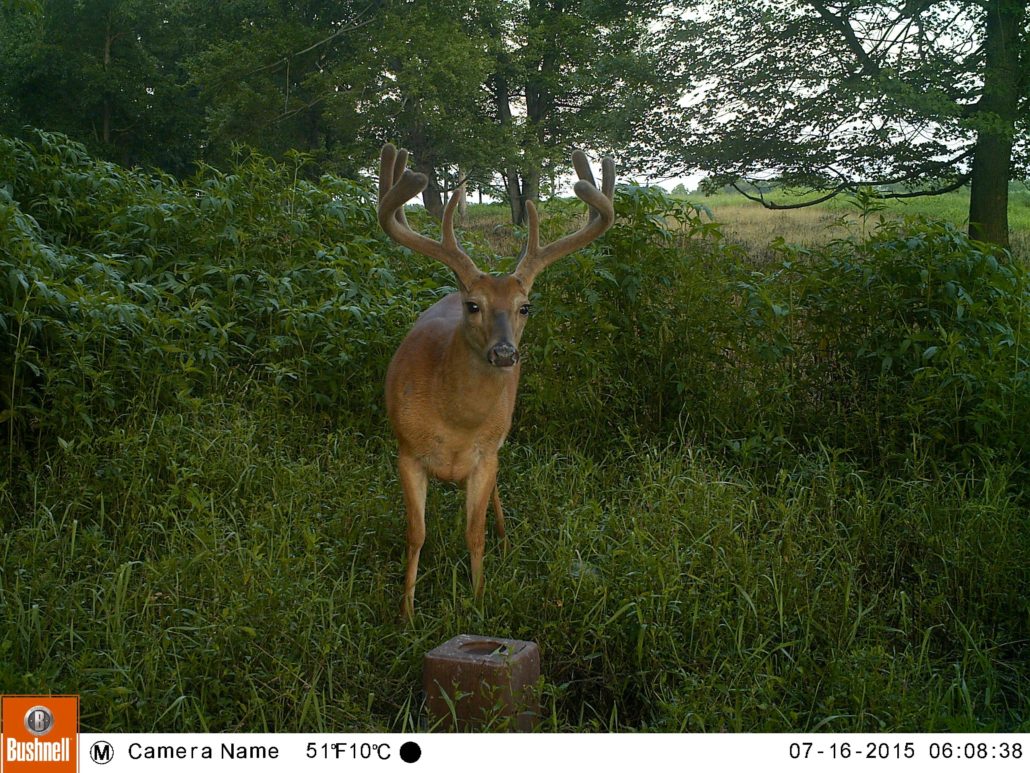
Photo: BuckScore® can adjust for velvet pictures. Just simply check the box that asks if the buck is in velvet.
Photo: If you film your hunts or have a great camera in the stand with you, you can take photos or screenshots of bucks encountered in the field. Video is the best option, so you can go back and screenshot when the buck turns his head to an appropriate angle for scoring.
Photo: A higher grade camera allows you to get a great night time photo. With high trigger speed, shutter, and great quality you are able to capture the buck without movement and an overestimated eye glare.
Photo: Taking a picture of a harvested deer can allow you to score the buck within minutes, without breaking out the tape!
Curious about how to take a picture of a harvested deer to score on BuckScore®? Check it out below!
https://www.buckscore.com/wp-content/uploads/2017/12/feature-1.jpg14582560BuckScorehttps://www.buckscore.com/wp-content/uploads/2024/09/buckscore-logo.pngBuckScore2017-12-07 16:52:082019-08-28 12:20:15Images That Don’t Work When Scoring Deer with BuckScore®
Scoring Deer with BuckScore® | How to Take Photos of Harvested Bucks
By: Jeremy Flinn, Co-Founder of BuckScore®
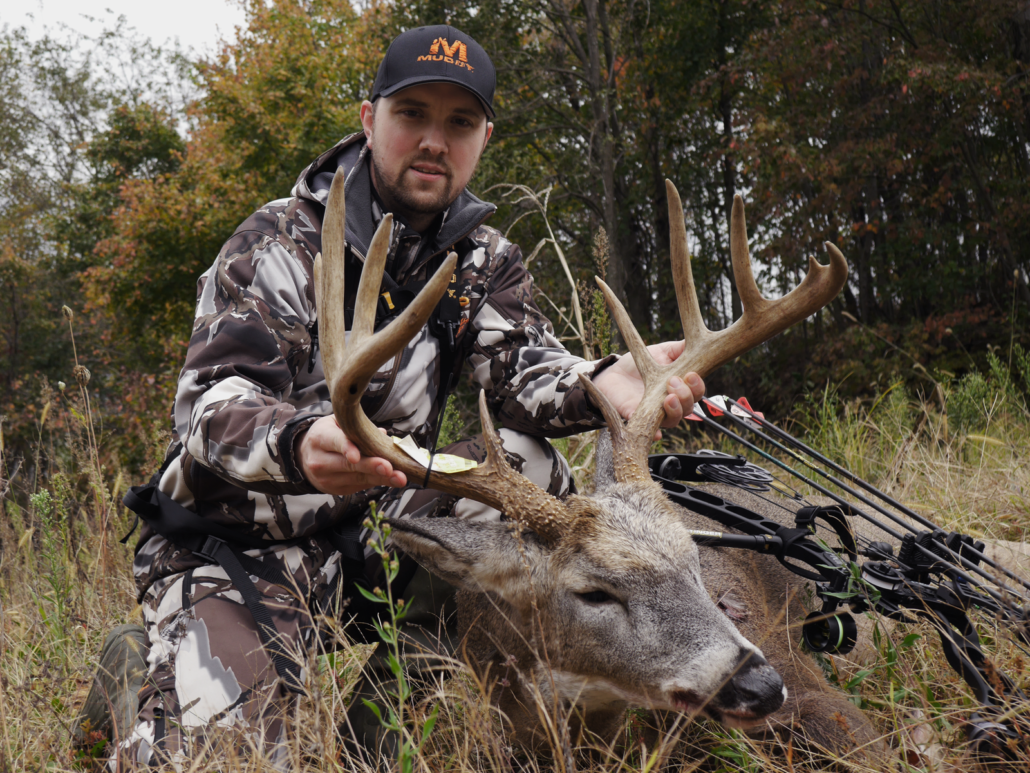
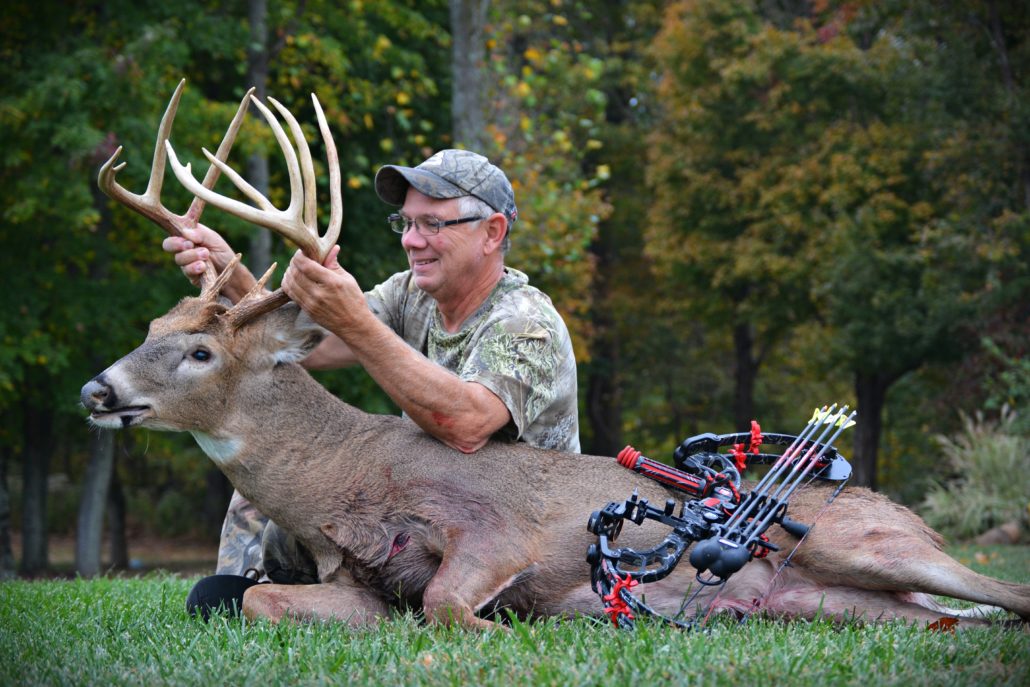
A lot of people will be looking to score a buck this year with the BuckScore® program. While most of these will be with trail camera pictures, some lucky individuals will be scoring harvest photos! I was fortunate enough to harvest this really great Pennsylvania buck in the video below. Of course, one of the first things a hunter is going to do after recovering a buck is take hero shots. One big consideration I urge you to make this year is to ensure you are taking hero shots that will work great for scoring the buck with the BuckScore® program. Of course not all hero shots will be scored, but if you want the most accurate score possible based off of a picture, make sure to follow the guidelines below.
The Right Angle
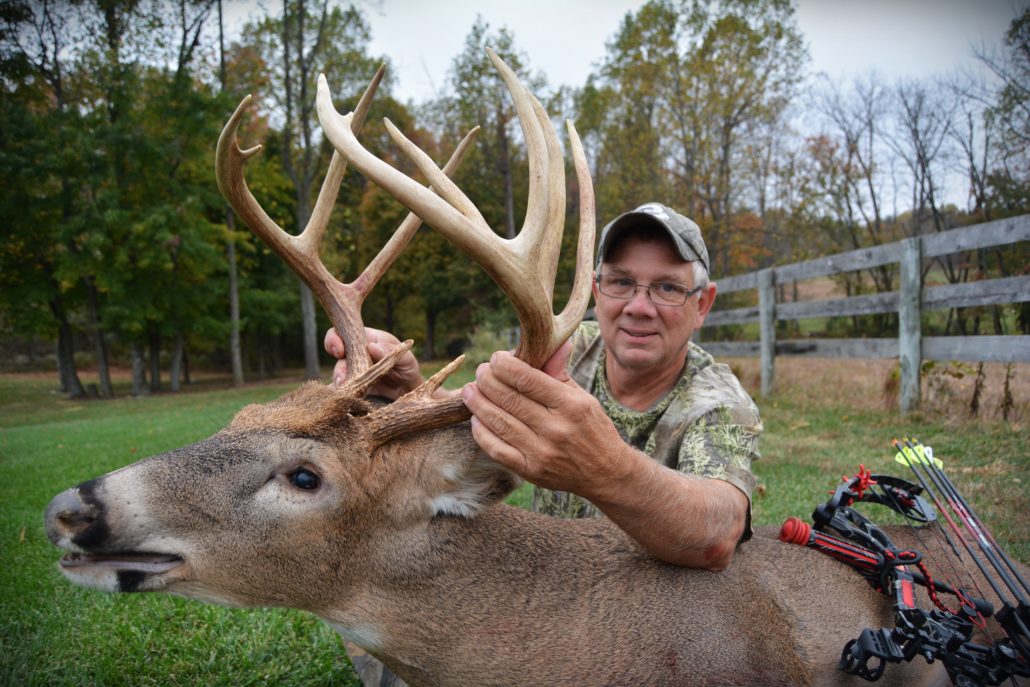
First off, you want to make sure you are taking pictures at the correct angle. You want to take your hero shots with the buck’s head at a 0, 45, and 90-degree angle to the camera. An image of the buck at 45 degrees will yield the most accurate score as the reference points and the majority of the buck’s rack are clearly visible.
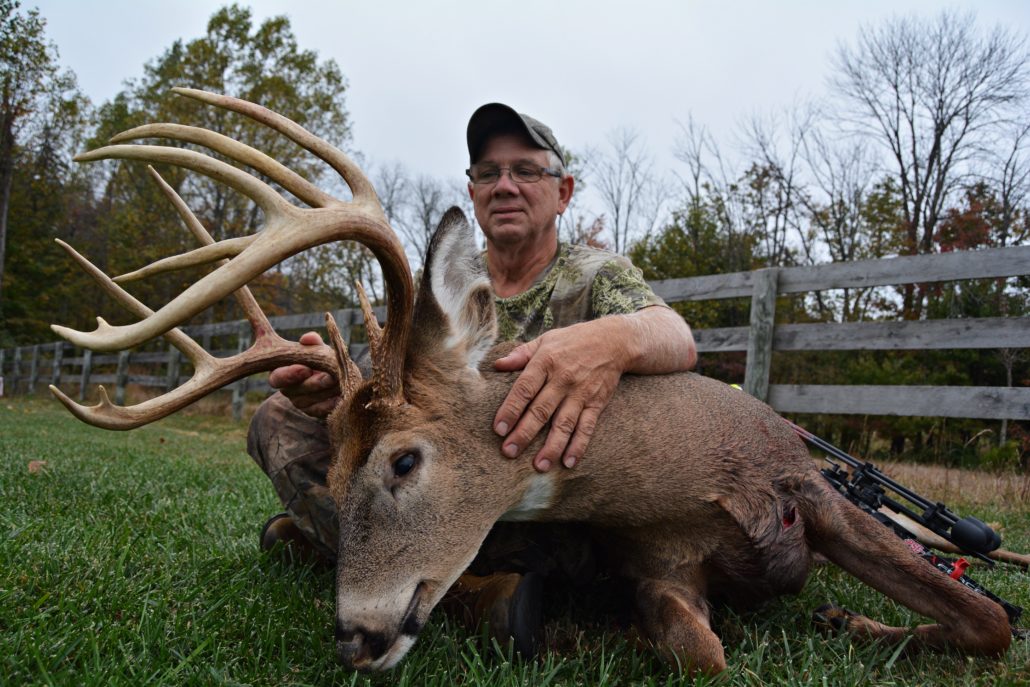
Reference Points
As you are taking pictures, remember to make sure the reference measurement features are clear. Make sure the buck’s ear is up and facing straight toward the camera. This is something that you will have to pay attention to as the ears will most likely be down or tucked behind your hand. Below are the different reference features you can use to score your buck with the BuckScore® program. Keep in mind that the ear width measurement is the most accurate, followed by eyeball width, and then eye to eye width.
Features for reference measurements:
Ear
Eye
Eye to eye
Take a Level Photo
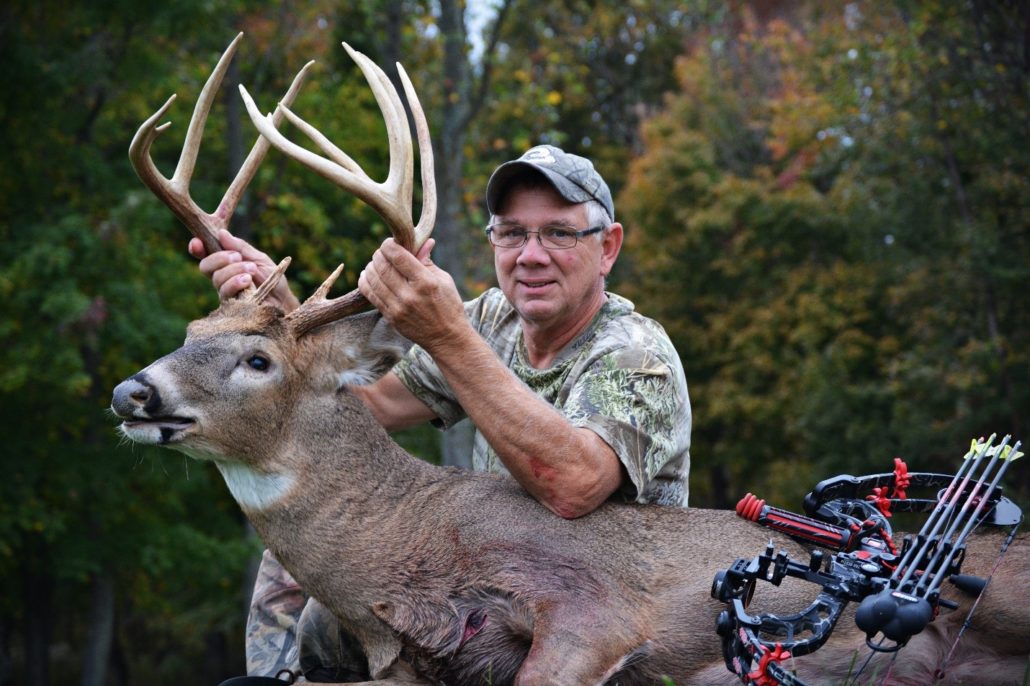
One last thing you will want to pay attention to when you are taking hero pictures is whether or not the buck’s head is level. In order to get the most accurate score of your buck, you will want to make sure the buck’s head is not tilted forward or backward.
If you snap a photo that meets the above criteria, you should be able to perfectly score your buck using the BuckScore® program!
Interested in taking better trophy buck pictures? Want to know how to take high-quality and stunning pictures of your harvested buck like the pro’s? Check out the blog below!
https://www.buckscore.com/wp-content/uploads/2017/12/trophy-buck-feild-scoring101-scaled.jpg13452560Jeff Breedenhttps://www.buckscore.com/wp-content/uploads/2024/09/buckscore-logo.pngJeff Breeden2017-12-01 13:57:432018-09-17 17:19:02How to Take The Best Harvest Photos for Scoring Your Buck!
BuckScore® Mobile now allows you to score deer with your phone! This now allows in the moment scoring! Within minutes of snapping a picture, you can have a score of the deer before he even offers you a shot opportunity! Before this technology, it was only possible to estimate a buck’s score from knowing how to field score a deer. An extremely loose fitting solution for estimating what a buck scores during an encounter or from a trail camera picture. Now, with BuckScore®, you can score a picture of a buck from a trail camera, taken from your cell phone during an encounter, or a picture of your harvested buck!
Don’t believe us…check out the video below!
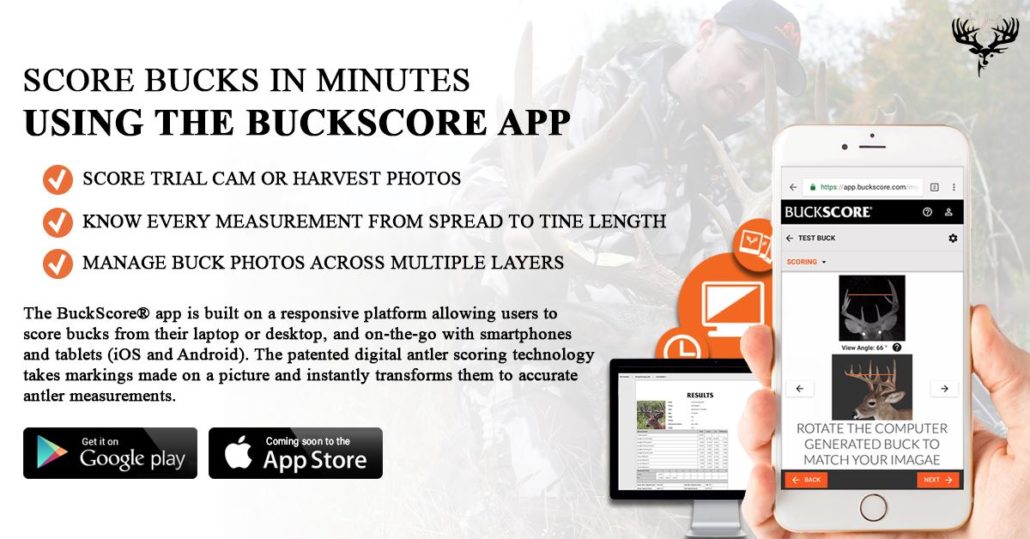
How Does It Work?
Holding two U.S. issued patents, BuckScore® is the only science-proven program that allows you to score pictures of bucks in minutes. The app accurately estimates antler size including spread, beam length, tine length, and circumference all to calculate a Net and Gross score within 3% of the actual score. It does this by having the user set a reference point of known lengths such as the eye to eye reference point, ear reference point, or the eye width reference point. The user then simply manually enters points for the requested measurements and within minutes receives an accurate estimate of the buck’s score.
https://www.buckscore.com/wp-content/uploads/2017/11/trophy-buck-feild-Mobile-Feature-scaled.jpg13452560BuckScorehttps://www.buckscore.com/wp-content/uploads/2024/09/buckscore-logo.pngBuckScore2017-11-22 16:00:012018-09-17 17:30:51BuckScore® Mobile | Score a Buck In Minutes!
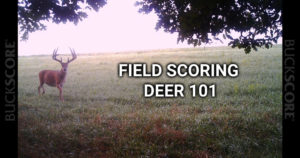
Scoring a Deer | How to Field Score a Whitetail Buck
While some whitetails are clearly “shooters”, as a hunter, you might often find yourself encountering a buck that is on the border of “shoot” or “don’t shoot”. Today’s advancements in trail cameras have tremendously cut back on the guesswork and these questionable encounters. It is not often that you come across a buck of significant caliber without at least having a couple of pictures of him. The addition of recent advancements in deer scoring technology now make it possible to know the exact score of the deer based off of these trail camera photos. However, there is always the possibility of the unknown. The rut, for example, is when hunters are still forced to test their skill at field scoring a whitetail. While it is not used often, the ability to field score deer is still a very important tool to have. The article below will walk you through how to quickly and effectively field score a buck. After you read through the blog, test yourself with the BuckScore® Field Scoring Quiz. The participation in the quiz will also reward you with a 50% off a subscription to the BuckScore® app. The quiz is located at the bottom of this article.
Field Scoring a Whitetail Buck
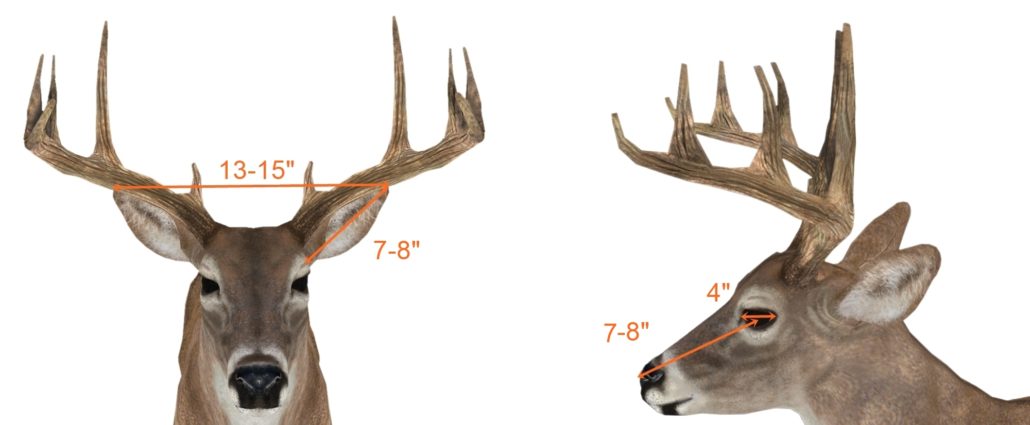
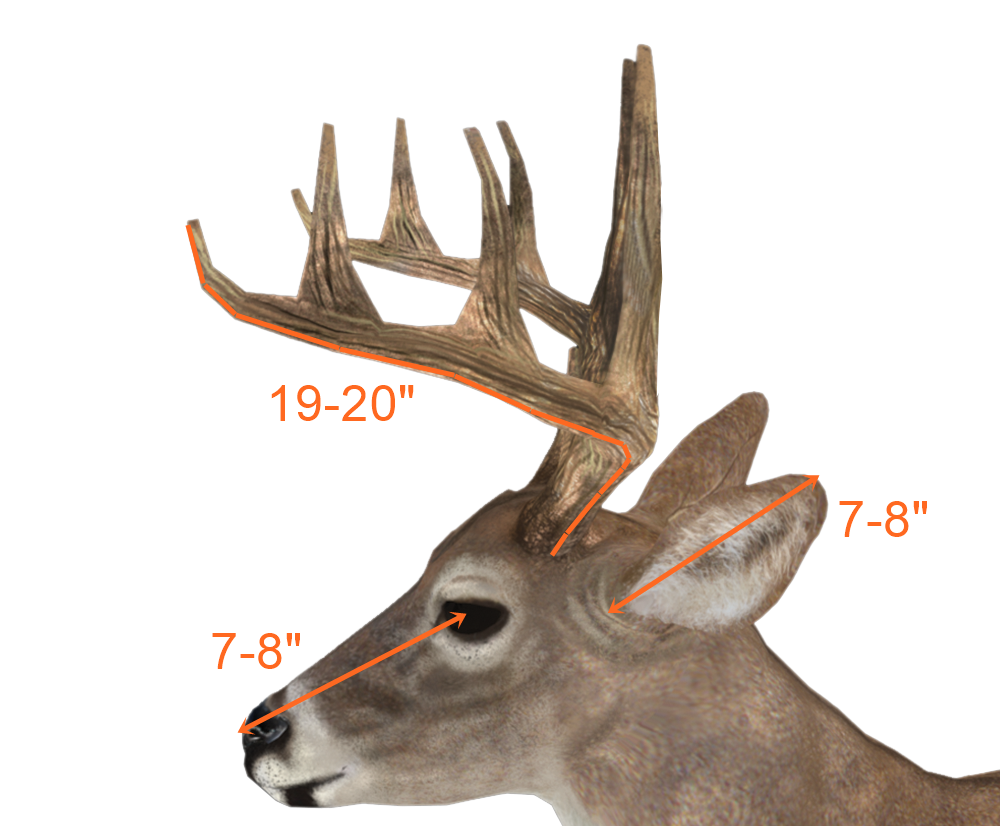
Follow along with each tip in order to find out how to properly field score a whitetail! The first step in this process is establishing your reference points. When field scoring deer, your best reference point to get an idea of the frame size will be the buck’s ears, eyes, and nose. While regionally speaking these measurements and reference points can be off, a general idea or average between regions should be used. The average measurements of how many inches each reference feature is will help you get a very accurate estimate of the buck’s score. The reference points include:
Ear Tip to Ear Tip – Ear tip to ear tip is a very important reference point in determining the buck’s spread. A frontal view is needed to get the best estimate, but generally, a buck’s ear tip to ear tip measurement will be 13-15 inches.
Ear Base to Tip – The ear base to tip measurement is important when figuring not only the size of the tines but the length of the main beam. Generally, a buck’s ears from base to tip will be 7-8 inches.
Eye Circumference – The circumference of a buck’s eye is a good reference point in roughly calculating your four antler circumference measurements. For this reference point, a buck’s eye is around 4 inches in circumference.
Eye to Tip of Nose – The center of the buck’s eye, to the tip of his nose is a good reference measurement when estimating main beam length. This measurement is around 7-8 inches.
After you have referenced your initial measurements you will be ready to start field scoring the buck. Take a look at the picture above to memorize the reference points. You will need them in the steps below. The first step will be estimating the buck’s spread.
The Field Scoring Shortcut
Note that the example pictures and steps below are walking you through scoring first the inside spread, but also just one side of the buck’s antlers. If the buck is relatively symmetrical, you will simply be able to score one antler and multiply it by two. By taking this shortcut and adding the measurement of the spread credit, you will arrive at a rough estimate of the buck’s score.
(Score of antler 1 X 2(if antlers are symmetrical)) + (spread) = Score of buck
Estimating Spread
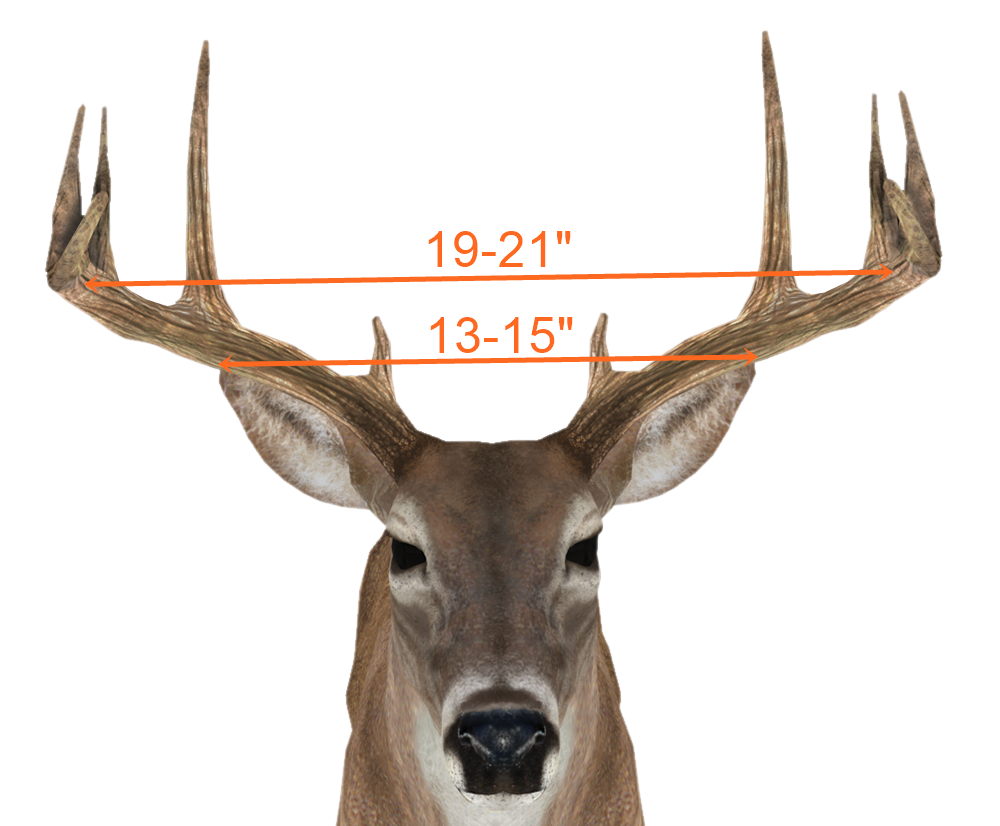
Estimating a buck’s spread credit is relatively one of the easiest scores to estimate while field scoring a buck. By using the Ear tip-to-tip reference measurement of 13-15 inches, you can quickly gather if a buck’s spread is an inch or two inside or wider than his ears. For bucks that have a spread that far exceeds his ears, simply reference the ear base to tip measurement of 7-8 inches. The picture below shows the example buck exceeding the tip to tip measurement, therefore by estimating how many inches wider the antler extends beyond we can roughly estimate the buck’s spread to be around 19 – 21 inches.
Main Beam length
Beam length is easiest to estimate from the side angle or 90 degrees. This allows you to reference the measurements of the ear (7-8”) and eye to nose tip (7-8”). Simply applying those measurements and subtracting or adding inches to how short or long the main beam is, can be the easiest way to estimate the beam lengths. In the case of this buck, the main beam is significantly longer than the ear and eye to nose tip measurements combined. Combined the reference points equal 14-16 inches, so this deer can easily be estimated to have a 19-20 inch main beam measurement.
Note: Be aware that significant “upturned” main beams or, for instance, when the main beam sweeps in and is close to touching tips with the other main beam, will potentially skew your estimates. In an ideal encounter with a buck, you would receive frontal and side views, allowing you to judge, in inches, how much the main beam may be skewed from the side view.
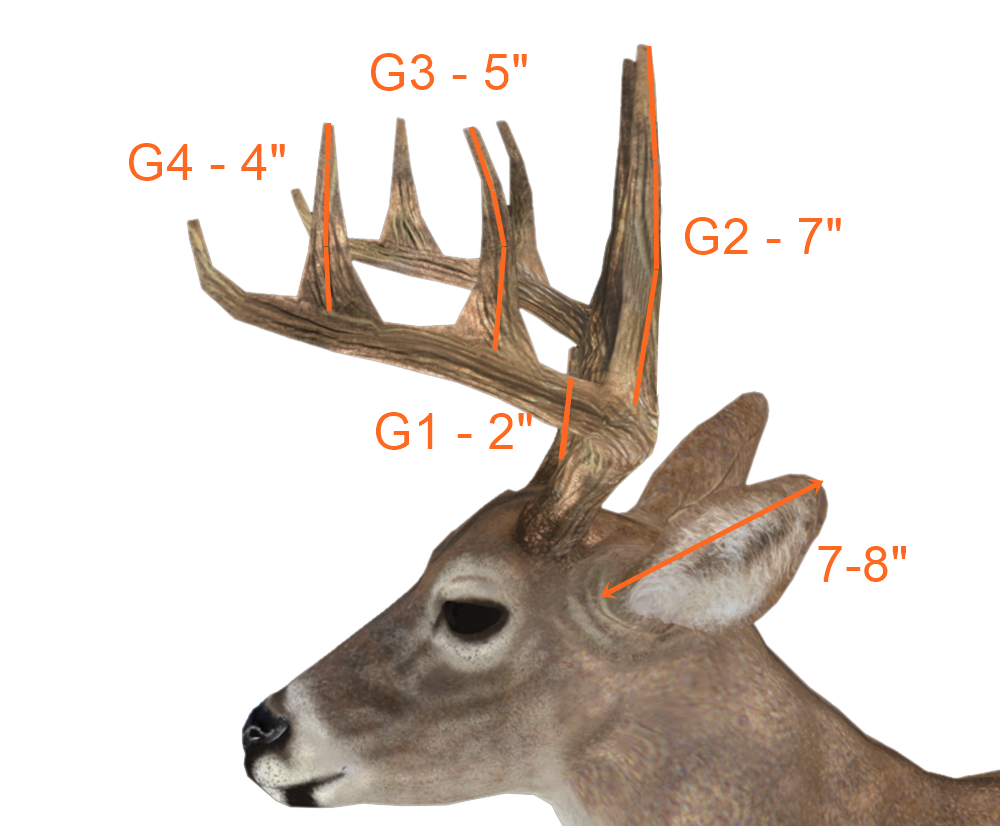
Tine Lengths
Tine lengths, while they may seem easy, are actually quite difficult to estimate. They are the furthest from the reference points but also can be subject skewed estimations based on view angles, or when additional points on the tine are present. Remember that for a point to count towards the whitetail’s score the tine must be at least one inch. The easiest point to reference tine length is the ear base to tip measurement. By estimating how much longer or shorter each tine length is (G1, G2, G3, G4, etc.) than the ear measurement of 7-8 inches, you can quickly gather a rough sum of the tine measurements. This buck’s tines can roughly be summed to roughly 18 inches.
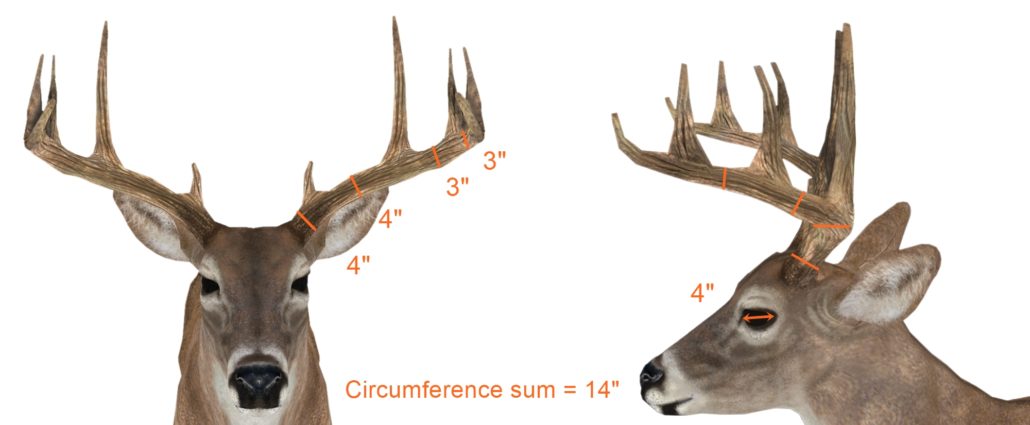
Estimating Mass
Without the reference measurement of the circumference of the buck’s eye at 4 inches, judging the four antler circumference measurements would be difficult. All bucks, regardless of how many tines they have always will be measured with four circumference measurements. Four pointers, six pointers, or even spikes will all need four evenly distributed measurements of antler circumference. The circumference measurements are measured between:
Halfway between the base and the G1
Halfway between the G1 and the G2
Halfway between the G2 and the G3
Halfway between the G3 and the G4
To estimate the buck’s circumference measurements simply judge how much smaller or bigger the antler’s circumference is from your reference point of the buck’s eye. If the antler looks roughly ¾ of the eye circumference it is most likely in the 3-inch range. If it is roughly 1.5X the circumference you will ballpark the circumference measurements in the 5.5-6 inch range. The example buck can be judged at essentially the same mass for the first two measurements between the base and G1, and the G1 and G2. These measurements would be somewhere in the ballpark of 3.5-4 inches. The third and fourth circumference measurements are around ¾ the size of the eye so can be estimated to be around 3 inches. The sum of the example buck’s circumference measurements is 14 inches.
Adding the Measurements
After you estimate each of the antler measurements for one side of the buck’s antlers, you are ready to either score the other side or you can take a shortcut. If time allows (it often does not) and if the buck is generally symmetrical, you can simply multiply the sum of the antler measurement by two. For this buck, a very symmetrical buck, we can total the antler measurements to be roughly 51-52 inches. By multiplying 51-52 inches by two, taking the shortcut in estimating the score of the other antler, we can arrive that this buck’s antlers are around 102-104 inches.
We then add the 19-21 inch spread credit of the buck to come to a rough estimate that this buck’s score is 121- 124 inches. This put’s the buck into the 120-inch class, but more specifically the 120-125 range.
Is That Estimate Correct?
You do not get the luxury of confirming your estimations in the field while hunting. However, you can do two things to greatly improve your odds at estimating the buck’s score correctly. You can practice field scoring pictures or videos of known bucks, or you can get ahold of the BuckScore® program. The BuckScore® program allows you to score a buck’s antlers based on any picture. This picture can be a trail camera picture, a harvest picture, or even a freeze-frame of a video if you happen to film your hunts! We scored this buck using the BuckScore® program. The results are posted below. The example buck’s antlers grossed at 121.988 or simplified to 122 inches.
Are You Ready to Field Score a Buck?
Test your ability at field scoring whitetails by taking the BuckScore® field scoring quiz. You will watch a quick video encounter with a buck and be given 4 multiple choice options of scores. There are 10 bucks to score with a time limit of 10 minutes for the entire quiz. This allows you 1 minute to score each buck, about all the time you might receive in a real hunting scenario. Once you have completed the quiz, you will to receive the actual BuckScore® certified score of the bucks, your quiz results, and a 50% off code on your first month of your BuckScore® subscription!
Still Not Confident Field Scoring Deer? Go Mobile!
BuckScore® Mobile, now allows you to score deer with your phone! This now allows real encounter scoring. Within minutes of snapping the picture, you can have a score of the deer before he even offers you a shot opportunity!
Photography Tips for Taking the Perfect Trophy Buck Pictures!
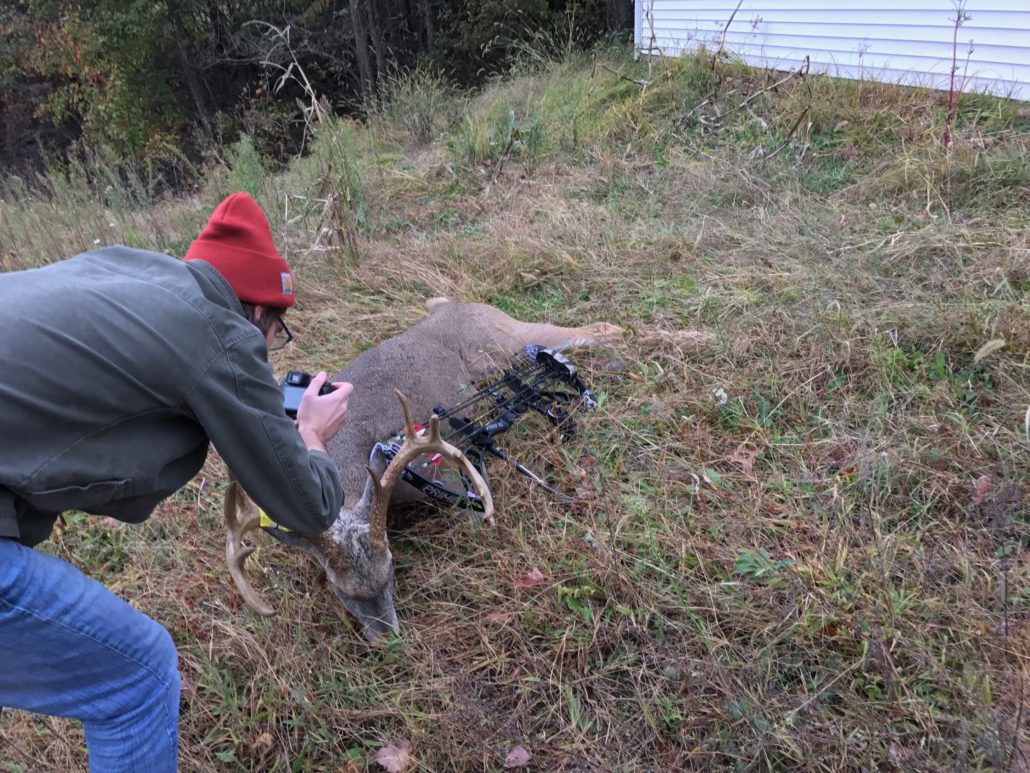
Congratulations, you’ve just harvested a true trophy! Now comes the fun part, making that memory last! Taking a quality photo with your harvested buck can be one of the most important things you do after the hunt. In today’s world, the picture you take is how you will announce your success to the world. Besides social media, these pictures will also be placed on your computer and cell phone background, framed in your house, and will probably go up on some local bragging boards! These photography tips will ensure you take images that are close to flawless, creating a high-quality trophy buck pictures that will last you a lifetime!
How to Take Great Trophy Buck Pictures!
Hopefully, you are reading these tips on taking a great hero or harvest photo before you actually wrap your tag around a buck. If not then go ahead and get moving on the first few tips! First, before you head out into the field you will need a few things!
List of items to take when taking hero pictures:
A “talented” person behind the camera
A high-quality camera (if available)
Multiple lenses
Wet wipes
White lights or a lot of headlamps (if night)
The Camera
Everyone has a phone, so that satisfies the basic need for a camera. Today’s phones actually take remarkable photos and taking pictures with a phone is relatively simple. However, if you are wishing to take a stunning picture that can be blown up on canvas or in a big frame, then you will want to snag a better camera. If you have a digital camera, or a DSLR for family pictures, go ahead and grab that with any lenses that you have for it. If you don’t have a nice DSLR or another camera, go ahead and scroll through your contact list to see if anyone you know has one. Chances are between family, friends, or any parents with kids in sports, you will find a great camera without much work.
If you are considering buying a camera, a basic entry-level DSLR ($300-$1,000) is a good camera for hero shots like this. These cameras can also be used to film your own hunts if you are into that sort of thing!
The “Talent”
Besides the camera, the photographer is the next vital aspect of taking great buck pictures. You do not want to select someone that lacks creativity or that might get frustrated when you ask for multiple angles and shots. It also helps if they have experience taking photos at the amateur level at least.
When a trophy buck hits the ground, it always seems to be one of the worst times for anyone to come and help drag and/or take pictures. If you do not have anyone to take pictures, then its time to use the time delay feature! Most cameras including most DSLRs and cell phones have a default timer If you happen to get someone out there who doesn’t have any experience taking photos, go ahead and run them through a couple of the key tips below. A quick read could make a drastic difference in the quality of your trophy buck pictures.
Trophy Buck Photography Tips
Buck check, camera check, photographer check…you are now ready to read through the tips below and start taking pictures!
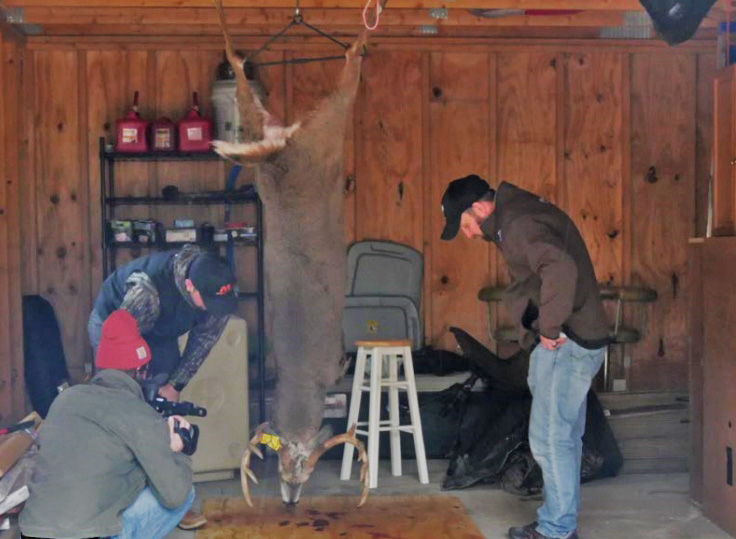
Rigor Mortis
One of the first tips you will need to deal with right after the kill is rigor mortis. Depending on when you recovered your deer and the time of day, your best pictures will be taken while the buck is still fresh and not stiff. The ability to move the head at different angle drastically helps retain the “natural” look. If worse comes to worse, and you need to wait until the following morning to take pictures, make sure you set the buck up in a proper position for pictures. If you hang your buck he will have his neck fully extended and legs straight out the next morning. The pictures will not look natural.
The ideal setup for the buck is the front legs tucked under the chest. This not only props the buck up like he is naturally laying down but also presents a full chest. Finally, make sure the head is propped up and is turned to one direction. Typically you will turn the buck’s head to the side you shot him on in case the exit from the bullet or arrow is a bit gory. On big bucks, this also shows the neck folds and the true weight/size of the bruiser. If you are setting the buck up and not hanging him, be sure you set him in a place that dogs or coyotes cannot reach him.
Timing is Everything
If at all possible avoid night pictures. Take a couple of photos that night, prop the buck up using the guidelines above, and wait until the early morning hours to start taking your real hero pictures. Typically the early morning or late afternoon offers the best lighting for taking pictures unless it is an overcast day. Direct sunlight is very harsh while taking pictures and also creates shadows across the buck, the background, and even the hunter’s face. Typically, late afternoon offers great picture taking. Not only do you get to experience the “golden hour” with dramatic sunsets, but also the low gray light that comes afterward.
The Desired Setting
The location in which you take your hero shot is entirely your decision. Typically the most common places are where the buck is found, where the buck was shot, or a key area that played a significant role in the hunt. These areas are often food plots, crop fields, pastures, oak flats, waterholes, or by a stream, river, or creek. On the other hand, you might have that historically great spot for pictures. This could be in front of a notable object on the property, an old barn, on the highest hill, or in the biggest field in the area.
Typically, you will want an area that offers plenty of distance behind where you and the buck are sitting. A distant background that is dark will offer a high contrast to the buck’s antlers. It also allows for plenty of blur in the picture behind you and the buck. Hills or even the slightest bit of topography can help provide great backgrounds, angles, or even sky lighting the buck’s antlers on a blue sky.
The Immediate Area and Items
One disaster that could result from these pictures could be a total embarrassment. Taking a picture that is too gory, has a funny item, too much brush, or is unsafe (gun pointed straight at your head) can and will be called out. This is where the wet wipes come in. Be sure to clean up any bloody noses, blood on the antlers, or any mess that you might have made while field dressing the buck.
After you choose a location, make sure you clear out the area of any grass, sticks, branches, or objects that could interrupt the picture. After clearing, take a moment to think about what items or object you might want in the photo. Don’t go crazy with the product shots! However, your bow or gun is always acceptable. Also, make sure you are wearing the gear you hunted in. This includes any hunter orange or legal items that should be in the photo. Make sure if it is firearms season that you and anyone you are with continuously wear orange throughout the photo shoot.
Why So Serious?
Smile for heaven’s sake! You just harvested a trophy, something that probably took hours, days, weeks, and months out of your life to complete. A couple of serious pictures are acceptable, but this is a happy time! Be sure to get anyone involved in the hunt in the picture including cameramen or women, property owners, or family members. The family is always nice to have in your buck pictures as you will probably make it your profile picture or background. This way you get your trophy buck, and the people you love most in the same photo!
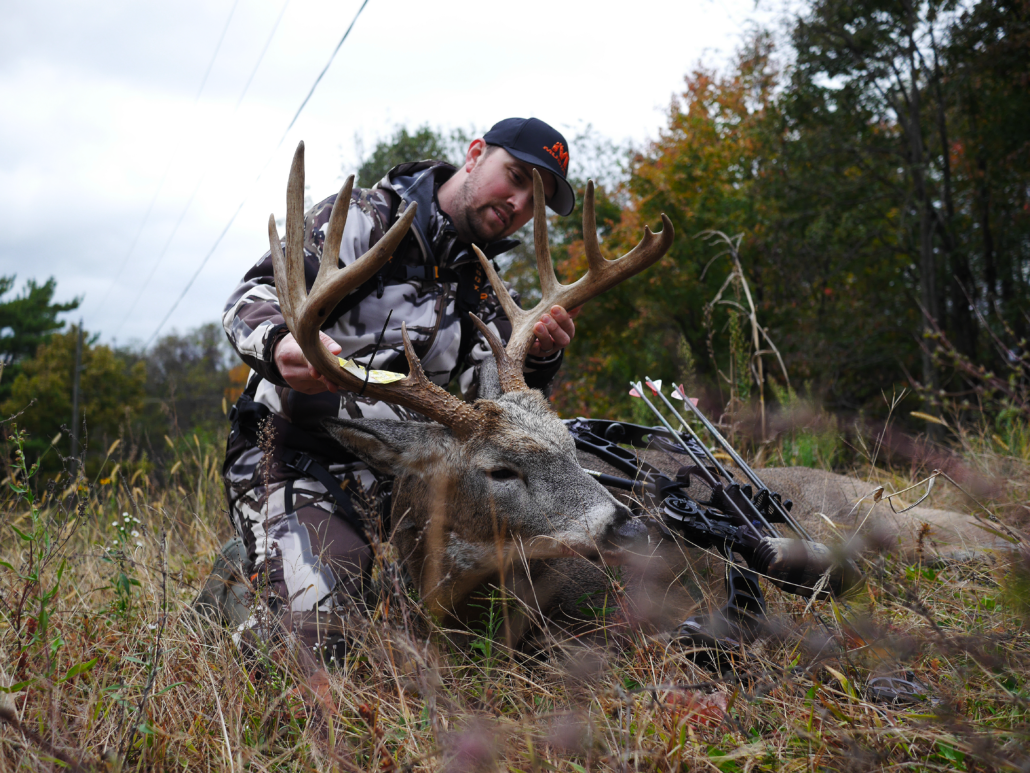
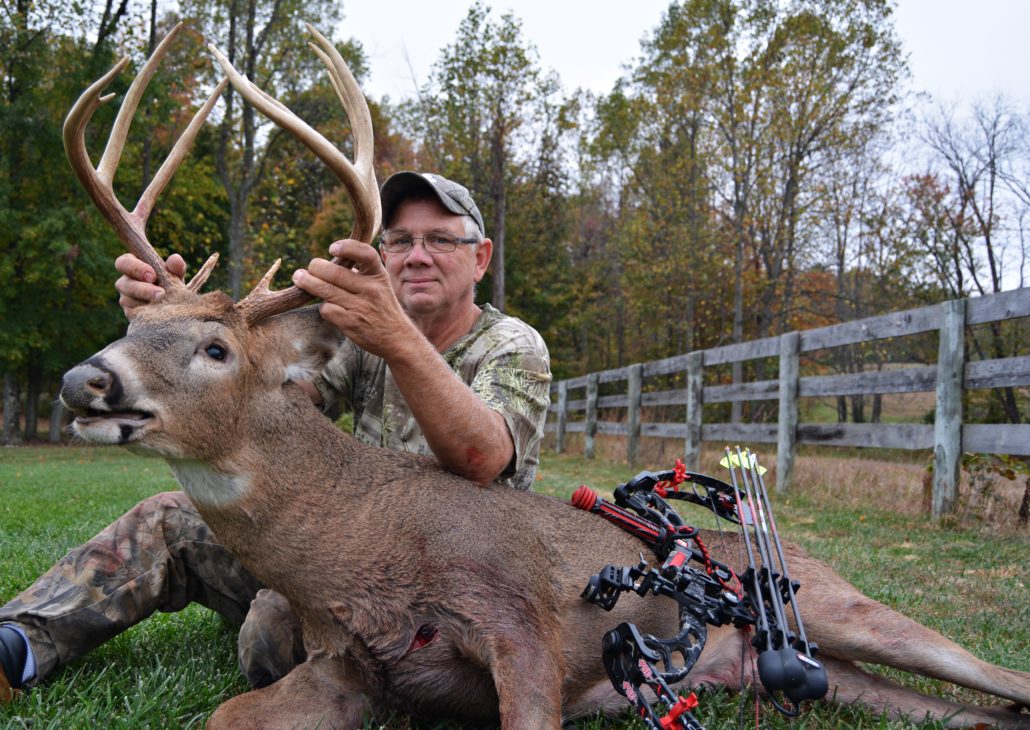
Framing and Positioning
Making sure the pictures are correctly framed is vital. Making sure there is enough margin between the edge of the photo and the buck is critical to creating a frame worthy picture. Of course, there are angles and pictures where the frame will be off on purpose. However, in nearly all the photos you will want correct portions of in-focus subjects ( you and the buck ) and the background ( the fence, trees, field in the picture below).
In the frame, the most common positioning you will see is the buck positioned with the hunter directly behind the buck. It is important that the hunter is sitting so the true size of the buck is proportional to the hunter. Don’t go crazy overboard with sitting dramatically behind the buck. This over-exaggeration is something you will see way too often in the hunting and fishing industry!
Hands
It is important to keep as much of your hand off the deer as possible. Some brutes are hard to hold up! Using a stick or pack to keep the deer’s head elevated could be useful so you are able to only place a couple of fingers on the far antler of the buck. The most impressive feature of the buck is his antlers…don’t cover them up!
Focus, Focal Length, Aperture, and Exposure
Aperture – the variable opening by which light enters a camera.
Focal length – distance between the center of a lens and its focus.
Exposure – the amount of light reaching the camera sensor.
While these terms may seem a little advanced, they are really quite simple. Most of the time, the auto function of your camera or cell phone will be more than adequate to snap a great picture of your buck. However, playing with the settings could drastically alter your picture and take it from great to simply amazing! Often, messing with these settings works when taking pictures at several angles. For example, focusing on the deer’s head and antlers at an upward angle could result in a very cool picture of the buck standing alone with the hunter in the background.
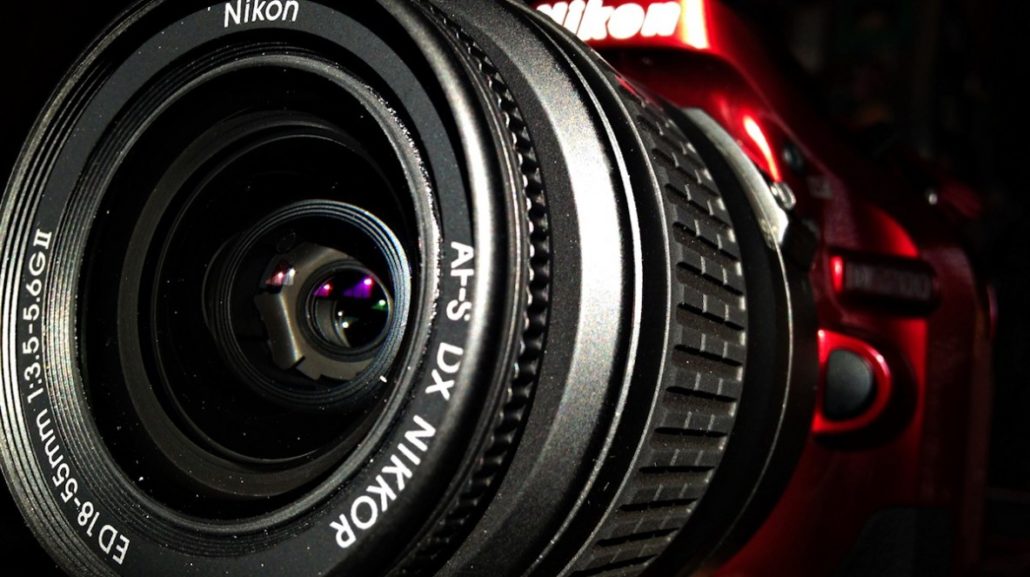
The biggest change in quality you will experience will be from utilizing different lenses and aperture settings. This will require a DSLR like a basic level Canon or Nikon. The basic level cameras normally come in packages with two different manufacturer’s lenses. Often the lenses are an 18-55mm and a 55-200mm both with an f-stop of around 5.6. Pictures with the 18mm will be close, personal, and wide angle shots.
(Picture) – This picture was taken at 18mm focal length f/5.6.
Pictures with the longer lens, 55-200mm, will result in a lot more constricted photo in regards to the background, but you are able to get a nice blurry background with an entry level lens.
(Picture) – This picture was taken at a focal length of 150mm with f/5.6.
Get crazy with it! This is why having an experienced photographer can result in great pictures. If the talent does not exist, then at least a person with patience and time will be able to snap a couple hundred pictures with different lenses and settings and get a couple just right!
Conclusion
Remember, you will want these pictures for the rest of your life! Take the time to set your location, area, and buck up correctly. Be sure to take your trophy buck pictures by employing multiple angles, with different lenses, and settings. By the time the last picture is taken you should have a quality photo worth sharing and framing!
Intrested in scoring your trophy buck? You can score your buck today in just mintutes using the BuckScore® app. Click below to get started!
https://www.buckscore.com/wp-content/uploads/2017/10/trophy-buck-feature_finals-scaled.jpg13452560Jeff Breedenhttps://www.buckscore.com/wp-content/uploads/2024/09/buckscore-logo.pngJeff Breeden2017-10-31 12:52:082018-09-17 19:31:32How to Properly Capture a Photo of Your Trophy Buck
Trail Camera Setup for Scoring Deer with BuckScore®
By: Weston Schrank
Is there such a thing as a perfect trail camera setup? Every property, every hunter, and every trail camera setup is obviously different, but is there a general guideline that hunters should follow? The simple answer is yes! A perfect trail camera setup would be one that not only gives you exactly what you want in terms of information, but also produces flawless photos and videos. While the perfect trail camera setup might sound too good to be true, or subject to some very opinionated comments, a setup does exist that optimizes the intel received. How? This perfect trail camera setup guideline allows any hunter, anywhere to produce the best trail camera data for identifying and observing bucks.
What is the most valuable information you can receive from a trail camera photo or video?
Is it the time, how many deer, the moon phase, or the weather? While most of those are extremely important, the most valuable thing a trail camera can do is identify an individual buck. A blurry or extremely distant photo of a buck is worthless. Without knowing which buck has been captured, it’s pointless to start correlating the other information (like date, time, weather, etc.). These trail camera tips and setup guidelines will not only allow you to capture more bucks on your trail cameras, but also capture better photos and videos in order to identify and even score individual bucks!
How to Setup a Trail Camera “Correctly”
Now most hunters know how to set up a trail camera. Trail cameras have been around so long that even the most traditional hunters know the ins-and-outs of a game camera. However, with just a tad bit more knowledge, that experience can be turned into expertise. Pay attention to the trail camera tips below, and follow each step of this guideline to setup your trail camera perfectly!
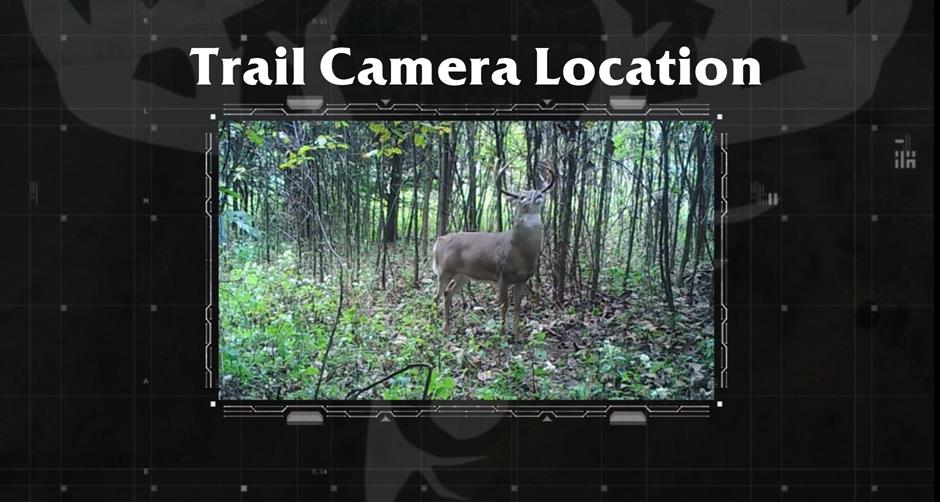
Trail Camera Locations
Don’t worry, I won’t start this trail camera tip off with the old real estate adage “location, location, location”. However, location is very important but it’s not exactly everything. Trail camera location is just the start. I believe that it usually points you in the right direction. Generally, you know the best spots to hang your camera. You may not know the exact tree, but I would presume you know the specific acre or so of ground you would put a camera. Often location is not the hard part, it’s actually the setup and hanging the trail camera that stumps most hunters. Even if you get in within the right acre, the setup direction, height, and distance can be way off from what it actually needs to be at.
For those wishing to dive into a bit more actual “tips” than explanation, my top trail camera locations would revolve around (depending on the time of year):
Runs
Funnels
Food Sources
Oak flats
Mock scrapes
Bait stations/Mineral sites for deer
Waterholes
Trail Camera Site Selection
We can narrow down the guideline of trail camera location further into trail camera site selection. Again the problem with the general term “location” is that within the one-acre area you have identified I might find three different sites I would put a camera. For example, the first site I could hang a camera on would be a run coming from a bedding area, the next would be the edge of a plot, and the third might be a giant community scrape just outside of the plot and the run. Generally, site selection for your camera needs to be decided by the highest probability of capturing bucks. In this example, the time of year would obviously decide where the camera would actually go. If it would happen to be October, I would lean strongly towards the mock scrape as there is a good chance any buck within that acre would scent check that scrape.
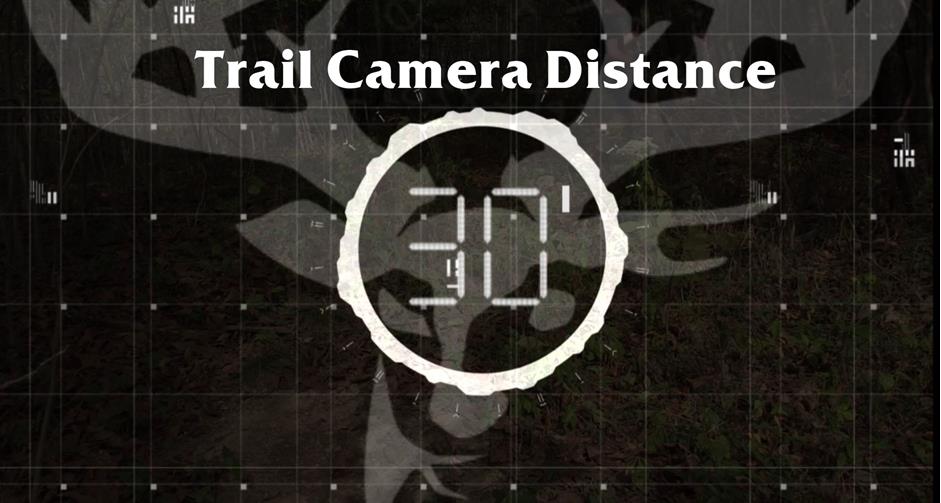
Trail Camera Distance from Target
When optimizing a trail camera for the best pictures and videos, you will want to pay special attention to the distance you are placing the camera from where you anticipate the deer being. Why is this important? Even the best trail camera photos, 14 MP or higher, have a point where the buck can become blurry. This fact, with the addition of some limited flash ranges, means that you could have several photos or videos that simply capture movement, yet fail to reveal enough detail to identify an individual buck. Following a rule of thumb, 10 yards or less is the ideal ballpark for a perfect trail camera video or picture. Most, if not all, trail cameras have a flash range containing more than 30 ft. They also have enough clarity to identify any buck within 10 yards.
Now you might be wondering, how on earth do I do that with something like an oak flat or food plot? An attraction like bait or a mock scrape can pull bucks into the correct range for a better picture. This is where clearly identifying the goals of the camera placement are important. A trail camera over a food plot on time-lapse will simply be for inventory or “plot watching”, not necessarily identifying individual bucks. If capturing individual buck movement patterns, behavior, and characteristics for identification is your goal then keep following along with these steps.
For the purposes of this article and general trail camera tips, if you are having difficulty determining distance, go ahead and place a mock scrape. Obviously, this only pertains to hunting season, but mock scrapes have become my favorite tactic for trail cameras over the past couple of years. The two bucks in the video are two of the best reasons I can offer!
Hanging Your Trail Camera
For the best picture or video, you will want to set your trail camera up at the appropriate height. If there is a tree or fence post within the suggested 10 yards or closer to your target area then you are ready to hang your camera. If not, simply driving a T-post or trail camera stake into the ground will allow you to get your camera within the distance you anticipate the bucks to walk.
Putting a trail camera at the right height will eliminate many problems hunters come across at this point in the process. One of the main problems encountered is framing your photo or video. Obviously aiming the camera is the next step, but making sure the camera is somewhere around chest height, or 4-5 ft. is a good start. Also be sure you are not hanging the camera pointing east or west, where the sun could blind the camera.
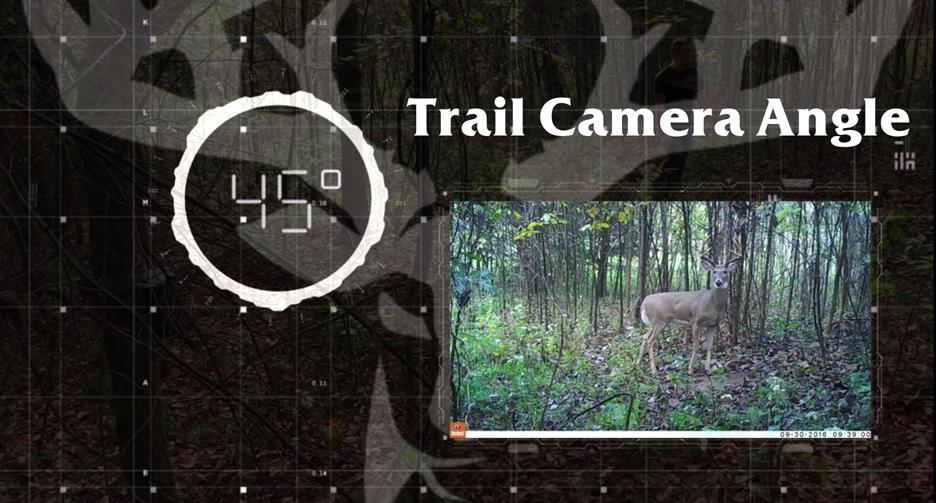
*Note: if you are placing a trail camera on a run, be sure to aim the camera at a 45-degree angle from the run. This ensures you do not have deer looking directly into the camera and won’t cause you to miss the deer as you might by placing the camera perpendicular to the run.
Next, you will need to make sure your camera angle is correct. This is where the old stick trick comes in. Don’t be ashamed, it is the oldest trick in the book! Just be sure the stick is firmly in place and won’t move with even the worst weather. Step off the distance one more time to make sure you are around the 10-yard mark. Finally, make sure the trail camera is aimed right at your chest while you are standing in the exact place you anticipate deer to stand or walk through.
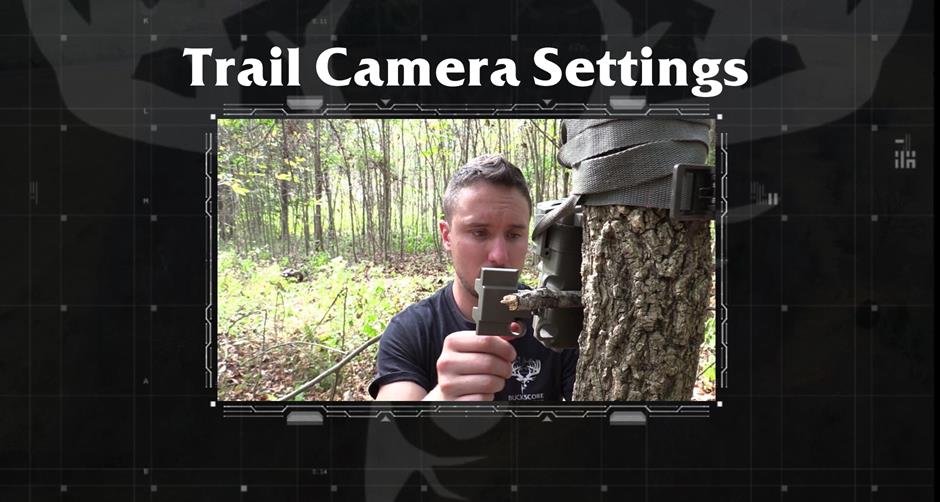
Trail Camera Settings
When it comes to the perfect trail camera setup, the trail camera’s settings can be the most difficult challenge you deal with. Deciding on the camera mode, burst number, video length, interval, or sensitivity can be overwhelming. Again, each location, site, scenario, and goal can greatly affect the trail camera settings. However, there are certain settings that allow a more optimal chance of capturing an individual buck and from there, identifying and/or scoring the buck.
The best trail camera settings will give you the best overall picture and detail in order to review characteristics, behavior, or key identification features of the buck. While some might think this would be a high-quality photo, I would argue that video is far more advantageous for not only a hunting perspective, but an inventory and scoring perspective as well.
Trail Camera Video…Not Pictures
Think about the potential of what video can reveal. In the example video, you can learn a lot about the behavior of the buck. In the video you can see that “Dub”, the buck with the split G2s, is far more curious and careful than “Leroy”, the chocolate horned buck in the video. You can also tell that “Dub” might have been shot before as he is injured and limping. This intel would go unnoticed with simple pictures. Another advantage, especially when it comes to identifying and scoring bucks, is multiple angles! “Dub” and “Leroy” both offer several angles as they work the scrape and turn their head. This makes it easy to achieve a good angle in order to score the bucks, and identify the key body and antler features like “Dub’s” split G2s.
Note* -Multiple angles also allow you to freeze-frame the video in order to score the buck using BuckScore® at the most accurate angles and reference points.
This trail camera setup should allow you to not only obtain more information on the bucks you are hunting but obtain better, higher quality information that can be used to hunt them. These images can also be used to score your deer! By uploading and running the freeze-frame photo through the BuckScore® program, you will be able to accurately estimate an individual buck’s score!
Why BuckScore®?
Holding two U.S. issued patents, BuckScore® is the only science-proven program that allows you to score pictures of bucks in minutes. The app accurately estimates antler size including spread, beam length, tine length, and circumference all to calculate a Net and Gross score within 3% of the actual score. With BuckScore®, you have one app that organizes, documents, and scores all your big bucks.
BuckScore® Features:
Works on any desktop, laptop, tablet, and most smartphones
Score trail cam or harvest photos
Know every measurement from spread to tine length
Score calculated in minutes
Manage buck photos across multiple years
Edit buck photos in program
https://www.buckscore.com/wp-content/uploads/2017/10/trail-camera-setup_Feature2-scaled.jpg13452560Jeff Breedenhttps://www.buckscore.com/wp-content/uploads/2024/09/buckscore-logo.pngJeff Breeden2017-10-19 19:08:152018-09-17 19:35:41Guidelines for the Perfect Trail Camera Setup
Ever wondered how to score deer? Curious what the easiest way to score a deer is? BuckScore® is your answer! Holding two U.S. issued patents, BuckScore® is the only science-proven program that allows you to score pictures of bucks in minutes. The app accurately estimates antler size including spread, beam length, tine length, and circumference all to calculate a Net and Gross score within 3% of the actual score. With BuckScore®, you have one app that organizes, documents, and scores all your big bucks.
BuckScore® Features:
Works on any desktop, laptop, tablet, and most smartphones
Score trail cam or harvest photos
Know every measurement from spread to tine length
Score calculated in minutes
Manage buck photos across multiple years
Edit buck photos in program
How To Score Deer with BuckScore®
Scoring deer, whether it be a trail camera photo, hero photo of a harvested deer, or a freeze frame from recently captured footage of a buck, can easily be done with BuckScore® by following four simple steps.
Step 1. Adding a New Buck Profile and Picture
The first step to scoring a deer using BuckScore® is to add a new buck. First, click the “ADD BUCK” button in the upper left-hand corner of the home screen. In the box that appears, name your buck and click “ADD BUCK” to move into this buck’s album.
Once in the “Buck Album”, you can begin adding images of the buck you want to score. To do this, click the “ADD PHOTO” button in the upper left-hand corner of the screen, assign a name to the image, and select a photo from your device.
Once selected, crop your image to the desired size and click “SAVE” to upload it to BuckScore®. You are now ready to prep your buck photo for scoring.
Step 2. Adding Photo Details
Once your buck photo has been uploaded, enter the correct photo details next to each section. Note: Some sections may be completed automatically depending on the camera you are using. If the Time and Date are incorrect, you can manually adjust it to log the correct timing. Once the details of the buck photo are complete, select “NEXT” to continue the process. After entering the correct information, rotate the computer-generated buck image on the right-hand side of the screen using the “ROTATE” buttons so that it most accurately represents the buck photo you have uploaded. Select “Next” Choose the reference feature that can be seen most clearly in your uploaded image. This is the most critical step in ensuring the accuracy of your final score. Remember the top option is always the most accurate feature, if applicable for measuring.
Finally, use the drop-down arrows next to each section to select the approximate age of the buck – select “unknown” if you are not sure, state located, whether your buck is in velvet or not, and the number of points on each antler – including abnormal or non-typical points.
You are now ready to score your buck – select “Next” to continue.
Step 3. Measuring Reference Points
The most critical part of the BuckScore® scoring process is measuring the reference feature accurately. This will determine the accuracy of all other measurements on the buck’s antlers and should be done carefully, making sure to compare your markings to the sample image provided.
Keep in mind that the ear width measurement is the most accurate, followed by eyeball width, and then eye to eye width, and that not all photographs will allow every feature to be measured.
Ear Width is the most accurate of the feature measurements, and can be available for use at every angle BuckScore® can be used.
Eyeball width is the second most accurate feature to be used and can be available at every angle except zero-degrees. However, be careful of eye glare on night images as it can greatly skew the true size of a deer’s eyeball.
Eye to eye width is a great feature measurement at the zero-degree angle. Be sure to measure from eye duct to eye duct. Often users measure incorrectly by measuring from eyeball to eyeball which will cause all antler measurements to be smaller than actually are.
Once you are satisfied with your reference measurements, you are ready to move on to the scoring process – Select “NEXT”
Step 4. Scoring Your Buck
The fourth and final step in scoring your deer with BuckScore® is to actually start the scoring and measuring process through the program. Starting with “Inside Spread,” take each measurement according to the checklist on the right-hand side of your screen.
Select the “Pen Icon” next to the measurement to open the Measurement Activity box.
Your measurement should mirror that depicted under “Sample Measurement.” To undo mismeasurements, use the UNDO LAST and CLEAR ALL buttons at the top of the activity box. When satisfied with your measurement, select “Save”.
Repeat for each measurement, and refer to the “Measurement Progress Bar” for status to completion.
Once every measurement has been made, and “Measurement Progress Bar” is signaling completely. Click “SCORE” at the bottom right-hand corner of the checklist.
This will take you to your official BuckScore® Results page where you will be able to view the each measurement you’ve made along with gross & net scores.
You are done! You have officially scored your deer using BuckScore®. You have completed the full BuckScore® scoring process and can begin adding more bucks to your profile! You can also begin to manage bucks photos, and bucks over multiple years! Don’t forget to score any new bucks you get on camera, or any old trophies you have hanging on the wall!
https://www.buckscore.com/wp-content/uploads/2017/10/how-to-score-a-deer_feature4GS-edit4.jpg6301200Jeff Breedenhttps://www.buckscore.com/wp-content/uploads/2024/09/buckscore-logo.pngJeff Breeden2017-10-10 18:52:502019-07-09 15:09:02How to Score Deer Using the BuckScore® App
To provide the best experiences, we use technologies like cookies to store and/or access device information. Consenting to these technologies will allow us to process data such as browsing behavior or unique IDs on this site. Not consenting or withdrawing consent, may adversely affect certain features and functions.
Functional
Always active
The technical storage or access is strictly necessary for the legitimate purpose of enabling the use of a specific service explicitly requested by the subscriber or user, or for the sole purpose of carrying out the transmission of a communication over an electronic communications network.
Preferences
The technical storage or access is necessary for the legitimate purpose of storing preferences that are not requested by the subscriber or user.
Statistics
The technical storage or access that is used exclusively for statistical purposes.The technical storage or access that is used exclusively for anonymous statistical purposes. Without a subpoena, voluntary compliance on the part of your Internet Service Provider, or additional records from a third party, information stored or retrieved for this purpose alone cannot usually be used to identify you.
Marketing
The technical storage or access is required to create user profiles to send advertising, or to track the user on a website or across several websites for similar marketing purposes.