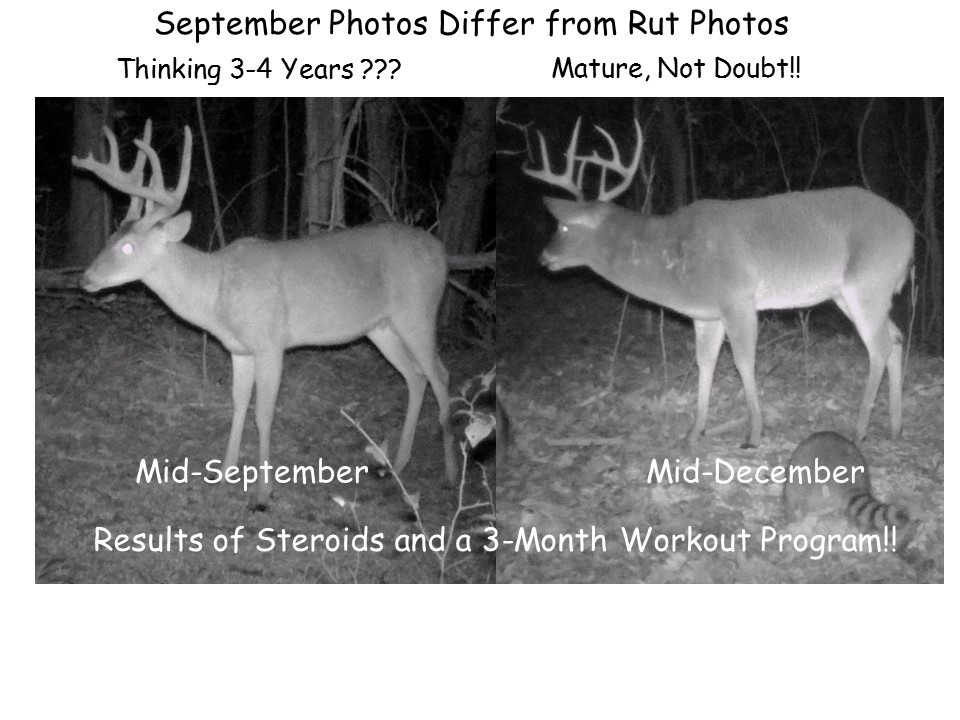
Estimating age of photographed bucks can be difficult enough due to less-than-ideal body alignment in the photos. Combining that with seasonal changes in body shape will really increase difficulty. Bucks change dramatically between the early fall compared to when they are primed for the rut, so always consider the date relative to you area’s peak rut. Bucks relax during the summer, putting extra nutrients into body fat and rapidly growing antlers. His interests and activities change once testosterone levels increase dramatically in August, leading to antler hardening and shedding of their velvet during mid-to-late September.
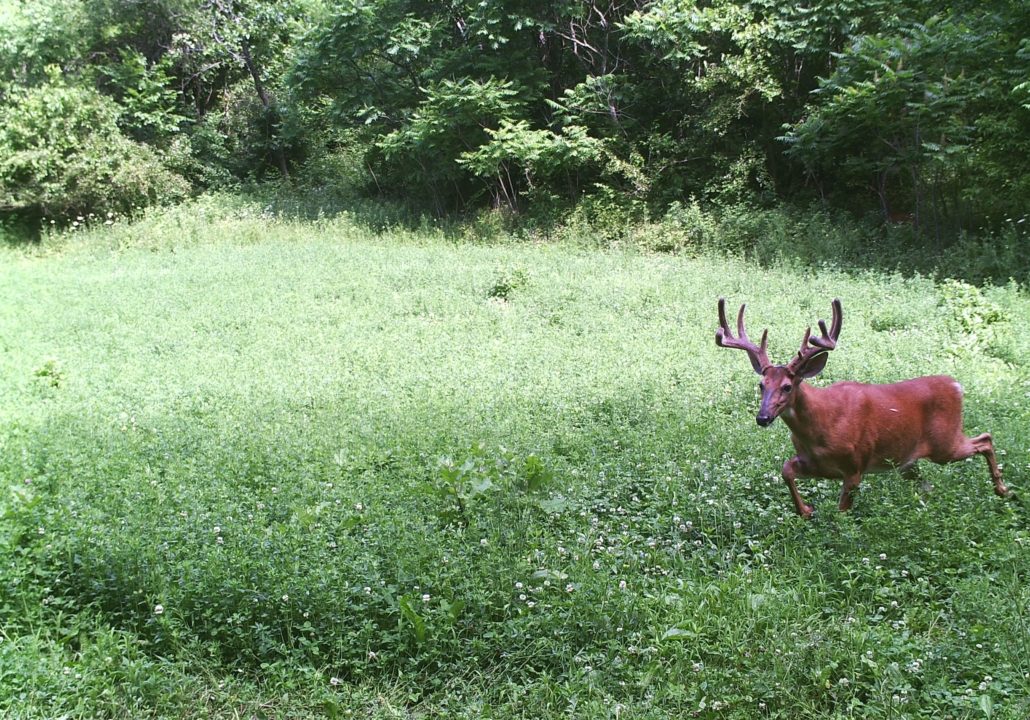
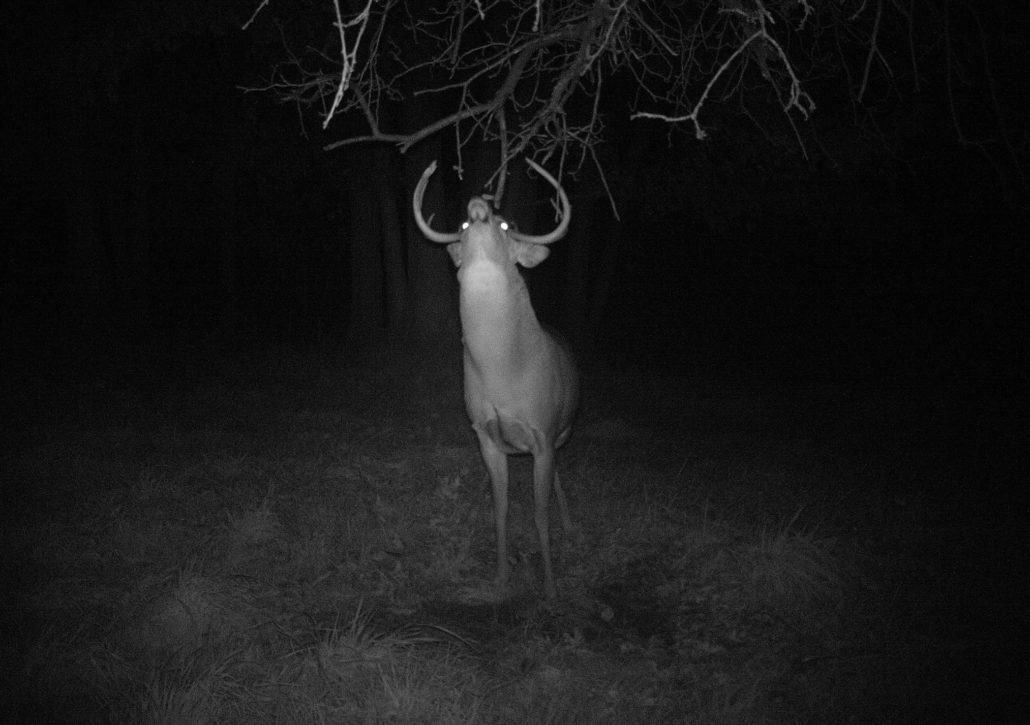
This buck photographed in mid-September has a relatively thin neck, which makes you think he’s 3-4 years old. His antlers look huge, but remember velvet antlers always appear to be larger than fully hardened antlers. Note how much different he looks in December – his neck is much thicker, a result of steroids (testosterone) and 3 month of serious exercise (rubbing, scraping, traveling, and fighting). But, also note his thinner hind quarter in December, which is the result of his reduced feeding activity during his increased exercise (sounds just like most human weight-loss programs!).
https://www.buckscore.com/wp-content/uploads/2019/01/aging-deer-mississippi_feature.jpg720960BuckScorehttps://www.buckscore.com/wp-content/uploads/2024/09/buckscore-logo.pngBuckScore2019-01-24 20:58:232019-08-28 12:20:10Why You Should Consider Seasonal Body Changes When Aging Bucks
Trail cameras have been the sportsman’s favorite scouting tool for decades. What was once only a blurry snapshot of a deer running off, has turned into a highly detailed image that is packed full of valuable scouting data. Everything a hunter could need is right at their fingertips.
Cameras have also become incredibly convenient. Before, having a trail camera meant running to grab the camera and then proceeding to run to the print shop to have the film developed. For some individuals, this was a process that took hours, if not days, depending on the convenience of the location. However nowadays, images are viewable on the spot. Not only are they clear and detailed, but they are packed full of data. In fact, cameras can go as far as telling you exactly how big the deer you are going to shoot is, before you even hunt it.
As with all technology, trail cameras are now better than ever. They are more compact, have higher quality photos, are more discrete, and give out such a significant amount of information that most people don’t even know what to do with it all.
However, getting the most out of a trail camera requires more than just buying the latest and greatest. Instead, it takes careful planning, knowledge, and a management strategy. That’s why we have put together a list of tips that will help improve your trail camera game.
Pick a Quality Camera (not just the fanciest one)
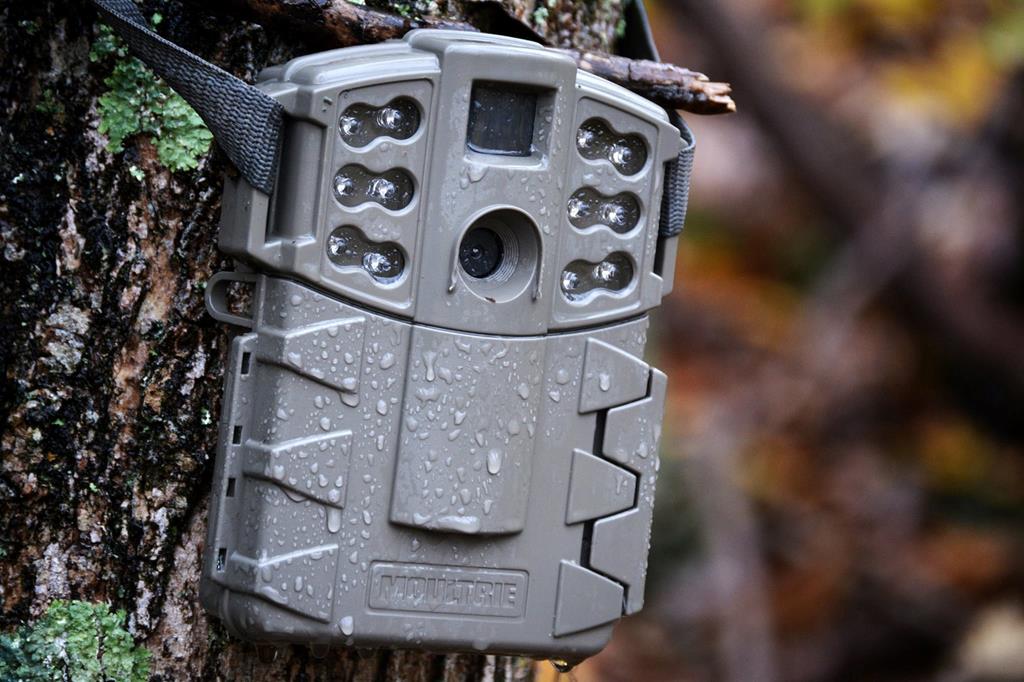
This one is pretty obvious. There can’t be quality trail camera photos without a quality camera. Using an outdated or poorly designed unit means not only disturbing deer, but also getting disproportioned and low quality images. Not being able to see the image makes it difficult to analyze the image and its data.
Therefore, one of the most important aspects of a productive scouting plan is having a camera that can take high enough quality images. Unfortunately, this is much more complicated than most people think. For starters, a high number of megapixels does not indicate a high quality camera. In fact, manufactures even inflate megapixels to help inflate sales. Therefore, it’s wise to look at more than just the megapixel count. Instead, look at its capabilities and if those capabilities will fit your individual situation.
For example, find out and compare the following features between cameras before making a purchase:
Motion detection range
Flash capabilities
Type of flash
Recovery time
Number of “true” megapixels
Number of lenses
Age of camera
Mode options (time lapse, video, etc..)
If your camera doesn’t have a fast recovery time; you’ll likely miss seeing critical angles, or even multiple deer in a photo. If your camera doesn’t have high quality flash, you risk spooking the deer or missing valuable night images. All of these have big impacts on your scouting plan.
Some people get lost comparing and understanding technical features; however, something everyone can do is read reviews, watch reviews, and even try a little trial and error of their own before committing to a purchase.
Ways to do this include:
Looking at real life example photos on social media,
Watching YouTube reviews
Reading reviews across the internet
Trying a friend’s camera out
Test running a camera in store before making that purchase
Remember not all trail cameras are created equal. Therefore, even when hunters aren’t familiar with a camera’s specifications, they can still look at real work examples to help them make a better purchase.
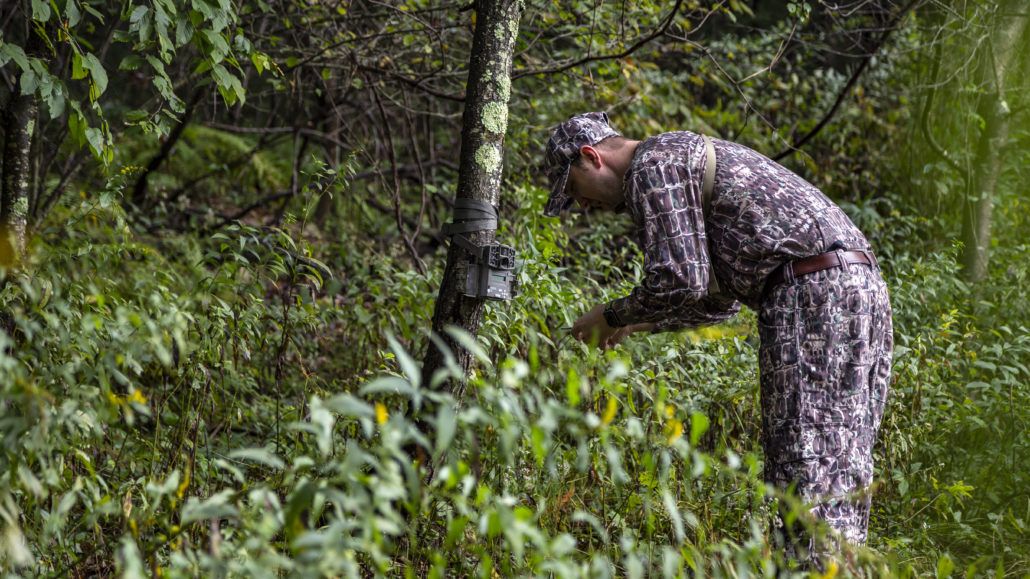
Find the Right Location and Don’t Be Afraid to Move
Location is everything. From macro-environment to the micro-environment, having the right location tends to be the one of the most critical factors in success. Whether you are talking about which parcel of land you want to focus your attention to the food plot you will decide to hunt over, success is highly dependent on each location and its ability at the time to support quality deer. When that field no longer has corn? It’s time to move locations.
Therefore, whether you hunt land in different locations, or during different times of the year, it’s important that you keep an open mind and move your camera when necessary. If you aren’t seeing deer that you think should be there, then move. You wouldn’t hunt the same spot without seeing deer; therefore, don’t scout the same spot – no matter how convincing the environment might look.
Perhaps you pushed too much scent through the area causing deer to re-route your area. Maybe the food source was harvested, water dried up, or hunting pressure changed the deer’s pattern. Then it’s time to move.
How to Find the Right Locations
When deciding on the right location before and after a trail camera move, there are some critical aspects to consider. These can include:
The Conditions of the Land
Is it woodland, prairie, or cropland? Understanding the landscape is important in understanding which areas you should monitor.
The Time of Year
As mentioned, deer patterns and actions change throughout the course of a year. In fact, the food plot you were monitoring in September might not be the best place to set up your camera during the rut. Instead, you might choose to setup over a scrape, or a funnel. As the season’s change, so should your scouting plan.
Number of Trail Cameras You Have at Your Disposal
If you could only afford one camera in your budget, make it count. Use it to help you find proper stand placement based on deer size, time of day, and routine.
If you use multiple cameras you can monitor the entire area, multiple deer patterns, and even find your buck’s core areas.
Ability to Move
If possible, move throughout the season. This helps reduce scent in a particular area and reduce pressure on the deer.
We have an in depth article discussing the best trail camera locations that you can read in full here.
Know Your Settings and What They Do For You
Setting up your trail camera means adjusting its settings to fit you and your situation. Just like with our cell phones and computers, sometimes it is easier to set it and forget it then to actually learn why these settings are there or what they can do for you.
Our tip is to have a list of tasks you should do before implementing any camera.
When you get your camera, first make sure you insert the right size SD card and the proper batteries. If you are checking your camera, be sure to check the batteries and camera storage. If you don’t plan on returning to this area for a significant amount of time, the bigger the card, the better.
Next, check for software updates. This is crucial to assure your camera is operating smoothly and at its highest capability.
Then you need to adjust the settings for your particular goal. Trail cameras come with many different modes and settings. For example, you can pick time lapse mode to catch the changing environment from afar. You can also adjust motion detection and response time to capture a select amount of images when movement appears. Perhaps video mode will be better for deer analysis and scoring.
In general, be sure to adjust the following settings:
Mode (video, timelapse, etc…)
Trigger speed
Flash settings
Frequency
Test these features. After finding the proper location and placement, be sure to test these settings before leaving the area. Nothing is worse than leaving the camera for a few weeks only to return and find that your photos aren’t angled appropriately, or you happen to have no photos at all.
Reconsider Your Placement
Knowing where to place your camera, means knowing your goals. Sometimes hunters seem to think it’s a “one size fits all approach”. However, that couldn’t be farther from the truth. There are many different angles and scenarios you can use your camera in.
For example, are you looking over a field and want to monitor the number of deer, environment, or other factors? Or do you hope to place it over a salt lick to catch that close up photo?
Knowing which one is right for you depends on a number of factors:
Do you want an aerial view of your food plot or a close up shot of that buck?
Do you have multiple cameras to catch multiple angles (close vs aerial)?
Do you want to score that deer? You will need a clear and close image, or video.
Is motion detection important or will you be using time lapse mode?
Is the camera the perfect distance from the target?
Go through each one of these before choosing, and especially leaving, a spot. Keep an open mind. Perhaps monitoring the environment while you monitor your deer size can help you put together a better scouting plan. Maybe video will suit your needs better. Don’t be afraid to learn the settings, find the right locations, and then change up your placement.
You can find a more detailed guide on properly setting up your trail camera here.
Photo Management
One of the most overlooked features of any trail camera strategy is organization. In fact, photo management can revolutionize a scouting routine. For example, being able to pattern deer means having a traceable record of deer size, timing, and camera placement. You cannot rely on your own memory for this. You need an organized database where you can literally map trends, track conditions, and even analyze deer size.
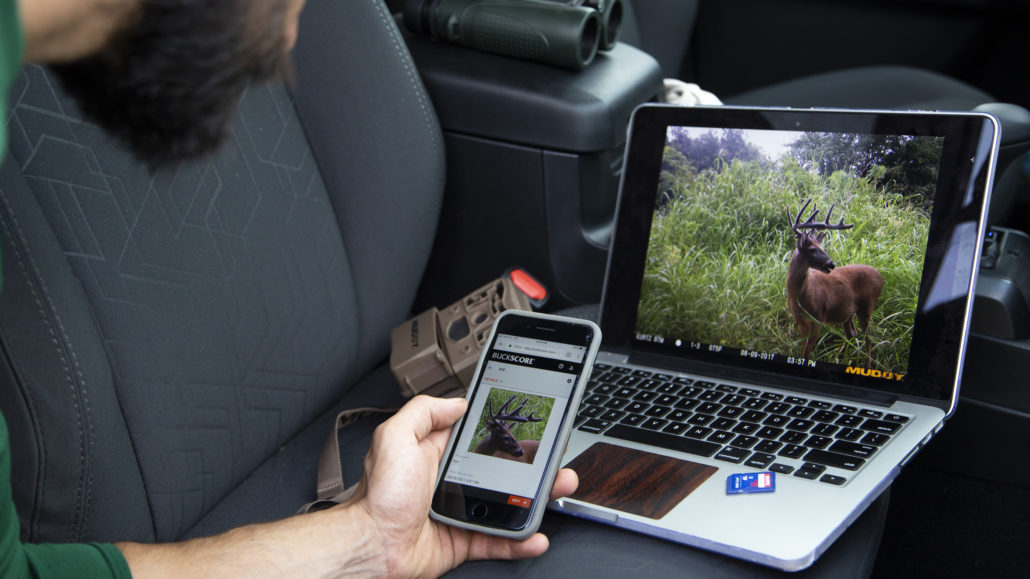
Photo management software is a must for properly organizing and analyzing this data. However, not all photo management software is the same. Despite there being plenty of options available, there is only one that is developed by researchers to accurately estimate your deer’s size: BuckScore.
BuckScore
One of the best tools for organizing and analyzing trail camera photos is BuckScore. Instead of traditional tools that simply organize photos based on environmental conditions and/or time, BuckScore can help you organize buck based on its size. This is incredibly important when determining which bucks to target and which ones to let walk. It also helps alleviate wasteful data and photos that clutter your computer and don’t let you reach your end goal: shooting that trophy deer. It’s also incredible exciting to know if that buck you’ve been tracking can join the Pope and Young club.
Take Your Trail Camera More Seriously This Year
Many people simply set it and forget it when it comes to trail cameras. They add the batteries, insert the SD card and set it out for use. However they are missing out on the cameras most advanced and beneficial features. A few adjustments can go a long way in trail camera value.
For example, if you don’t plan on leaving your camera out for a significant amount of time; you might benefit more from video mode then from capturing stills. Additionally, if you plan on leaving your camera unattended for a few months, it’s in your advantage to not use video or time lapse to save space.
By better managing your data, taking time to find the best spots, and doing your research before you invest; you cannot only improve the quality of your trail camera information, but also improve the success rate of your hunt this fall.
https://www.buckscore.com/wp-content/uploads/2018/12/BuckScore_FeatureImage-scaled.jpg14402560BuckScorehttps://www.buckscore.com/wp-content/uploads/2024/09/buckscore-logo.pngBuckScore2018-10-18 19:50:122019-08-28 12:20:11Best Trail Camera Tips for Deer Season
Trail cameras are arguably one of the best tools you have as a deer hunter to help increase your chances of harvesting a buck in the fall. Hunters are able to develop things like their hit list of bucks they would like to harvest if given the opportunity during the hunting season and can glean the most recent information about deer movement to help guide which stand to hunt. Although using trail cameras can be useful, how do you know how many to use or where to put them on your hunting property? This article will give you some tips on where to set up your cameras and how many cameras you may need to be effective in your scouting.
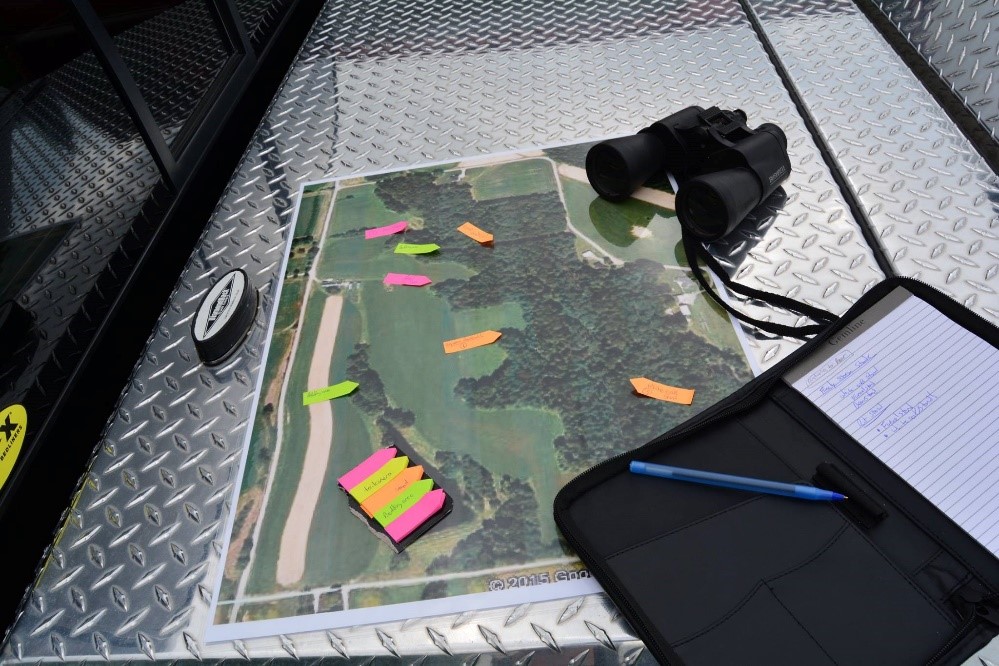
Identifying Buck Movements
Every hunting property is a little bit different. Some properties may have plenty of bedding areas but lack food sources and others may have just the opposite. Using cameras is one of the more effective ways to identify how individual bucks are using your property. This generally begins sometime in mid to late summer when you can start to identify bucks based off their antler development. Place your cameras in known feeding areas to inventory which bucks are hitting which food sources. Once you have a buck identified and know which food source they are consistently visiting, you can then begin to identify travel corridors and potential bedding areas. Hopefully you have already had a chance to scout the property to identify travel corridors and bedding areas, but if you haven’t you can begin with an aerial map to help you narrow down these locations. Once you have identified those areas on the map, you can more precisely go in to scout. Using multiple cameras on multiple food sources will also help paint a picture for you regarding deer movement on your hunting property. For example, if you get a picture of a buck in your food plot planted with soybeans at 7:30 p.m. and then another photo of the same buck in your white clover plot 6 hours later, you likely can start to put together that buck is taking it’s time moving between plots. That may mean there is a bedding area in between them or there are certain features in the landscape that the buck may be more likely to use when traveling. This type of scouting if done well before hunting season or even year-round can dramatically improve your chances of harvesting a buck by simply knowing how deer in general, or a buck in particular, is moving across your hunting property.
Inventorying Bucks on Your Hunting Property
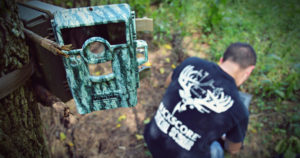
One of the more entertaining things hunters generally look forward to each year is creating a hit list of bucks they may be interested in harvesting in the upcoming hunting season. Trail cameras can obviously aid in this process, but how many cameras do you need and where should you place them to accurately inventory the bucks using your property? Research has shown that when conducting a trail camera survey to estimate things like deer density, recruitment, and adult sex ratios, you will need one camera per 100-acres of land with larger properties generally yielding more accurate estimates. This is a good rule of thumb to follow, but what if you only hunt 200-acres and are most concerned with simply inventorying the bucks using your property? If this is your situation, then placing a camera on each major food source, whether that be a summer food plot, an agricultural field, or even a supplemental mineral site, will allow you the best chance of identifying a majority of the bucks using your property. If you are limited on the number of cameras you have, make best use of them by placing them on high-traffic food sources. In other words, use some on the ground scouting to identify heavily used trails coming into or leaving a food source. This will help maximize your efficiency. If you check your cameras and find that you don’t have many pictures, then don’t be afraid to move the camera. Placing cameras in major food sources means you can check them without causing a major disturbance. Drive right up to the camera if you can. This will help decrease the impact you have on the area and will allow you to move the camera if you think you may have a better area.
Gaining the Most Recent Information (MRI)
Being mobile during the hunting season can be one of the best ways to increase your chances of harvesting a buck. But how do you know when it’s time to move to another stand or move your set-up all together? Having the most recent information, or MRI, on hand will help you in making this decision. There are several ways to gain information during the hunting season. You may simply see deer consistently using a trail just out of range and need to move your set-up to capitalize on that movement. But what about the movement around other stands you aren’t using? You guessed it! Trail cameras can help in this arena as well. Using cameras at stand sites can be tricky given you will want to minimize disturbance when checking them. Waiting for the perfect stand conditions to hunt that particular stand and then switching out SD cards when you are walking into or leaving the area will help minimize the disturbance you are causing. You can also try using cameras that use cell phone connection to remotely send you pictures of what’s going on. This will completely eliminate any disturbance from an area while still allowing you to obtain the MRI. Deciding on how many cameras you need to have out during the hunting season is also a bit trickier than when you’re inventorying what bucks are using your property. Try to identify which stands will be your best stands during the season. This may change throughout the fall as bucks transition from using food sources more during early and late seasons to checking bedding areas during the rut; though, bucks will also still scent check food plots during the rut so it’s always a good idea to have a stand on a food source that does will use throughout the fall. Again, you want to be careful and minimize your disturbance when checking cameras during the hunting season, so wait on ideal conditions to hunt a stand and check your cameras then to see what’s going on and don’t be afraid to move if the cameras are showing heavy action in a different area.
The old adage, “a picture is worth a thousand words” couldn’t be more accurate when using trail cameras for scouting. Using them year-round will help you identify everything from how deer are using your hunting property to which hit list bucks are around in the fall. Try using some of these tips the next time you’re scouting your hunting property and they just might help you close the deal during hunting season.
https://www.buckscore.com/wp-content/uploads/2018/12/BuckScore_TrailCameraTips_FeatureImage.jpg11522048BuckScorehttps://www.buckscore.com/wp-content/uploads/2024/09/buckscore-logo.pngBuckScore2018-10-17 17:39:012018-12-17 17:51:21Trail Camera Tips for the Hunting Season and Beyond
Trail Camera Tips for Attracting Deer without Bait
By: Eric Michel, Wildlife Biologist
Chronic wasting disease; three words that no deer hunter wants to hear. Yet, more and more deer hunters are dealing with this disease as it continues to spread across the whitetails range. Chronic wasting disease or, CWD, is at the top of the list of concerns for many state wildlife biologists. Why? It’s an always fatal infectious brain disease caused by a prion (misshaped protein) that currently has no cure. Unlike other diseases such as epizootic hemorrhagic disease (EHD), deer do not build up an immunity to CWD and once CWD is found in a herd, it’s there to stay as it spreads among the population through urine, feces and saliva of infected individuals. What’s even more concerning is that CWD is in the same family as mad cow disease and although there hasn’t been any documented cases of CWD leaping the species barrier and infecting humans, agencies such as the World Health Organization and the Centers of Disease Control do not recommend eating meat from CWD infected animals.
Once CWD is found in an area, deer management tends to dramatically change. Everything from harvest regulations to baiting regulations are up for debate and rightfully so. Recent research out of the University of Wisconsin – Madison showed that areas where minerals are placed to help supplement a herd’s nutrition actually serve as a reservoir for the prions that cause CWD and deer can become infected from using these mineral sites. This is bad news for hunters who like to place supplemental minerals or other attractants on their properties to increase the number of pictures they can get with trail cameras. Using some type of attractant with your trail camera can dramatically increase the quantity and quality of photos you are able to get which translates into things like deriving a hit list for the fall or obtaining information like population estimates to help you better understand how many bucks and does you should harvest. So what can you do if you no longer want to use attractants or the use of attractants is now illegal because of the presence of CWD in your area?
Trail Camera Tips and Tactics Without Deer Bait and Minerals
This article will discuss other, more “natural” attractants you can use that will allow you to still get high-quality photos.
Mineral Stumps
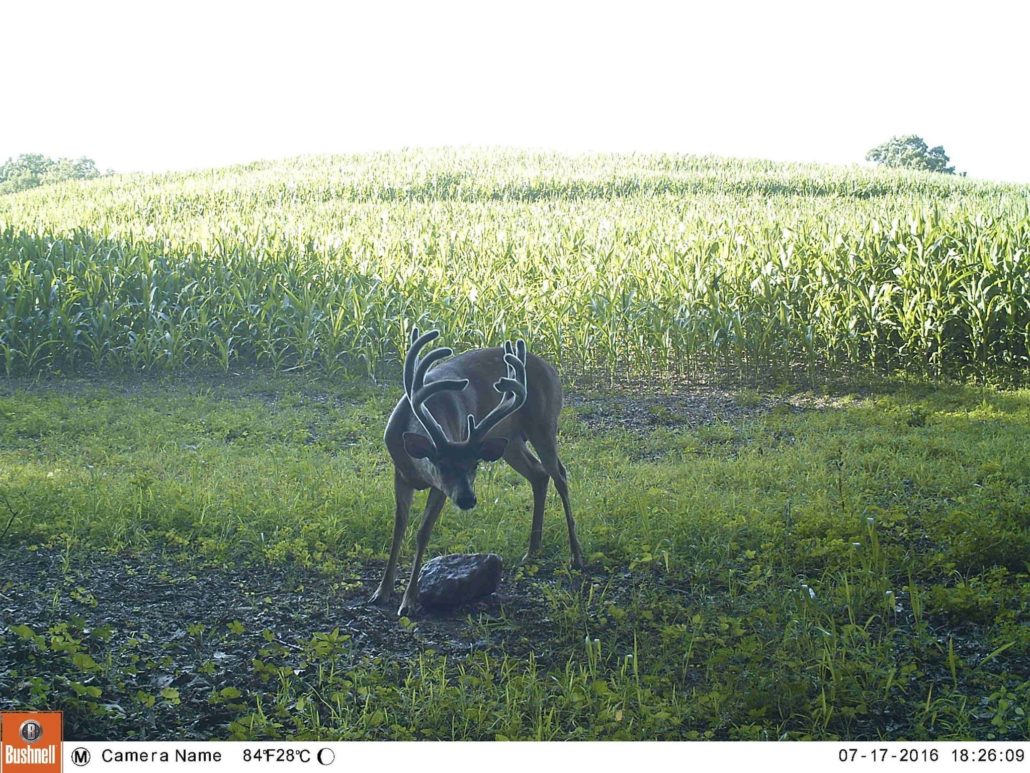
Mineral stumps have taken the deer world by force since they were first mentioned by members of the Mississippi State University Deer Lab last year.
Provide minerals to deer the way Mother Nature intended – thru vegetation. Create "Mineral Stumps" to increase deer nutrition and hunting opportunities. Please watch the video and tune into the next episode of Deer University to learn more.https://traffic.libsyn.com/deeruniversity/Episode_007_-_Mineral_Stumps_for_Deer_Nutrition.mp3College of Forest Resources, Mississippi State University Mississippi State University Extension Service Mississippi State University Foundation Mississippi Department of Wildlife, Fisheries, and Parks Wired To Hunt National Deer Alliance The Quality Deer Management Association White Knuckle Productions WebShow & Podcast The Management Advantage Mossy Oak GameKeepers STIHL Husqvarna
Essentially, mineral stumps occur when harvested trees produce sprouts from their stumps. These sprouts are highly nutritious because the root system is so much larger than the sprouts that they contain increased minerals. Deer tend to flock to mineral stumps and placing a camera on these stumps can produce high-quality photos. So how are mineral stumps different than supplemental mineral that’s placed on the ground? Deer aren’t as likely to consume dirt like they would if they were using attractants that are placed directly on the ground. This is important because prions are directly deposited into the dirt by other deer using the site, which can lead to infecting multiple deer. Additionally, once the leaves are gone from a mineral stump, deer use will dramatically decrease. Other attractants tend to leach into the soil meaning deer will continue to visit those sites long after the attractant is gone.
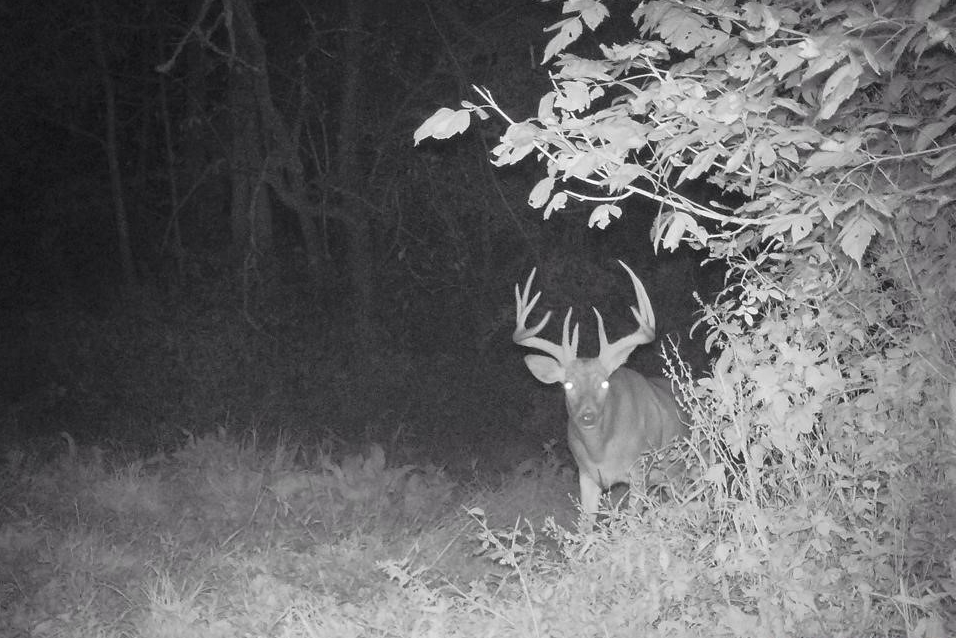
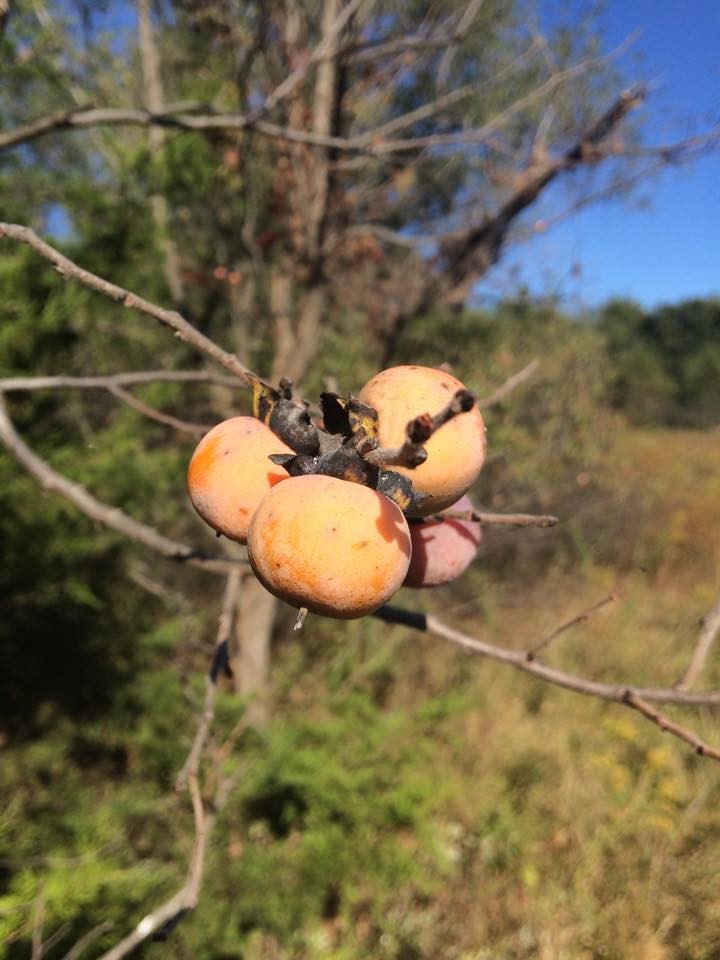
Mast Trees
Setting up trail cameras on trees that produce hard or soft mast is another great way to get photos of those bucks you’ll be hunting in the fall. Deer will disproportionately feed in areas that are producing and dropping apples, acorns, or persimmons. This is because mast represents a limited resource that isn’t available throughout the year. Acorns are particularly high in fat content which can be crucial to helping deer increase their body fat in preparation for the rut. Even the most mature, nocturnal bucks will eventually hit these food sources before they run out.
Food Plots
Food plots may seem like an obvious choice to place a camera to get pictures. There are a couple of things to keep in mind though when picking a specific food plot and a location within that plot to place your camera. First, think about the size of the plot. Larger food plots can be difficult to capture photos from because deer may have several access points, in turn, decreasing your ability to concentrate deer and get photos of most of the deer using the plot. Obviously, one way to curb this issue is to place your camera on what seems to be the main trail being used by deer or simply use multiple cameras. Another way to increase your ability to concentrate deer into a food plot is to consider the size of the plot itself. Putting a camera in a small “honey-hole” sized plot (usually less than an acre) will increase your ability to cover the entire plot with one or two cameras while still getting quality photos because deer shouldn’t be too far away from your camera.
Mock Scrapes
Using mock scrapes can be an extremely effective method to use to get pictures of bucks but there has been some recent controversy with the type of deer urine that you might use in a mock scrape. Several states have banned the use of natural urine because of the potential of it containing CWD prions. Because of this, it is best to use synthetic deer lures just to reduce all potential risk. Additionally, deer urinate at scrape sites, which may potentially infect the site if the deer has CWD, though there is no specific research that shows this. Regardless, using synthetic deer lures to create mock scrapes can be a great way for you to inventory what bucks are using your hunting property.
Although all of these more natural methods will undoubtedly help you get pictures of your hit list bucks, research is still needed to address whether these methods are good enough to use when running a trail camera survey or study to estimate things like population size, buck to doe ratios, and fawn recruitment into the population. Regardless, you should give these alternative methods a try if you have CWD in your area or are simply concerned about the potential spread of CWD. You may be surprised at just how well they work!
https://www.buckscore.com/wp-content/uploads/2018/09/CWD-Baiting-bans-trail-camera-tips_Feature.jpg13161907BuckScorehttps://www.buckscore.com/wp-content/uploads/2024/09/buckscore-logo.pngBuckScore2018-09-12 18:03:032018-09-12 19:17:06CWD Baiting Bans | Attracting Deer to Your Trail Cameras Without Bait
By: Weston Schrank, BuckScore Specialist and Wildlife Biologist
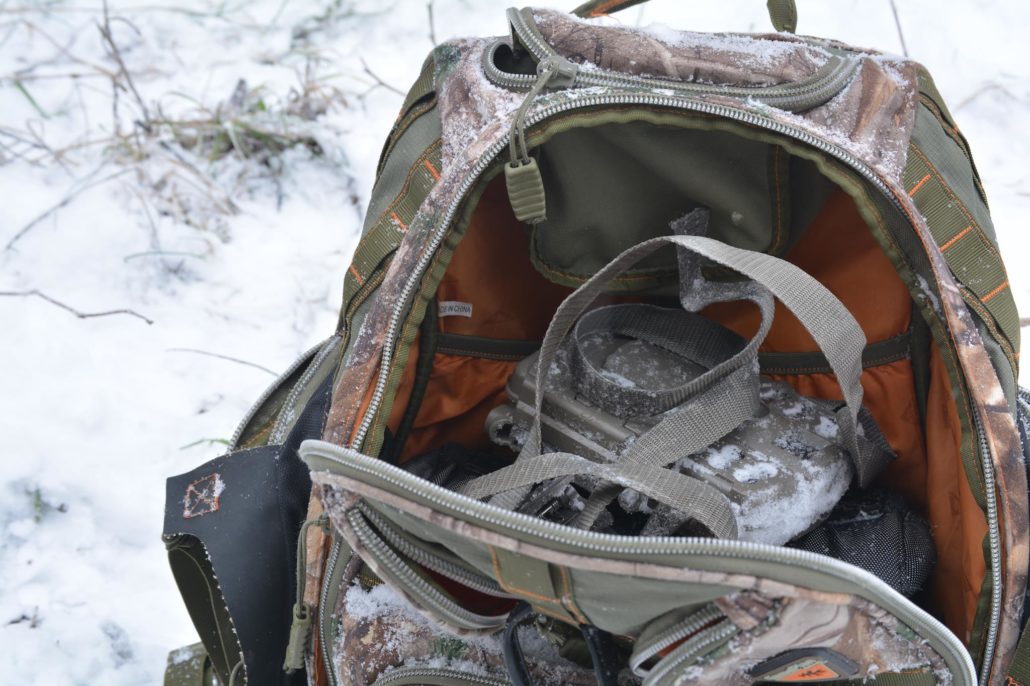
The first two weeks of December can be a rough and confusing time for any deer hunter. Personally, if I have not tagged out yet I’m very unsure what to do with myself. Usually I am already focused on coyote hunting or just spending more time with family and friends… but again only if I am tagged out. The weather and deer activity are in a weird place and deer hunters are caught in the middle of it all. Before the cold temperatures of winter arrive, and after the intense rut action, a lot of deer hunters can catch themselves in this period known as the December lull. The only thing that I have come to know is that trail cameras can be a saving grace during this lull period. I aim to give you some solid trail camera strategies and tips for the late season. But I know reading this will also give you a better understanding of what is actually going on during the late season!
Late Season Strategies
While I might completely ignore my cameras around the rut and focus more on just getting time in the stand, this ideal completely shifts during the first weeks of December. Unless you are a fan of throwing “Hail Mary” hunts together, trail cameras are the best strategy for the late season. While it might be obvious to some readers, the main reason why trail cameras are your best bet for the late season is because of deer patterns. The late season is the second time period where hunters can accurately pattern mature buck movement down to literally the minute!
Late Season Patterns
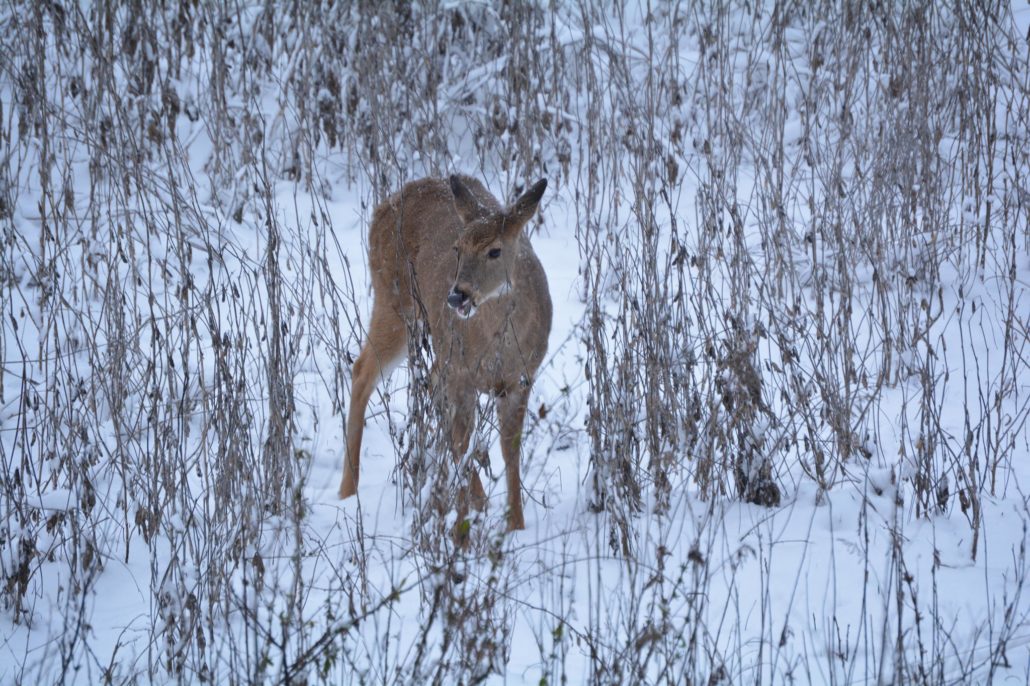
Mature bucks focus on recovery and staying warm during the late season. This is similar to their focus during late summer when they are busy feeding on protein. Naturally, their late season patterns fall prey to the same opportunities that their previous summer patterns do. This means that with some simple scouting, and some well-placed cameras a hunter has the ability to pick up on a pattern and plan a hunt based off the intel.
The buck will be noticeable in only one location… a food source. He will spend morning to early evening hours held up in his warm thermal bedding. This is often a southern slope, a spot where sun can reach the buck but also where the cover blocks the cold wind. Early successional spots and native grass fields that are southern oriented are perfect spots for mature bucks to bed. When the buck does get up he will be headed to a nearby food source. This food source will be most likely one of the 4 most attractive food sources a deer can feed on during this time of year.
Late Season Food Sources
There are 4 food sources that you should take notice of, or plant next year specifically for the late season. Some are quite easy to establish and hunt, and others take quite a bit of investment.
Brassicas – the fancy name for turnips, radishes, and rape. If enough acreage is planted, the green sugary tops and robust buried treasures can be a potent combo for cold winter days.
Cereal Grains – winter rye, winter wheat, and oats (winter hardy) can be a great green source of food that will stay green all winter long. They make great cover crops if you are managing soil properly.
Standing Corn – standing or freshly cut or mowed over corn can be a major attraction during the late season.
Standing Beans – standing beans, just like standing corn, can be a great late season food source, but it offers summer protein, something that corn cannot. This makes beans a better option if you have enough acreage to have standing beans throughout the season and into early spring.
The Occasional Hot Doe
Now before I dive straight into trail camera strategies and setups based on the information below ,I do need to talk about the occasional hot doe. Some people refer to it as the second rut, but the more correct term would be the fawn rut. Now, Midwest and Northern states can see an upwards of 75% of all breeding occur during the peak rut week. Some does do come in if they are not bred in the first round, especially if sex ratios are skewed towards more does than bucks. However what I am talking about here is what I commonly see on well managed properties. When doe fawns have great habitat, great food, and as a result great nutrition, they can reach the magical weight of 60-70 lbs. What happens then? If 6-7 month fawns reach this weight they can become sexually active and come into estrous. This is why you might have seen a small doe fawn being chased by 2 or 3 bucks in a late season food source or cut corn field. The one difference here of course is that these bucks are chasing an uneducated fawn, not a smart mature doe!
This is not something to rely on, just a word of caution that the mature buck you are hunting is not completely safe with a late season pattern on your property. There is still a chance that he could cross the property line.
Late Season Trail Camera Setups
Obviously the most successful trail camera strategies will be based around the most important aspect of the late season… food! This means creating camera setups that will either inventory the food source location. Or will catch deer movement and behavior around or in route to the food source. Now I have tried multiple setups, on multiple properties, and over the course of the years have ended up with a few videos to help viewers setup trail cameras for the late season.
Trail Camera Tips | patterning Deer with Late Season Cameras –this video was a couple years back, but the principles of the advice are solid. It discusses some of the information I have reviewed above.
Last year I ran a series called “Trail Cameras Weekly” on Muddy TV. During each week of the rut, I published a different video on what to do with your trail cameras for that week. Of course, I covered this time period in that series, and last year I gave some extremely helpful tips for late season trail camera setups.
The “Trail Cameras Weekly video reveals two very useful trail camera setups. One is a trail camera over a food source on time-lapse mode, and the other is on a late season funnel.
By setting up a trail camera over a late season food source over time-lapse mode, you can inventory what deer are utilizing the food source. You can also see where they frequent and even where they are filtering out of. You will want a camera with very high resolution photos (>10-12 MP). Set the camera to take pictures during the last 1-2 hours of daylight, with a photo every minute. Also make sure you have a big memory card (>16gb).
Late Season Funnels
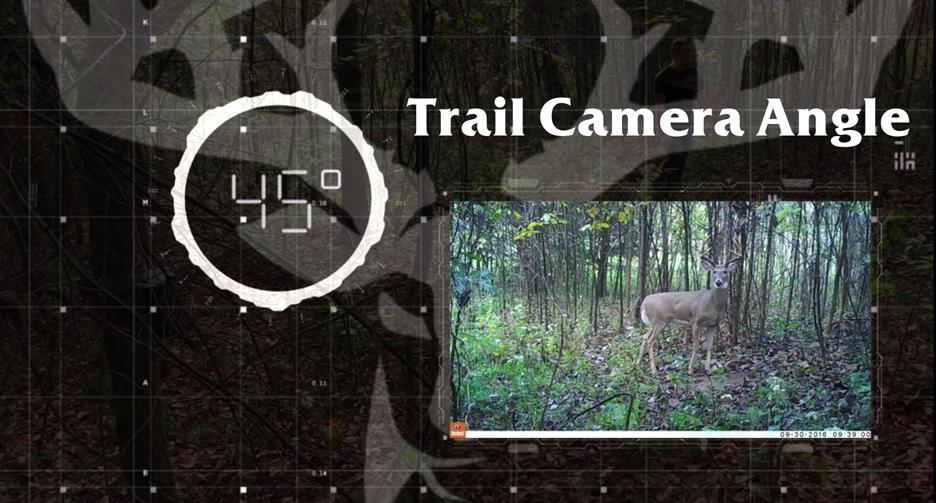
If you can identify the main areas of a late season bedding area, essentially anywhere with thick cover and sunshine, you can gather intel by hanging a trail camera over a late season funnel. For this setup, identify a heavily used run and set the trail camera up at a 45 degree angle from that run. You will want a camera with a quick trigger speed that can capture 3+ photos in a photo burst mode.
When to Make a Move
Stay out of these food sources except to check trail cameras. Keep the pressure off your food sources until one of the following happens:
Cold temperatures – when a cold front moves through or snow hits, deer will be forced to get up and feed earlier in the afternoon just to ensure they can keep up with the energy demands of staying warm.
Daylight movement – if you capture a buck utilizing the food source on a regular basis during legal shooting light don’t hesitate! Go in after him immediately.
These trail camera tips should help you target late season movement patterns of bucks to target. It can be your saving grace that arrives just when it seems like all other opportunities have faded away.
Have a nice buck on camera? Score him in minutes using the BuckScore® Software!
https://www.buckscore.com/wp-content/uploads/2017/12/late-seasontrail-camera-tips_feature.jpg13652048BuckScorehttps://www.buckscore.com/wp-content/uploads/2024/09/buckscore-logo.pngBuckScore2017-12-08 16:49:472019-08-28 12:20:14Salvage Your Deer Season With These Late Season Camera Tips!
Trail Camera Setup for Scoring Deer with BuckScore®
By: Weston Schrank
Is there such a thing as a perfect trail camera setup? Every property, every hunter, and every trail camera setup is obviously different, but is there a general guideline that hunters should follow? The simple answer is yes! A perfect trail camera setup would be one that not only gives you exactly what you want in terms of information, but also produces flawless photos and videos. While the perfect trail camera setup might sound too good to be true, or subject to some very opinionated comments, a setup does exist that optimizes the intel received. How? This perfect trail camera setup guideline allows any hunter, anywhere to produce the best trail camera data for identifying and observing bucks.
What is the most valuable information you can receive from a trail camera photo or video?
Is it the time, how many deer, the moon phase, or the weather? While most of those are extremely important, the most valuable thing a trail camera can do is identify an individual buck. A blurry or extremely distant photo of a buck is worthless. Without knowing which buck has been captured, it’s pointless to start correlating the other information (like date, time, weather, etc.). These trail camera tips and setup guidelines will not only allow you to capture more bucks on your trail cameras, but also capture better photos and videos in order to identify and even score individual bucks!
How to Setup a Trail Camera “Correctly”
Now most hunters know how to set up a trail camera. Trail cameras have been around so long that even the most traditional hunters know the ins-and-outs of a game camera. However, with just a tad bit more knowledge, that experience can be turned into expertise. Pay attention to the trail camera tips below, and follow each step of this guideline to setup your trail camera perfectly!
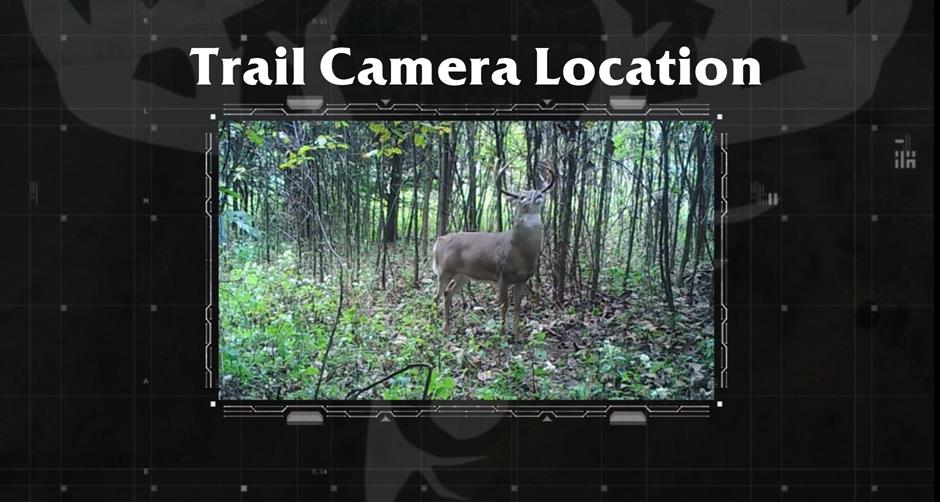
Trail Camera Locations
Don’t worry, I won’t start this trail camera tip off with the old real estate adage “location, location, location”. However, location is very important but it’s not exactly everything. Trail camera location is just the start. I believe that it usually points you in the right direction. Generally, you know the best spots to hang your camera. You may not know the exact tree, but I would presume you know the specific acre or so of ground you would put a camera. Often location is not the hard part, it’s actually the setup and hanging the trail camera that stumps most hunters. Even if you get in within the right acre, the setup direction, height, and distance can be way off from what it actually needs to be at.
For those wishing to dive into a bit more actual “tips” than explanation, my top trail camera locations would revolve around (depending on the time of year):
Runs
Funnels
Food Sources
Oak flats
Mock scrapes
Bait stations/Mineral sites for deer
Waterholes
Trail Camera Site Selection
We can narrow down the guideline of trail camera location further into trail camera site selection. Again the problem with the general term “location” is that within the one-acre area you have identified I might find three different sites I would put a camera. For example, the first site I could hang a camera on would be a run coming from a bedding area, the next would be the edge of a plot, and the third might be a giant community scrape just outside of the plot and the run. Generally, site selection for your camera needs to be decided by the highest probability of capturing bucks. In this example, the time of year would obviously decide where the camera would actually go. If it would happen to be October, I would lean strongly towards the mock scrape as there is a good chance any buck within that acre would scent check that scrape.
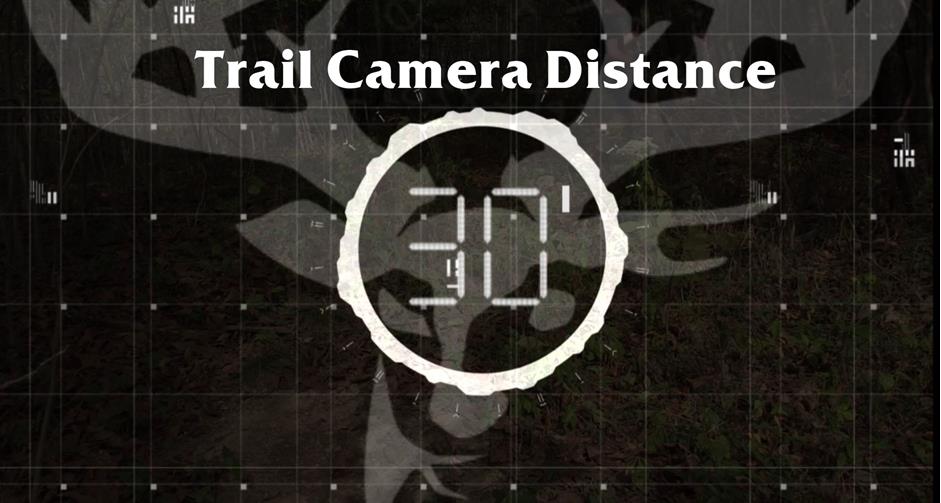
Trail Camera Distance from Target
When optimizing a trail camera for the best pictures and videos, you will want to pay special attention to the distance you are placing the camera from where you anticipate the deer being. Why is this important? Even the best trail camera photos, 14 MP or higher, have a point where the buck can become blurry. This fact, with the addition of some limited flash ranges, means that you could have several photos or videos that simply capture movement, yet fail to reveal enough detail to identify an individual buck. Following a rule of thumb, 10 yards or less is the ideal ballpark for a perfect trail camera video or picture. Most, if not all, trail cameras have a flash range containing more than 30 ft. They also have enough clarity to identify any buck within 10 yards.
Now you might be wondering, how on earth do I do that with something like an oak flat or food plot? An attraction like bait or a mock scrape can pull bucks into the correct range for a better picture. This is where clearly identifying the goals of the camera placement are important. A trail camera over a food plot on time-lapse will simply be for inventory or “plot watching”, not necessarily identifying individual bucks. If capturing individual buck movement patterns, behavior, and characteristics for identification is your goal then keep following along with these steps.
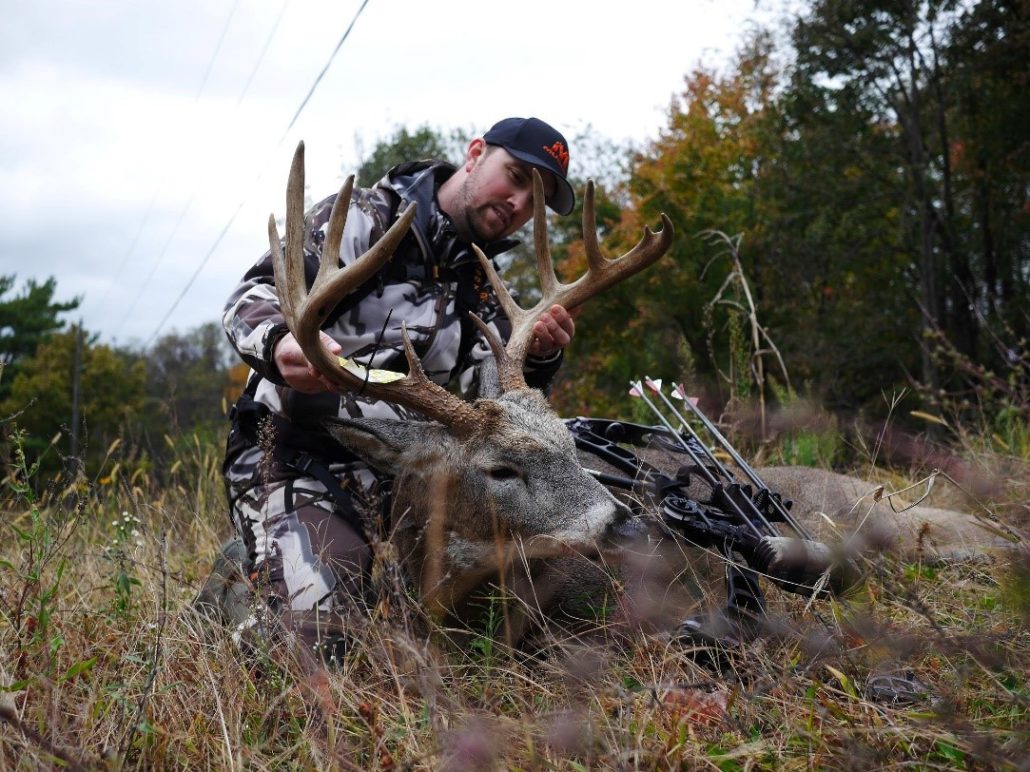
For the purposes of this article and general trail camera tips, if you are having difficulty determining distance, go ahead and place a mock scrape. Obviously, this only pertains to hunting season, but mock scrapes have become my favorite tactic for trail cameras over the past couple of years. The two bucks in the video are two of the best reasons I can offer!
Hanging Your Trail Camera
For the best picture or video, you will want to set your trail camera up at the appropriate height. If there is a tree or fence post within the suggested 10 yards or closer to your target area then you are ready to hang your camera. If not, simply driving a T-post or trail camera stake into the ground will allow you to get your camera within the distance you anticipate the bucks to walk.
Putting a trail camera at the right height will eliminate many problems hunters come across at this point in the process. One of the main problems encountered is framing your photo or video. Obviously aiming the camera is the next step, but making sure the camera is somewhere around chest height, or 4-5 ft. is a good start. Also be sure you are not hanging the camera pointing east or west, where the sun could blind the camera.
*Note: if you are placing a trail camera on a run, be sure to aim the camera at a 45-degree angle from the run. This ensures you do not have deer looking directly into the camera and won’t cause you to miss the deer as you might by placing the camera perpendicular to the run.
Next, you will need to make sure your camera angle is correct. This is where the old stick trick comes in. Don’t be ashamed, it is the oldest trick in the book! Just be sure the stick is firmly in place and won’t move with even the worst weather. Step off the distance one more time to make sure you are around the 10-yard mark. Finally, make sure the trail camera is aimed right at your chest while you are standing in the exact place you anticipate deer to stand or walk through.
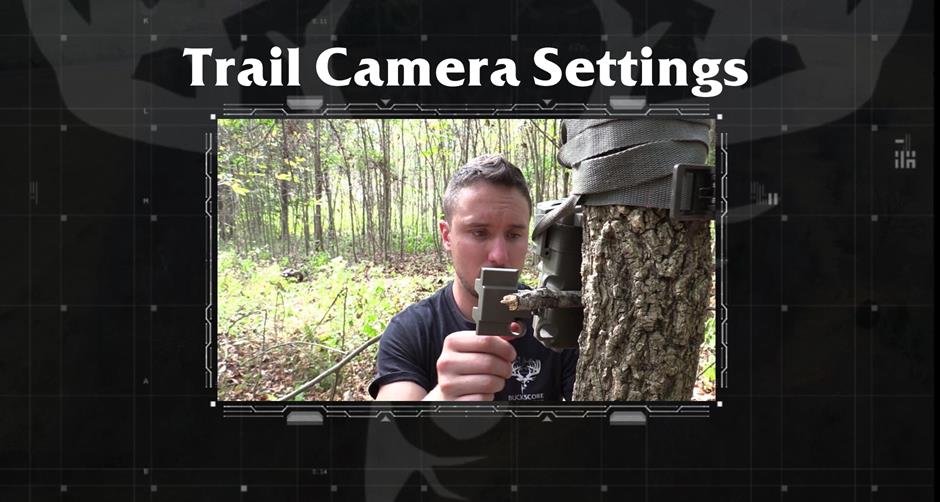
Trail Camera Settings
When it comes to the perfect trail camera setup, the trail camera’s settings can be the most difficult challenge you deal with. Deciding on the camera mode, burst number, video length, interval, or sensitivity can be overwhelming. Again, each location, site, scenario, and goal can greatly affect the trail camera settings. However, there are certain settings that allow a more optimal chance of capturing an individual buck and from there, identifying and/or scoring the buck.
The best trail camera settings will give you the best overall picture and detail in order to review characteristics, behavior, or key identification features of the buck. While some might think this would be a high-quality photo, I would argue that video is far more advantageous for not only a hunting perspective, but an inventory and scoring perspective as well.
Trail Camera Video…Not Pictures
Think about the potential of what video can reveal. In the example video, you can learn a lot about the behavior of the buck. In the video you can see that “Dub”, the buck with the split G2s, is far more curious and careful than “Leroy”, the chocolate horned buck in the video. You can also tell that “Dub” might have been shot before as he is injured and limping. This intel would go unnoticed with simple pictures. Another advantage, especially when it comes to identifying and scoring bucks, is multiple angles! “Dub” and “Leroy” both offer several angles as they work the scrape and turn their head. This makes it easy to achieve a good angle in order to score the bucks, and identify the key body and antler features like “Dub’s” split G2s.
Note* -Multiple angles also allow you to freeze-frame the video in order to score the buck using BuckScore® at the most accurate angles and reference points.
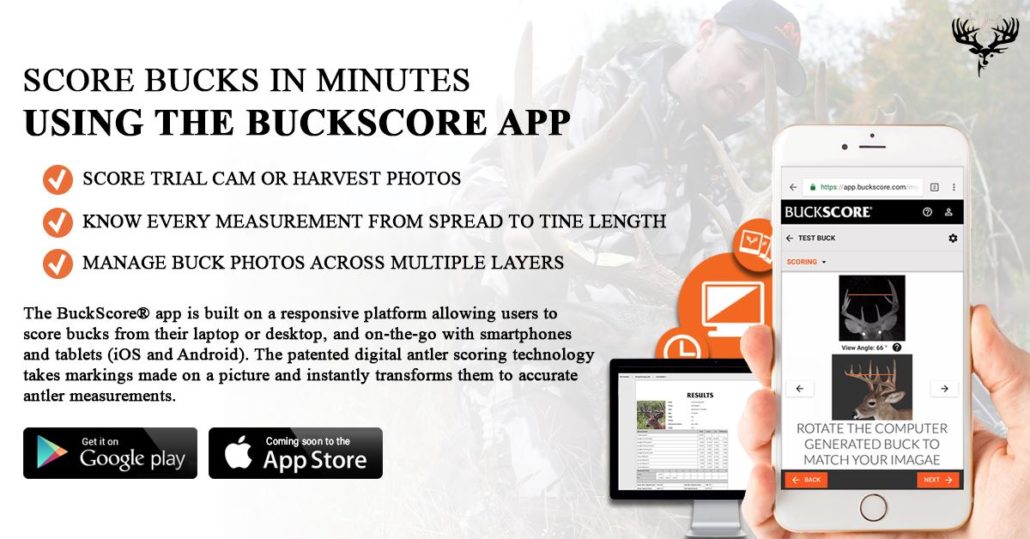
This trail camera setup should allow you to not only obtain more information on the bucks you are hunting but obtain better, higher quality information that can be used to hunt them. These images can also be used to score your deer! By uploading and running the freeze-frame photo through the BuckScore® program, you will be able to accurately estimate an individual buck’s score!
Why BuckScore®?
Holding two U.S. issued patents, BuckScore® is the only science-proven program that allows you to score pictures of bucks in minutes. The app accurately estimates antler size including spread, beam length, tine length, and circumference all to calculate a Net and Gross score within 3% of the actual score. With BuckScore®, you have one app that organizes, documents, and scores all your big bucks.
BuckScore® Features:
Works on any desktop, laptop, tablet, and most smartphones
Score trail cam or harvest photos
Know every measurement from spread to tine length
Score calculated in minutes
Manage buck photos across multiple years
Edit buck photos in program
https://www.buckscore.com/wp-content/uploads/2017/10/trail-camera-setup_Feature2-scaled.jpg13452560Jeff Breedenhttps://www.buckscore.com/wp-content/uploads/2024/09/buckscore-logo.pngJeff Breeden2017-10-19 19:08:152018-09-17 19:35:41Guidelines for the Perfect Trail Camera Setup
To provide the best experiences, we use technologies like cookies to store and/or access device information. Consenting to these technologies will allow us to process data such as browsing behavior or unique IDs on this site. Not consenting or withdrawing consent, may adversely affect certain features and functions.
Functional
Always active
The technical storage or access is strictly necessary for the legitimate purpose of enabling the use of a specific service explicitly requested by the subscriber or user, or for the sole purpose of carrying out the transmission of a communication over an electronic communications network.
Preferences
The technical storage or access is necessary for the legitimate purpose of storing preferences that are not requested by the subscriber or user.
Statistics
The technical storage or access that is used exclusively for statistical purposes.The technical storage or access that is used exclusively for anonymous statistical purposes. Without a subpoena, voluntary compliance on the part of your Internet Service Provider, or additional records from a third party, information stored or retrieved for this purpose alone cannot usually be used to identify you.
Marketing
The technical storage or access is required to create user profiles to send advertising, or to track the user on a website or across several websites for similar marketing purposes.