Images That Don’t Work When Scoring Deer with BuckScore®
Images That Don’t Work When Scoring Deer
Getting the perfect trail camera photo is hard enough. Add to it the pressure of trying to acquire a picture that would work to score with the BuckScore® program can feel next to impossible. This article’s aim is to clarify what pictures can be scored and what pictures cannot.
BuckScore® software scores deer based on the information you manually put in. The scoring starts with a reference feature. This measures the scale, angle, and other photo characteristics based on your manual measurement of the ear width, eye, or eye-to-eye measurement. After the reference feature, you will draw the other measurements on the antlers. This is why clear, crisp angles at correct angles must be used when using the BuckScore app.
Images That Cannot Be Scored Using BuckScore®
There are several images that won’t work when using the BuckScore® program, however they revolve around 4 main attributes.
- Low quality
- Movement
- Angles
- Anatomically incorrect reference features (mounted deer)
Low Quality
Why? – Low–quality images are simply too blurry or not detailed enough to accurately score with BuckScore®. Some cell phone pictures or any low–quality camera pictures, often from trail cameras, can lead to an inaccurate score. Inexpensive trail cameras with low megapixel images quickly become blurry when the deer gets further than 30 ft away from the camera. This is especially true if the image is captured at night. The “fuzzy” factor creates a lot of variation to exactly where a tine, circumference, or main beam measurement starts and ends. It can also throw the reference measurement off.
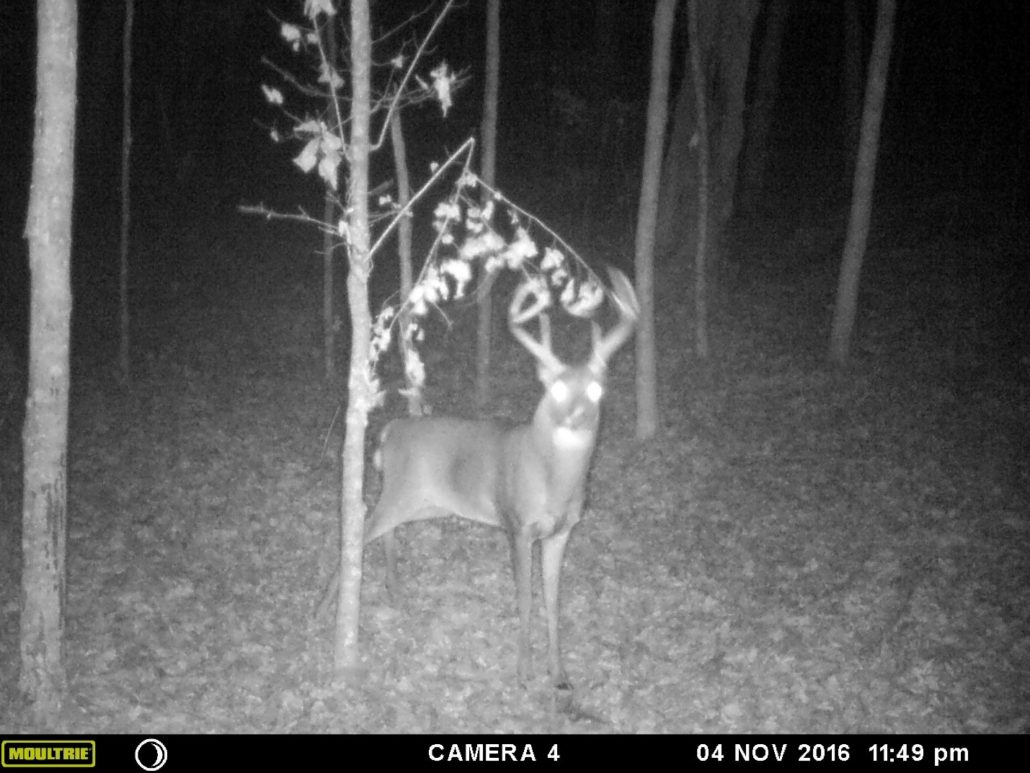
Photo: This image is low quality, but it also is at night. This renders the eye reference measurements useless as the glare exaggerates the eye location and width. This buck also has his ears laid back which does not allow the ear reference measurement to be taken.
Solution – The obvious solution here is to get a better camera. Most medium price range cameras offer 8-12 MP images. However, that is not going to fly with most hunters on a budget! The best option, in this case, is to bring the deer in closer. You can do this by setting up the trail camera differently on the run or food plot or simply create a point of attraction. Bait, licks, or mock scrapes are all great ways to stop a deer for a close detailed picture.
Movement
Why? – This one is pretty self-explanatory…movement causes blurry images. Blurry Images cause inaccuracy in the BuckScore® program. Even a slightly blurry picture due to movement can throw off circumference measurements and reference point measurements by an inch or more. A camera with a higher trigger speed and the ability to freeze images with a quick shutter speed is needed to capture moving deer. Higher price range cameras do a fantastic job of freezing images.
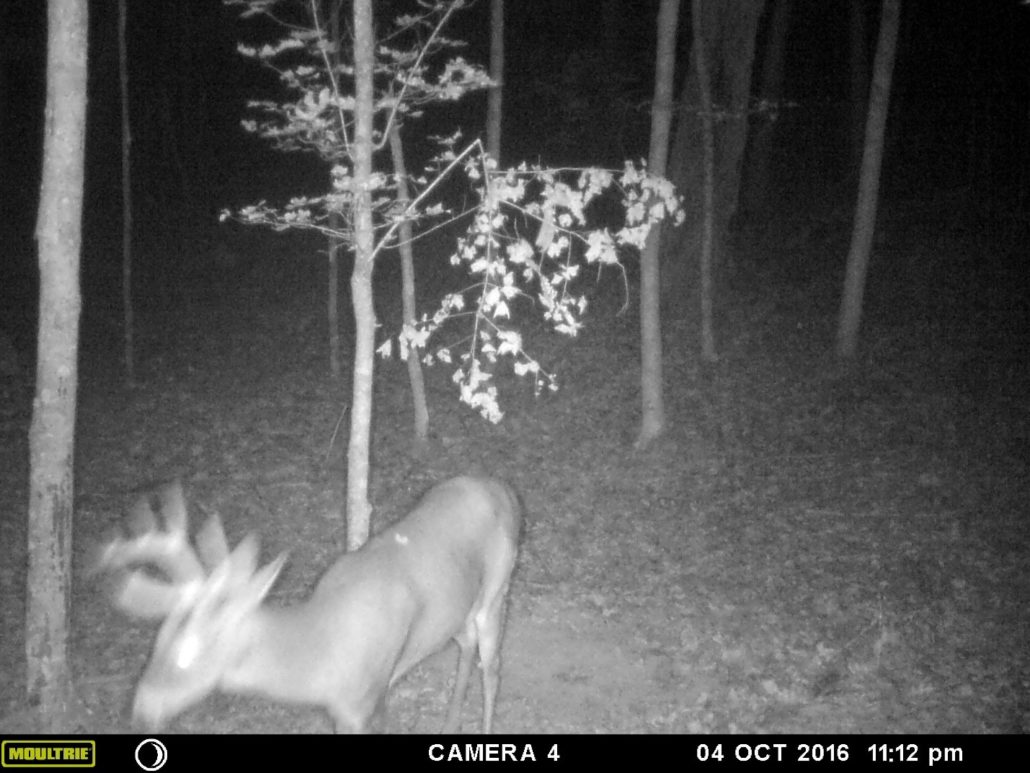
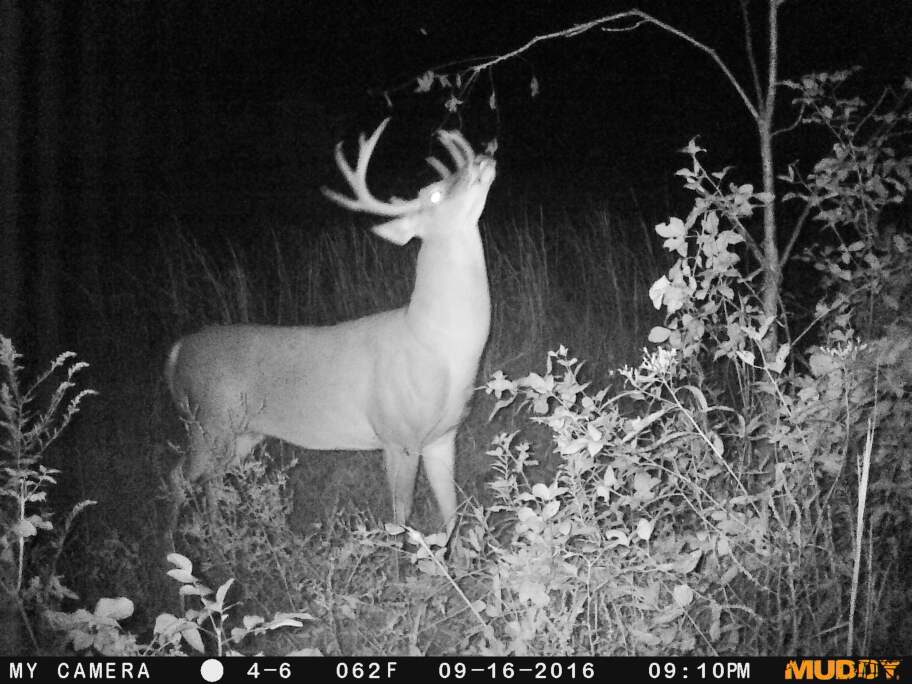
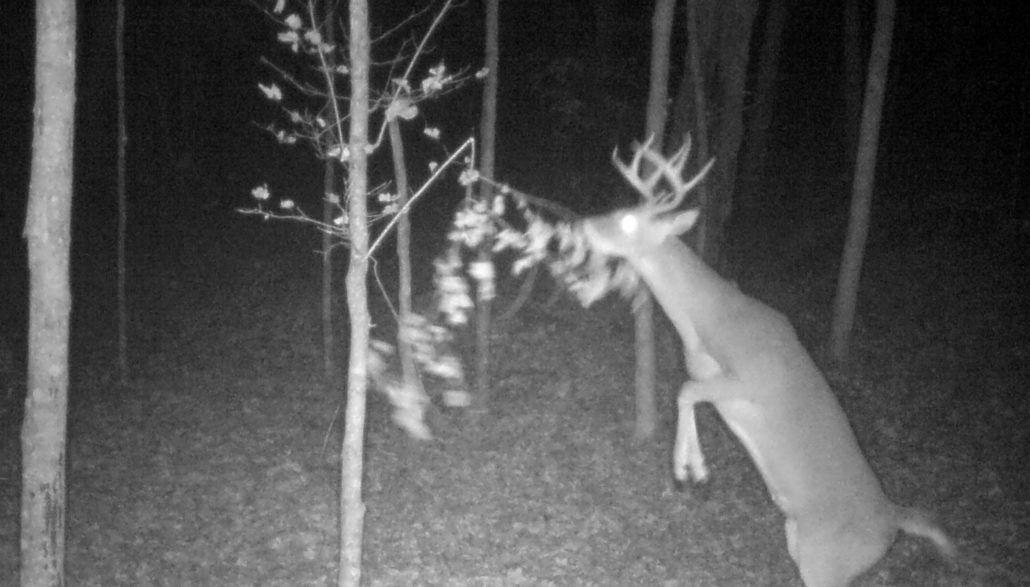
Photo: The buck in this image is not only moving, but his head is also at an angle that could significantly alter the accuracy of the score.
Solution – Try a camera with a faster motion freeze/trigger speed. If your camera is on a run, try stopping them with a point of interest, bait, scrape, or deer scent. Essentially something to stop them in their tracks!
Angles
Why? – BuckScore® can accurately score images of deer at the 0°, 22° , 45°, 66°, and 90° angles. Essentially if the buck’s head is level and facing towards the camera the picture can be scored. Angles refer to not only deer facing away from the camera, but also the head being tilted forward, backward, or another variation that could cause variation in measurements. This means that bucks in the back of truck beds, lying flat on the ground, or pictures of bucks eating from bait piles cannot be scored.
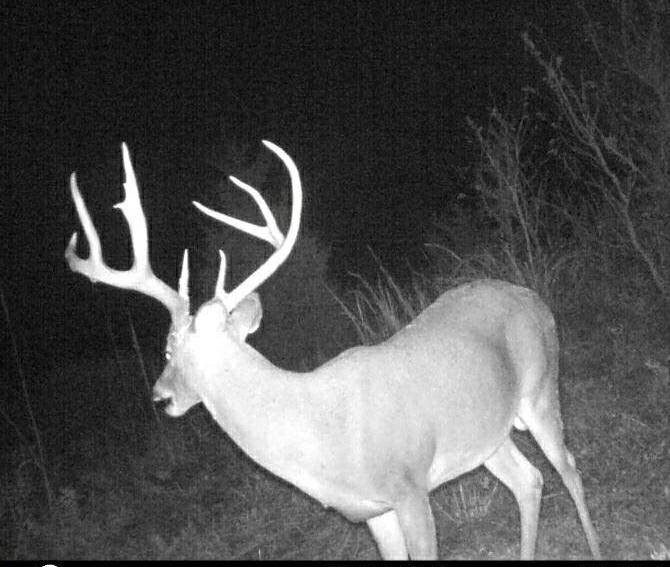
Photo: In this picture, the buck is turned away from the camera. This can drastically overestimate the size of the rack and as a result, the BuckScore® results.
Solution – Making sure the trail camera is level is one easy way to make sure the deer’s head and the image is level. Of course, you can’t always get a buck to hold his head level, especially during the rut and images over bait. Having a higher burst photo mode or a video mode can allow you to make sure you drastically improve your odds of getting a shot of the buck’s head level and at the correct angles.
Mounted Deer
Why? – Mounted deer give you the ability to take the perfect picture for scoring deer with BuckScore®. However, the mounting process might throw off the reference measurements. While the score of the antlers remain the same, the reference features (ear, eye, and eye-to-eye) could all be anatomically incorrect. This will throw off the BuckScore® results.
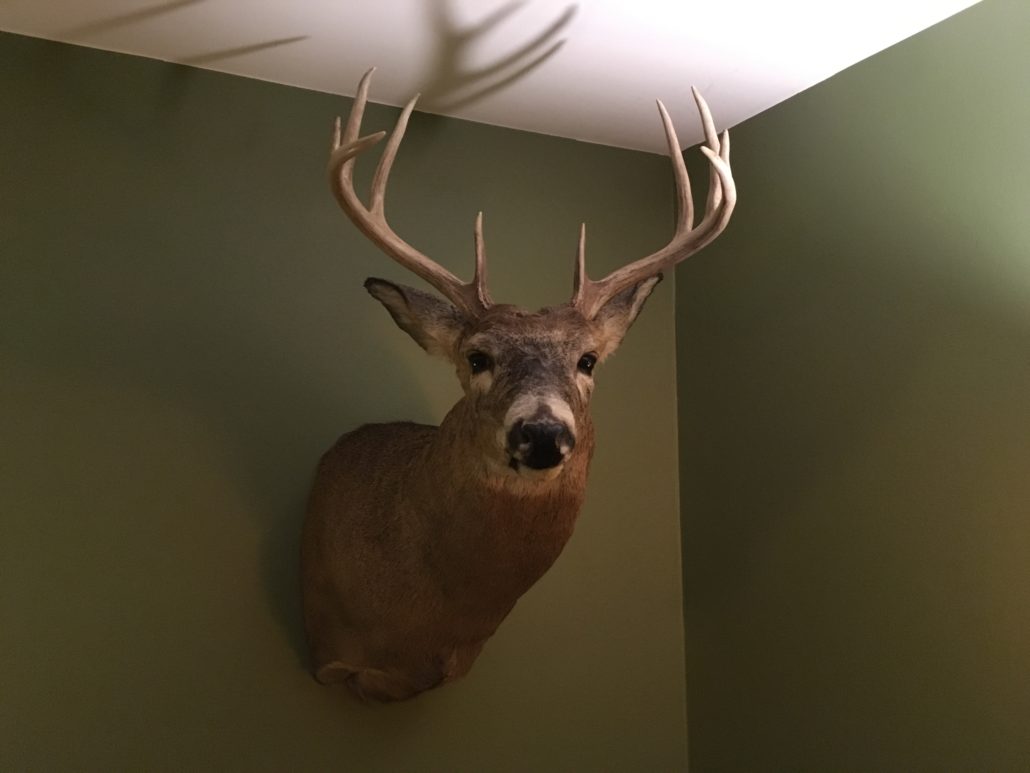
Solution – Take a picture of the harvest according to the BuckScore® harvest photo guidelines. This will allow you to score a picture of a harvested deer.
5 Examples of Pictures That can be Scored
Of course, most photos can be scored by BuckScore®. These include pictures of harvested bucks or hero pictures. Take a look at some of the example pictures below. If you still have questions about scoring deer with BuckScore® contact us here.
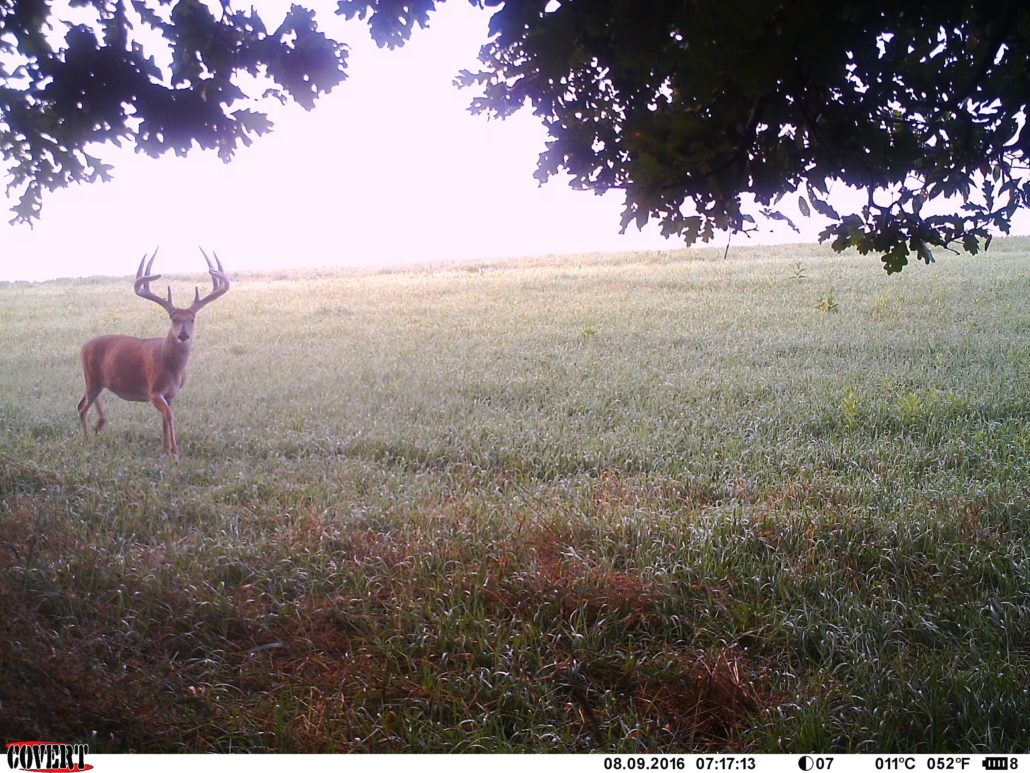 Photo: With good camera quality, even deer far away from the camera can be scored.
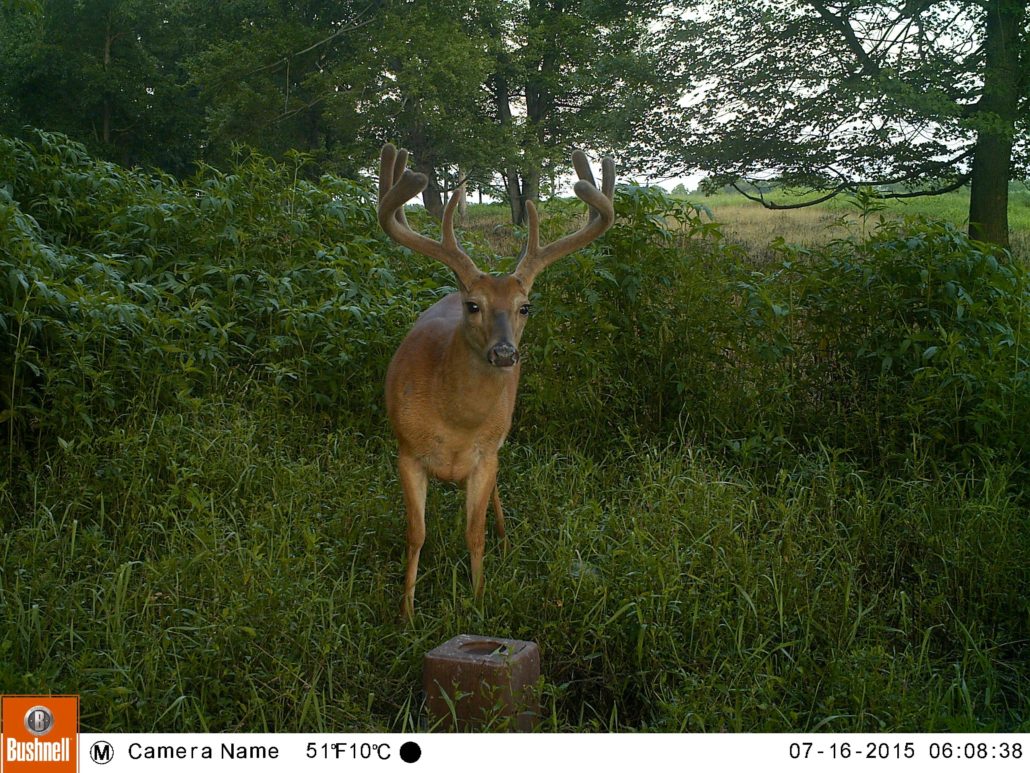 Photo: BuckScore® can adjust for velvet pictures. Just simply check the box that asks if the buck is in velvet.
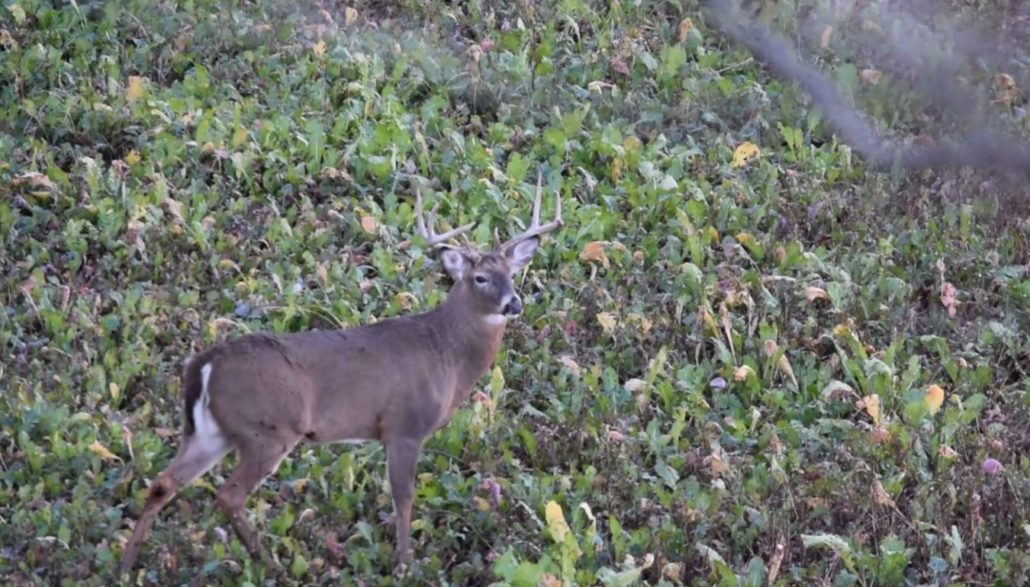 Photo: If you film your hunts or have a great camera in the stand with you, you can take photos or screenshots of bucks encountered in the field. Video is the best option, so you can go back and screenshot when the buck turns his head to an appropriate angle for scoring.
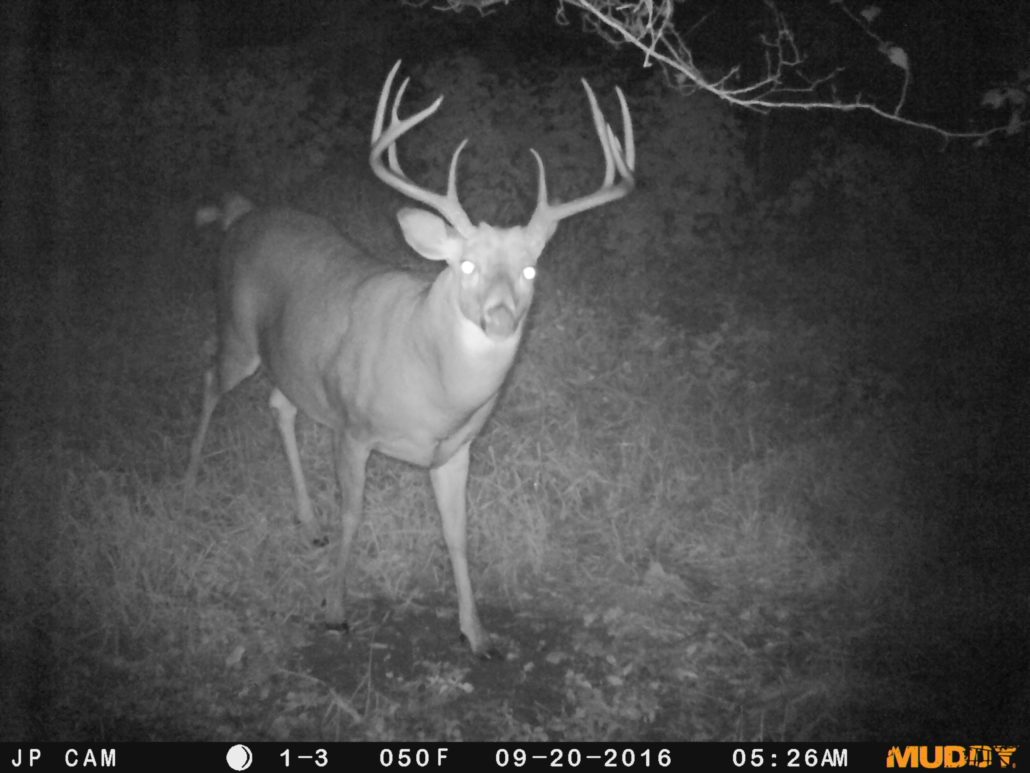
Photo: A higher grade camera allows you to get a great night time photo. With high trigger speed, shutter, and great quality you are able to capture the buck without movement and an overestimated eye glare.
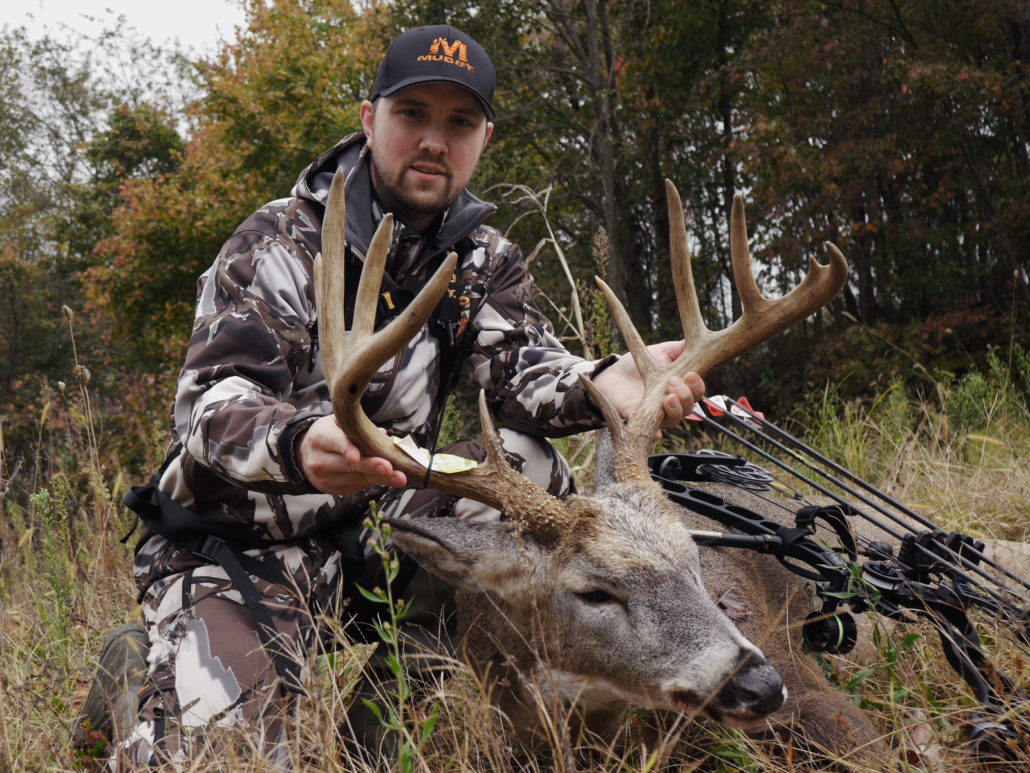 Photo: Taking a picture of a harvested deer can allow you to score the buck within minutes, without breaking out the tape!
Curious about how to take a picture of a harvested deer to score on BuckScore®? Check it out below!

")


")

")


