Jeremy Flinn is graduate of the MSU Deer Lab and is now the Chief Marketing Officer for Stone Road Media, a company that represents many of the well-known brands in the hunting industry. We talk about the influence “brand-name” hunters have on the education of the hunting public and how Jeremy is working to insure that accurate, biologically sound information is being distributed. We also talk about habitat management differences in the Northeast, Southeast and Midwest, and how Jeremy uses biological knowledge about buck movements, complimented with camera technology, to most effectively scout and harvest deer. If you would like to reach out to Jeremy, you can find him at jeremy@stoneroadmedia.com.
https://www.buckscore.com/wp-content/uploads/2019/02/P1150710-1-scaled.jpg19202560BuckScorehttps://www.buckscore.com/wp-content/uploads/2024/09/buckscore-logo.pngBuckScore2019-02-07 20:01:142019-08-28 12:20:09MSU Deer Lab Podcast Episode 033 with Special Guest Jeremy Flinn
Most serious buck hunters have taken the effort to pattern a nice buck, only to be frustrated when they never saw him again in the original area. In Part 1 of Here Today, Gone Tomorrow, we explained that many adult bucks shift their area of use during the hunting season in response to several needs related to food and reproduction. Here we take learning to an entire new level as we describe personality differences that explain some of the most bazar behaviors you may have experienced on your hunting grounds.
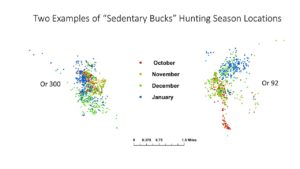
The MSU Deer Lab’s ongoing movement project is generating location estimates every three hours for up to 50 adult bucks each year across a large landscape dominated by forests and agriculture. Graduate students Ashley Jones and Colby Henderson are just getting started with their analyses, but our preliminary results prove that you should NEVER say “always” and ALWAYS say “maybe” when it comes to predicting buck behavior. However, there appears to be two general types of adult buck personalities that we can tie to general patterns of movement. About 60% of our adult bucks live in one general area or home range, and we call these “Sedentary Bucks.” The other 40% of our adult bucks split their time between two or more areas or home ranges, and we call these “Mobile Bucks.”
Orange 300 and Orange 92 are both 3-year old bucks that exemplify the relatively sedentary movement pattern present in 60% of our collared bucks. They live in a single general area, although they shift their movements across their hunting season home range in response to food resources and potential breeding opportunity. They also make short excursions outside of their normal home range, likely to evaluate potential new opportunities. Don’t take the term “sedentary” to suggest that they don’t move much – looking at the scale in this figure shows that each of these bucks’ hunting season home ranges cover a range of 3-4 miles!
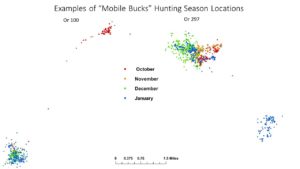
Orange 100 and Orange 297 are three-year-old bucks that also shifted concentration areas within their hunting season home ranges, but the extent of their shift differentiates them from the Sedentary Buck Personality. These two examples of the Mobile Buck Personality made significant movements between two home range areas separated by up to 7 miles. Some Mobile Personalities make a single movement between their two home ranges while others make regular visits back and forth.
These extreme shifts in home range location explain why bucks patterned on one property may end up being harvested many miles away on another property. Stay tuned for more valuable buck behavior insights as we continue to analyze data from this monumental adult buck movement project.
Adult Buck Movement Study | Shifting Buck Home Ranges
By: MSU™ Deer Lab
Most serious buck hunters have located a nice buck prior to or early in the hunting season and invested time and effort trying to bring him home. Many of these same hunters have experienced the frustration of never seeing him again in the original area and wondered why. Did he move because of your scouting and hunting efforts or was the shift in the buck’s home range part of normal buck behavior? Well, the MSU Deer Lab’s ongoing adult buck movement project is generating buck location estimates across a large landscape. Graduate students Ashley Jones and Colby Henderson are just getting started with their analyses, but our preliminary results show the cause of your frustration when it comes to shifting buck home ranges.
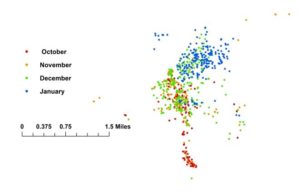
Look at the movements of a 3-year old buck (Orange 92) during the 2017-18 hunting season and you’ll notice a distinct shift in areas of concentrated activity across the hunting season. Each dot is a location estimate sampled at three-hour intervals and color-coded by month to illustrate changes in home range use across the hunting season.
Orange 92’s October locations (red dots) have nothing in common with his January locations (blue dots). Examining the November (orange dots) and December (green dots) locations shows that his home range shift was a graduate transition that took place over two months. This pattern is present in many of our collared adult bucks. A closer look also shows two important and common movement behaviors associated with the rut, which peaks during late December and early January on this study area. First, are the excursions or short-term movements outside of his normal home range during November, as he likely seeks out an opportunity to breed an estrus doe. Second, note the greatly expanded movements during December and January as he moves more widely and regularly in search of does in estrus and expands his home range to double that of pre-rut. He evens takes a short return trip down into the lower portion that he used extensively during October.
Adult bucks are creatures of habit but thank goodness for our sport, predicting their locations with accuracy is difficult. Future updates will expand on our new knowledge of how buck movements can actually be classified into personality traits!
https://www.buckscore.com/wp-content/uploads/2019/02/shorttop-scaled.jpg13602560BuckScorehttps://www.buckscore.com/wp-content/uploads/2024/09/buckscore-logo.pngBuckScore2019-02-07 14:54:092019-02-07 19:35:32Here Today, Gone Tomorrow (Part 1): Shifts in Buck Home Range Areas
By: Weston Schrank, BuckScore Specialist and Wildlife Biologist
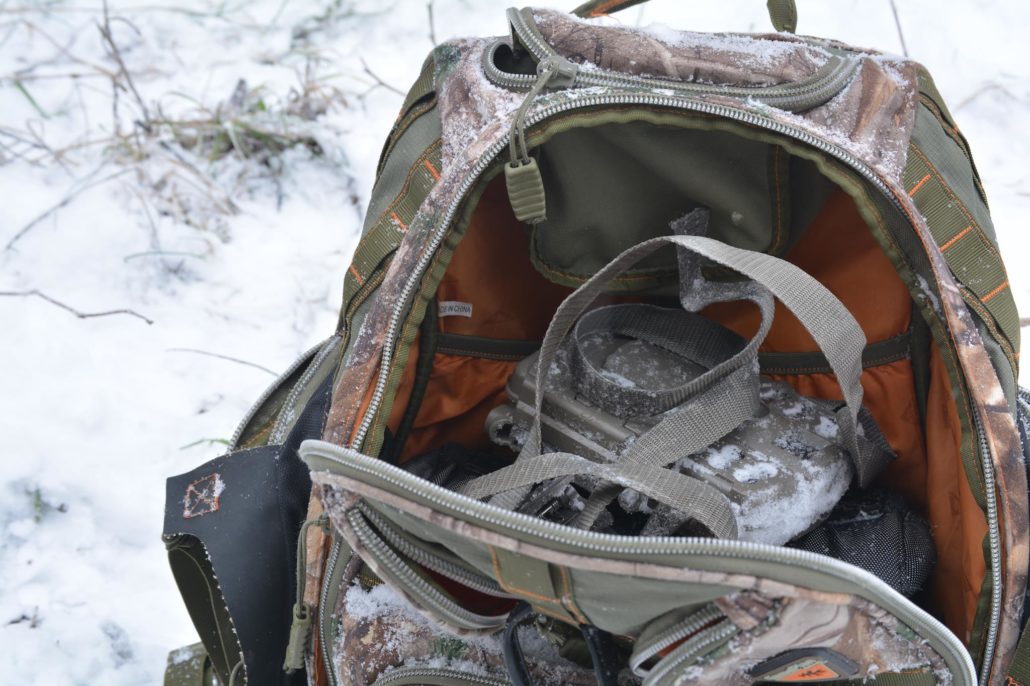
The first two weeks of December can be a rough and confusing time for any deer hunter. Personally, if I have not tagged out yet I’m very unsure what to do with myself. Usually I am already focused on coyote hunting or just spending more time with family and friends… but again only if I am tagged out. The weather and deer activity are in a weird place and deer hunters are caught in the middle of it all. Before the cold temperatures of winter arrive, and after the intense rut action, a lot of deer hunters can catch themselves in this period known as the December lull. The only thing that I have come to know is that trail cameras can be a saving grace during this lull period. I aim to give you some solid trail camera strategies and tips for the late season. But I know reading this will also give you a better understanding of what is actually going on during the late season!
Late Season Strategies
While I might completely ignore my cameras around the rut and focus more on just getting time in the stand, this ideal completely shifts during the first weeks of December. Unless you are a fan of throwing “Hail Mary” hunts together, trail cameras are the best strategy for the late season. While it might be obvious to some readers, the main reason why trail cameras are your best bet for the late season is because of deer patterns. The late season is the second time period where hunters can accurately pattern mature buck movement down to literally the minute!
Late Season Patterns
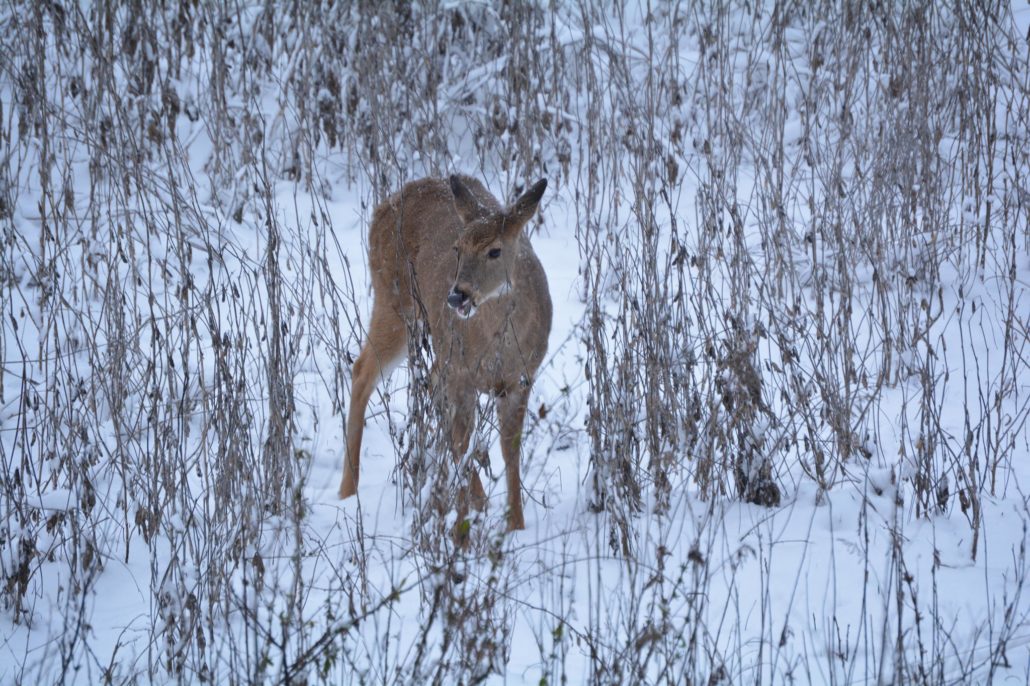
Mature bucks focus on recovery and staying warm during the late season. This is similar to their focus during late summer when they are busy feeding on protein. Naturally, their late season patterns fall prey to the same opportunities that their previous summer patterns do. This means that with some simple scouting, and some well-placed cameras a hunter has the ability to pick up on a pattern and plan a hunt based off the intel.
The buck will be noticeable in only one location… a food source. He will spend morning to early evening hours held up in his warm thermal bedding. This is often a southern slope, a spot where sun can reach the buck but also where the cover blocks the cold wind. Early successional spots and native grass fields that are southern oriented are perfect spots for mature bucks to bed. When the buck does get up he will be headed to a nearby food source. This food source will be most likely one of the 4 most attractive food sources a deer can feed on during this time of year.
Late Season Food Sources
There are 4 food sources that you should take notice of, or plant next year specifically for the late season. Some are quite easy to establish and hunt, and others take quite a bit of investment.
Brassicas – the fancy name for turnips, radishes, and rape. If enough acreage is planted, the green sugary tops and robust buried treasures can be a potent combo for cold winter days.
Cereal Grains – winter rye, winter wheat, and oats (winter hardy) can be a great green source of food that will stay green all winter long. They make great cover crops if you are managing soil properly.
Standing Corn – standing or freshly cut or mowed over corn can be a major attraction during the late season.
Standing Beans – standing beans, just like standing corn, can be a great late season food source, but it offers summer protein, something that corn cannot. This makes beans a better option if you have enough acreage to have standing beans throughout the season and into early spring.
The Occasional Hot Doe
Now before I dive straight into trail camera strategies and setups based on the information below ,I do need to talk about the occasional hot doe. Some people refer to it as the second rut, but the more correct term would be the fawn rut. Now, Midwest and Northern states can see an upwards of 75% of all breeding occur during the peak rut week. Some does do come in if they are not bred in the first round, especially if sex ratios are skewed towards more does than bucks. However what I am talking about here is what I commonly see on well managed properties. When doe fawns have great habitat, great food, and as a result great nutrition, they can reach the magical weight of 60-70 lbs. What happens then? If 6-7 month fawns reach this weight they can become sexually active and come into estrous. This is why you might have seen a small doe fawn being chased by 2 or 3 bucks in a late season food source or cut corn field. The one difference here of course is that these bucks are chasing an uneducated fawn, not a smart mature doe!
This is not something to rely on, just a word of caution that the mature buck you are hunting is not completely safe with a late season pattern on your property. There is still a chance that he could cross the property line.
Late Season Trail Camera Setups
Obviously the most successful trail camera strategies will be based around the most important aspect of the late season… food! This means creating camera setups that will either inventory the food source location. Or will catch deer movement and behavior around or in route to the food source. Now I have tried multiple setups, on multiple properties, and over the course of the years have ended up with a few videos to help viewers setup trail cameras for the late season.
Trail Camera Tips | patterning Deer with Late Season Cameras –this video was a couple years back, but the principles of the advice are solid. It discusses some of the information I have reviewed above.
Last year I ran a series called “Trail Cameras Weekly” on Muddy TV. During each week of the rut, I published a different video on what to do with your trail cameras for that week. Of course, I covered this time period in that series, and last year I gave some extremely helpful tips for late season trail camera setups.
The “Trail Cameras Weekly video reveals two very useful trail camera setups. One is a trail camera over a food source on time-lapse mode, and the other is on a late season funnel.
By setting up a trail camera over a late season food source over time-lapse mode, you can inventory what deer are utilizing the food source. You can also see where they frequent and even where they are filtering out of. You will want a camera with very high resolution photos (>10-12 MP). Set the camera to take pictures during the last 1-2 hours of daylight, with a photo every minute. Also make sure you have a big memory card (>16gb).
Late Season Funnels
If you can identify the main areas of a late season bedding area, essentially anywhere with thick cover and sunshine, you can gather intel by hanging a trail camera over a late season funnel. For this setup, identify a heavily used run and set the trail camera up at a 45 degree angle from that run. You will want a camera with a quick trigger speed that can capture 3+ photos in a photo burst mode.
When to Make a Move
Stay out of these food sources except to check trail cameras. Keep the pressure off your food sources until one of the following happens:
Cold temperatures – when a cold front moves through or snow hits, deer will be forced to get up and feed earlier in the afternoon just to ensure they can keep up with the energy demands of staying warm.
Daylight movement – if you capture a buck utilizing the food source on a regular basis during legal shooting light don’t hesitate! Go in after him immediately.
These trail camera tips should help you target late season movement patterns of bucks to target. It can be your saving grace that arrives just when it seems like all other opportunities have faded away.
Have a nice buck on camera? Score him in minutes using the BuckScore® Software!
https://www.buckscore.com/wp-content/uploads/2017/12/late-seasontrail-camera-tips_feature.jpg13652048BuckScorehttps://www.buckscore.com/wp-content/uploads/2024/09/buckscore-logo.pngBuckScore2017-12-08 16:49:472019-08-28 12:20:14Salvage Your Deer Season With These Late Season Camera Tips!
BuckScore® Mobile now allows you to score deer with your phone! This now allows in the moment scoring! Within minutes of snapping a picture, you can have a score of the deer before he even offers you a shot opportunity! Before this technology, it was only possible to estimate a buck’s score from knowing how to field score a deer. An extremely loose fitting solution for estimating what a buck scores during an encounter or from a trail camera picture. Now, with BuckScore®, you can score a picture of a buck from a trail camera, taken from your cell phone during an encounter, or a picture of your harvested buck!
Don’t believe us…check out the video below!
How Does It Work?
Holding two U.S. issued patents, BuckScore® is the only science-proven program that allows you to score pictures of bucks in minutes. The app accurately estimates antler size including spread, beam length, tine length, and circumference all to calculate a Net and Gross score within 3% of the actual score. It does this by having the user set a reference point of known lengths such as the eye to eye reference point, ear reference point, or the eye width reference point. The user then simply manually enters points for the requested measurements and within minutes receives an accurate estimate of the buck’s score.
https://www.buckscore.com/wp-content/uploads/2017/11/trophy-buck-feild-Mobile-Feature-scaled.jpg13452560BuckScorehttps://www.buckscore.com/wp-content/uploads/2024/09/buckscore-logo.pngBuckScore2017-11-22 16:00:012018-09-17 17:30:51BuckScore® Mobile | Score a Buck In Minutes!
Trail Camera Setup for Scoring Deer with BuckScore®
By: Weston Schrank
Is there such a thing as a perfect trail camera setup? Every property, every hunter, and every trail camera setup is obviously different, but is there a general guideline that hunters should follow? The simple answer is yes! A perfect trail camera setup would be one that not only gives you exactly what you want in terms of information, but also produces flawless photos and videos. While the perfect trail camera setup might sound too good to be true, or subject to some very opinionated comments, a setup does exist that optimizes the intel received. How? This perfect trail camera setup guideline allows any hunter, anywhere to produce the best trail camera data for identifying and observing bucks.
What is the most valuable information you can receive from a trail camera photo or video?
Is it the time, how many deer, the moon phase, or the weather? While most of those are extremely important, the most valuable thing a trail camera can do is identify an individual buck. A blurry or extremely distant photo of a buck is worthless. Without knowing which buck has been captured, it’s pointless to start correlating the other information (like date, time, weather, etc.). These trail camera tips and setup guidelines will not only allow you to capture more bucks on your trail cameras, but also capture better photos and videos in order to identify and even score individual bucks!
How to Setup a Trail Camera “Correctly”
Now most hunters know how to set up a trail camera. Trail cameras have been around so long that even the most traditional hunters know the ins-and-outs of a game camera. However, with just a tad bit more knowledge, that experience can be turned into expertise. Pay attention to the trail camera tips below, and follow each step of this guideline to setup your trail camera perfectly!
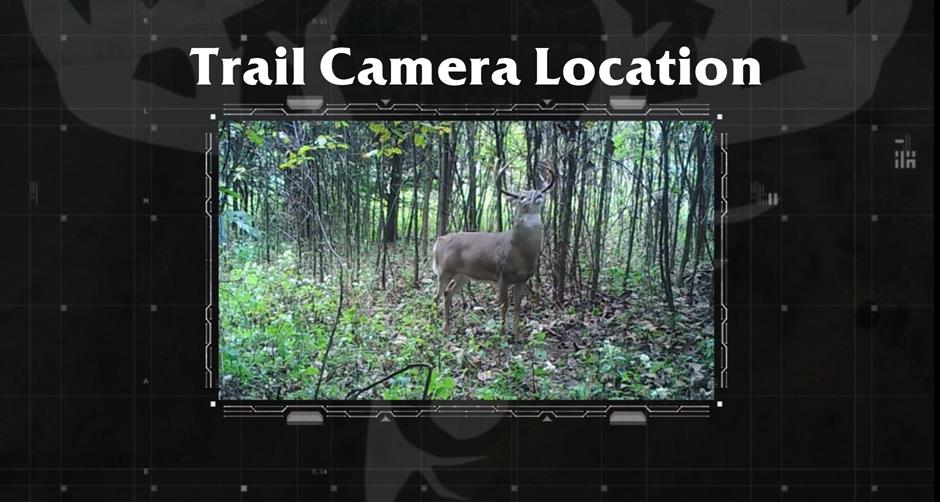
Trail Camera Locations
Don’t worry, I won’t start this trail camera tip off with the old real estate adage “location, location, location”. However, location is very important but it’s not exactly everything. Trail camera location is just the start. I believe that it usually points you in the right direction. Generally, you know the best spots to hang your camera. You may not know the exact tree, but I would presume you know the specific acre or so of ground you would put a camera. Often location is not the hard part, it’s actually the setup and hanging the trail camera that stumps most hunters. Even if you get in within the right acre, the setup direction, height, and distance can be way off from what it actually needs to be at.
For those wishing to dive into a bit more actual “tips” than explanation, my top trail camera locations would revolve around (depending on the time of year):
Runs
Funnels
Food Sources
Oak flats
Mock scrapes
Bait stations/Mineral sites for deer
Waterholes
Trail Camera Site Selection
We can narrow down the guideline of trail camera location further into trail camera site selection. Again the problem with the general term “location” is that within the one-acre area you have identified I might find three different sites I would put a camera. For example, the first site I could hang a camera on would be a run coming from a bedding area, the next would be the edge of a plot, and the third might be a giant community scrape just outside of the plot and the run. Generally, site selection for your camera needs to be decided by the highest probability of capturing bucks. In this example, the time of year would obviously decide where the camera would actually go. If it would happen to be October, I would lean strongly towards the mock scrape as there is a good chance any buck within that acre would scent check that scrape.
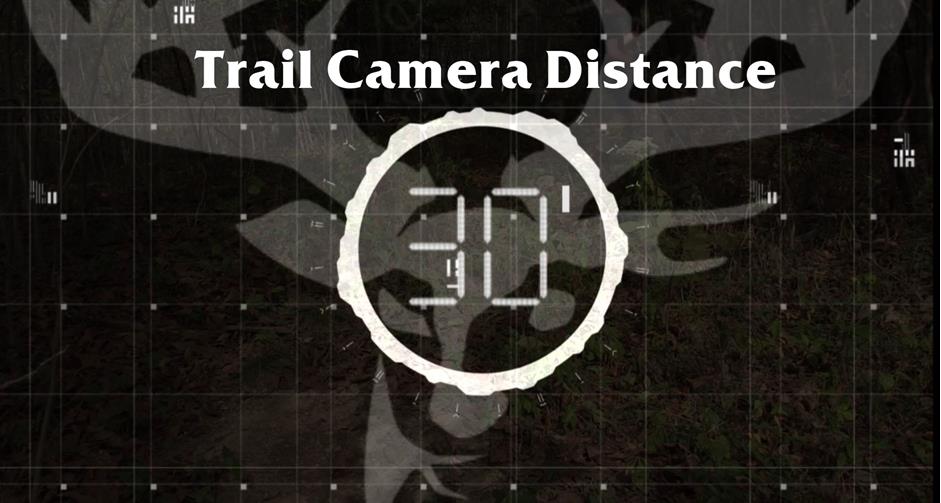
Trail Camera Distance from Target
When optimizing a trail camera for the best pictures and videos, you will want to pay special attention to the distance you are placing the camera from where you anticipate the deer being. Why is this important? Even the best trail camera photos, 14 MP or higher, have a point where the buck can become blurry. This fact, with the addition of some limited flash ranges, means that you could have several photos or videos that simply capture movement, yet fail to reveal enough detail to identify an individual buck. Following a rule of thumb, 10 yards or less is the ideal ballpark for a perfect trail camera video or picture. Most, if not all, trail cameras have a flash range containing more than 30 ft. They also have enough clarity to identify any buck within 10 yards.
Now you might be wondering, how on earth do I do that with something like an oak flat or food plot? An attraction like bait or a mock scrape can pull bucks into the correct range for a better picture. This is where clearly identifying the goals of the camera placement are important. A trail camera over a food plot on time-lapse will simply be for inventory or “plot watching”, not necessarily identifying individual bucks. If capturing individual buck movement patterns, behavior, and characteristics for identification is your goal then keep following along with these steps.
For the purposes of this article and general trail camera tips, if you are having difficulty determining distance, go ahead and place a mock scrape. Obviously, this only pertains to hunting season, but mock scrapes have become my favorite tactic for trail cameras over the past couple of years. The two bucks in the video are two of the best reasons I can offer!
Hanging Your Trail Camera
For the best picture or video, you will want to set your trail camera up at the appropriate height. If there is a tree or fence post within the suggested 10 yards or closer to your target area then you are ready to hang your camera. If not, simply driving a T-post or trail camera stake into the ground will allow you to get your camera within the distance you anticipate the bucks to walk.
Putting a trail camera at the right height will eliminate many problems hunters come across at this point in the process. One of the main problems encountered is framing your photo or video. Obviously aiming the camera is the next step, but making sure the camera is somewhere around chest height, or 4-5 ft. is a good start. Also be sure you are not hanging the camera pointing east or west, where the sun could blind the camera.
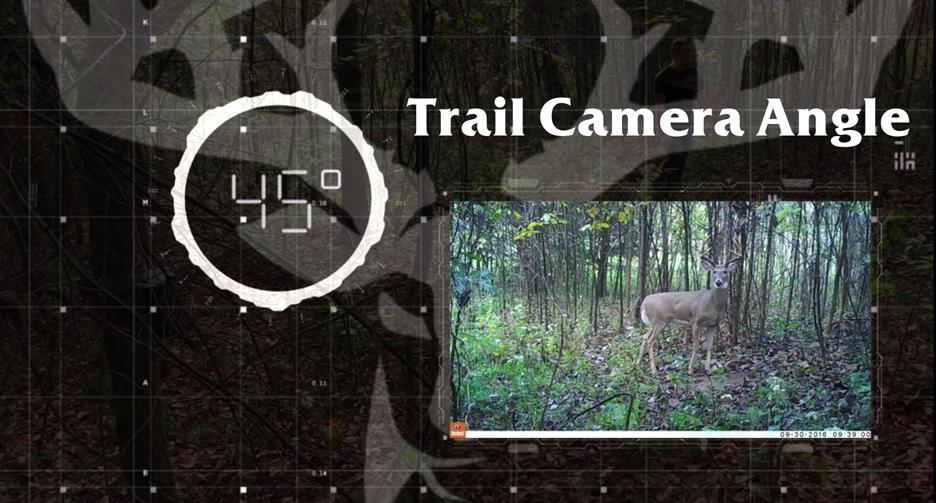
*Note: if you are placing a trail camera on a run, be sure to aim the camera at a 45-degree angle from the run. This ensures you do not have deer looking directly into the camera and won’t cause you to miss the deer as you might by placing the camera perpendicular to the run.
Next, you will need to make sure your camera angle is correct. This is where the old stick trick comes in. Don’t be ashamed, it is the oldest trick in the book! Just be sure the stick is firmly in place and won’t move with even the worst weather. Step off the distance one more time to make sure you are around the 10-yard mark. Finally, make sure the trail camera is aimed right at your chest while you are standing in the exact place you anticipate deer to stand or walk through.
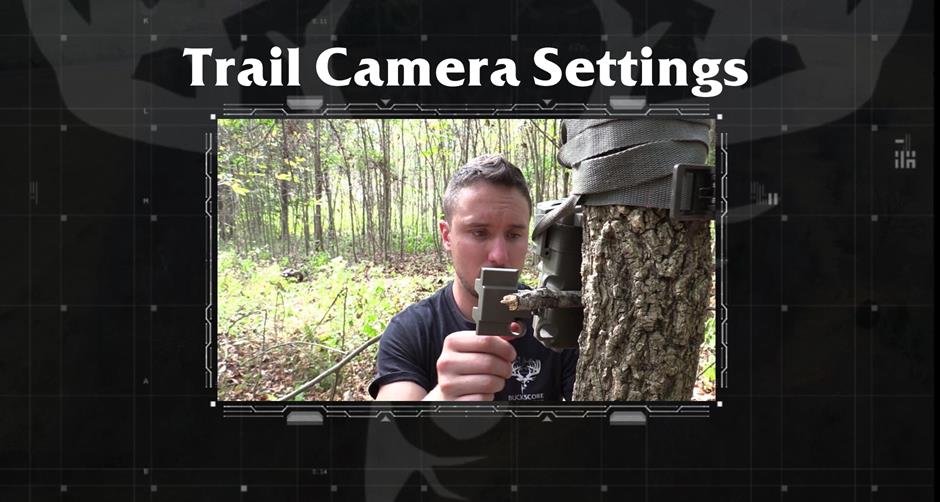
Trail Camera Settings
When it comes to the perfect trail camera setup, the trail camera’s settings can be the most difficult challenge you deal with. Deciding on the camera mode, burst number, video length, interval, or sensitivity can be overwhelming. Again, each location, site, scenario, and goal can greatly affect the trail camera settings. However, there are certain settings that allow a more optimal chance of capturing an individual buck and from there, identifying and/or scoring the buck.
The best trail camera settings will give you the best overall picture and detail in order to review characteristics, behavior, or key identification features of the buck. While some might think this would be a high-quality photo, I would argue that video is far more advantageous for not only a hunting perspective, but an inventory and scoring perspective as well.
Trail Camera Video…Not Pictures
Think about the potential of what video can reveal. In the example video, you can learn a lot about the behavior of the buck. In the video you can see that “Dub”, the buck with the split G2s, is far more curious and careful than “Leroy”, the chocolate horned buck in the video. You can also tell that “Dub” might have been shot before as he is injured and limping. This intel would go unnoticed with simple pictures. Another advantage, especially when it comes to identifying and scoring bucks, is multiple angles! “Dub” and “Leroy” both offer several angles as they work the scrape and turn their head. This makes it easy to achieve a good angle in order to score the bucks, and identify the key body and antler features like “Dub’s” split G2s.
Note* -Multiple angles also allow you to freeze-frame the video in order to score the buck using BuckScore® at the most accurate angles and reference points.
This trail camera setup should allow you to not only obtain more information on the bucks you are hunting but obtain better, higher quality information that can be used to hunt them. These images can also be used to score your deer! By uploading and running the freeze-frame photo through the BuckScore® program, you will be able to accurately estimate an individual buck’s score!
Why BuckScore®?
Holding two U.S. issued patents, BuckScore® is the only science-proven program that allows you to score pictures of bucks in minutes. The app accurately estimates antler size including spread, beam length, tine length, and circumference all to calculate a Net and Gross score within 3% of the actual score. With BuckScore®, you have one app that organizes, documents, and scores all your big bucks.
BuckScore® Features:
Works on any desktop, laptop, tablet, and most smartphones
Score trail cam or harvest photos
Know every measurement from spread to tine length
Score calculated in minutes
Manage buck photos across multiple years
Edit buck photos in program
https://www.buckscore.com/wp-content/uploads/2017/10/trail-camera-setup_Feature2-scaled.jpg13452560Jeff Breedenhttps://www.buckscore.com/wp-content/uploads/2024/09/buckscore-logo.pngJeff Breeden2017-10-19 19:08:152018-09-17 19:35:41Guidelines for the Perfect Trail Camera Setup
Ever wondered how to score deer? Curious what the easiest way to score a deer is? BuckScore® is your answer! Holding two U.S. issued patents, BuckScore® is the only science-proven program that allows you to score pictures of bucks in minutes. The app accurately estimates antler size including spread, beam length, tine length, and circumference all to calculate a Net and Gross score within 3% of the actual score. With BuckScore®, you have one app that organizes, documents, and scores all your big bucks.
BuckScore® Features:
Works on any desktop, laptop, tablet, and most smartphones
Score trail cam or harvest photos
Know every measurement from spread to tine length
Score calculated in minutes
Manage buck photos across multiple years
Edit buck photos in program
How To Score Deer with BuckScore®
Scoring deer, whether it be a trail camera photo, hero photo of a harvested deer, or a freeze frame from recently captured footage of a buck, can easily be done with BuckScore® by following four simple steps.
Step 1. Adding a New Buck Profile and Picture
The first step to scoring a deer using BuckScore® is to add a new buck. First, click the “ADD BUCK” button in the upper left-hand corner of the home screen. In the box that appears, name your buck and click “ADD BUCK” to move into this buck’s album.
Once in the “Buck Album”, you can begin adding images of the buck you want to score. To do this, click the “ADD PHOTO” button in the upper left-hand corner of the screen, assign a name to the image, and select a photo from your device.
Once selected, crop your image to the desired size and click “SAVE” to upload it to BuckScore®. You are now ready to prep your buck photo for scoring.
Step 2. Adding Photo Details
Once your buck photo has been uploaded, enter the correct photo details next to each section. Note: Some sections may be completed automatically depending on the camera you are using. If the Time and Date are incorrect, you can manually adjust it to log the correct timing. Once the details of the buck photo are complete, select “NEXT” to continue the process. After entering the correct information, rotate the computer-generated buck image on the right-hand side of the screen using the “ROTATE” buttons so that it most accurately represents the buck photo you have uploaded. Select “Next” Choose the reference feature that can be seen most clearly in your uploaded image. This is the most critical step in ensuring the accuracy of your final score. Remember the top option is always the most accurate feature, if applicable for measuring.
Finally, use the drop-down arrows next to each section to select the approximate age of the buck – select “unknown” if you are not sure, state located, whether your buck is in velvet or not, and the number of points on each antler – including abnormal or non-typical points.
You are now ready to score your buck – select “Next” to continue.
Step 3. Measuring Reference Points
The most critical part of the BuckScore® scoring process is measuring the reference feature accurately. This will determine the accuracy of all other measurements on the buck’s antlers and should be done carefully, making sure to compare your markings to the sample image provided.
Keep in mind that the ear width measurement is the most accurate, followed by eyeball width, and then eye to eye width, and that not all photographs will allow every feature to be measured.
Ear Width is the most accurate of the feature measurements, and can be available for use at every angle BuckScore® can be used.
Eyeball width is the second most accurate feature to be used and can be available at every angle except zero-degrees. However, be careful of eye glare on night images as it can greatly skew the true size of a deer’s eyeball.
Eye to eye width is a great feature measurement at the zero-degree angle. Be sure to measure from eye duct to eye duct. Often users measure incorrectly by measuring from eyeball to eyeball which will cause all antler measurements to be smaller than actually are.
Once you are satisfied with your reference measurements, you are ready to move on to the scoring process – Select “NEXT”
Step 4. Scoring Your Buck
The fourth and final step in scoring your deer with BuckScore® is to actually start the scoring and measuring process through the program. Starting with “Inside Spread,” take each measurement according to the checklist on the right-hand side of your screen.
Select the “Pen Icon” next to the measurement to open the Measurement Activity box.
Your measurement should mirror that depicted under “Sample Measurement.” To undo mismeasurements, use the UNDO LAST and CLEAR ALL buttons at the top of the activity box. When satisfied with your measurement, select “Save”.
Repeat for each measurement, and refer to the “Measurement Progress Bar” for status to completion.
Once every measurement has been made, and “Measurement Progress Bar” is signaling completely. Click “SCORE” at the bottom right-hand corner of the checklist.
This will take you to your official BuckScore® Results page where you will be able to view the each measurement you’ve made along with gross & net scores.
You are done! You have officially scored your deer using BuckScore®. You have completed the full BuckScore® scoring process and can begin adding more bucks to your profile! You can also begin to manage bucks photos, and bucks over multiple years! Don’t forget to score any new bucks you get on camera, or any old trophies you have hanging on the wall!
https://www.buckscore.com/wp-content/uploads/2017/10/how-to-score-a-deer_feature4GS-edit4.jpg6301200Jeff Breedenhttps://www.buckscore.com/wp-content/uploads/2024/09/buckscore-logo.pngJeff Breeden2017-10-10 18:52:502019-07-09 15:09:02How to Score Deer Using the BuckScore® App
To provide the best experiences, we use technologies like cookies to store and/or access device information. Consenting to these technologies will allow us to process data such as browsing behavior or unique IDs on this site. Not consenting or withdrawing consent, may adversely affect certain features and functions.
Functional
Always active
The technical storage or access is strictly necessary for the legitimate purpose of enabling the use of a specific service explicitly requested by the subscriber or user, or for the sole purpose of carrying out the transmission of a communication over an electronic communications network.
Preferences
The technical storage or access is necessary for the legitimate purpose of storing preferences that are not requested by the subscriber or user.
Statistics
The technical storage or access that is used exclusively for statistical purposes.The technical storage or access that is used exclusively for anonymous statistical purposes. Without a subpoena, voluntary compliance on the part of your Internet Service Provider, or additional records from a third party, information stored or retrieved for this purpose alone cannot usually be used to identify you.
Marketing
The technical storage or access is required to create user profiles to send advertising, or to track the user on a website or across several websites for similar marketing purposes.